Set up DNS over HTTPS on Ubuntu Server
If you wish to increase the privacy and security of your Ubuntu server, contemplate enabling DNS over HTTPS (DoH) or DNS over TLS (DoT). These functionalities encrypt your DNS traffic, thereby fortifying your server against potential threats such as malware, counterfeit DNS responses, and DNS spoofing. Below, you’ll find instructions on how to configure both options.
How to choose a DNS provider
Before enabling DNS over HTTPS (DoH) or DNS over TLS (DoT) on your Ubuntu system, it’s essential to select a DNS provider. Numerous outstanding DNS providers are available. Below, you’ll discover a compilation of some of the top choices to consider:
- Cloudflare DNS: Renowned for its speed, unwavering commitment to privacy, and robust security posture.
- Google Public DNS: Offers exceptional speed, formidable security measures, and unparalleled reliability.
- Quad9 DNS: Emphasizes security with features such as malware detection while also respecting user privacy.
- OpenDNS: Provides robust security features, including content filtering and malware protection, elevating online safety.
Each of the DNS providers listed here represents an excellent choice for implementing DNS over HTTPs and DNS over TLS. After you’ve made your selection, ensure that you create an account on the provider’s website, as you’ll need it for customizing DNS settings.
How to set up DNS over HTTPS (DoH) and DNS over TLS (DoT) on Ubuntu Server
After you’ve chosen a DNS provider for DNS over HTTPS on the Ubuntu Server, initiate an SSH session to your Ubuntu server. Once it’s open, you’ll need to locate your DNS over HTTPS endpoint URL. To simplify matters, we’ve provided a list of each DNS over HTTPS endpoint below.
- CloudFlare DNS: https://1.1.1.1/dns-query
- Google Public DNS: https://dns.google/dns-query
- Quad9 DNS: https://dns.quad9.net/dns-query
- OpenDNS: https://doh.opendns.com/dns-query
Once you have your DNS over HTTPS endpoint URL, it’s time to add it to Ubuntu. To do this on your Ubuntu server, you first need to install a program called “dnscrypt-proxy.”
To install the “dnscrypt-proxy” application on your Ubuntu server, begin by logging into the server through an SSH session. After logging in, use the following apt install command to install the package.
sudo apt install dnscrypt-proxy
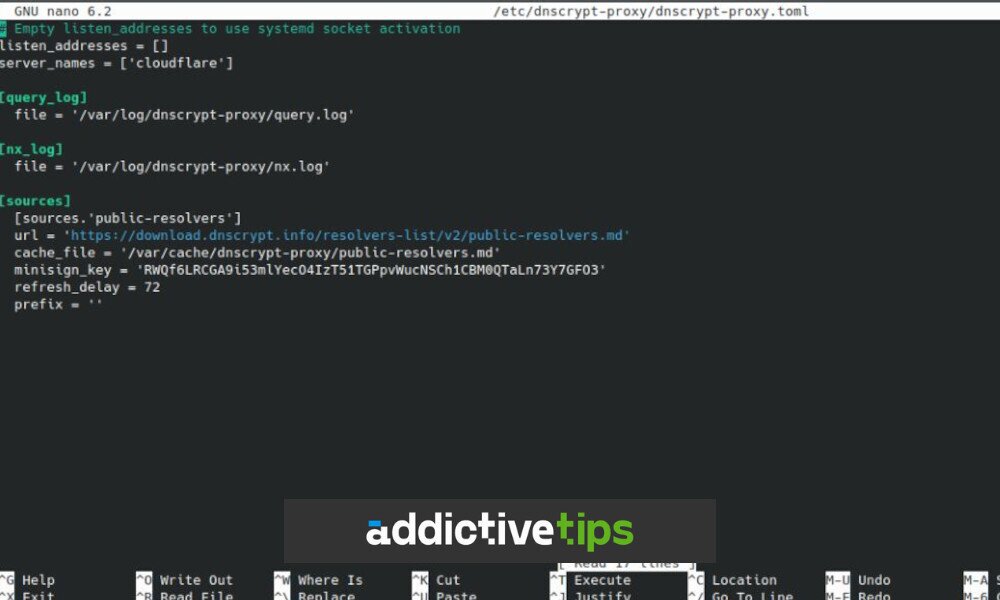
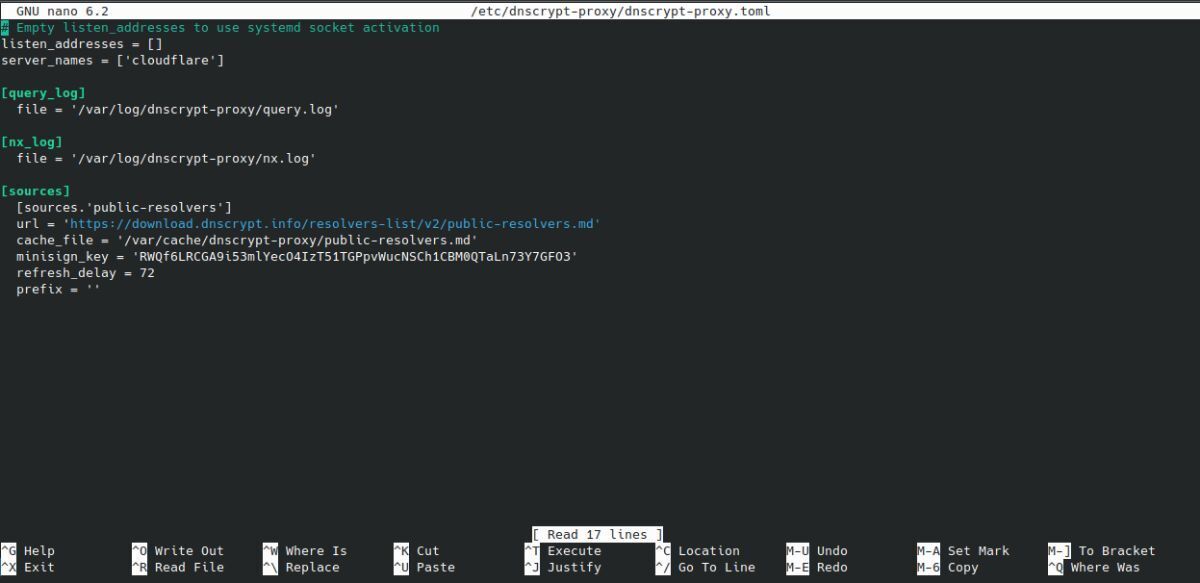
Once the program is installed on your Ubuntu system, you’ll need to edit the configuration file. Open the configuration file using the Nano text editor with the following command.
sudo nano -w /etc/dnscrypt-proxy/dnscrypt-proxy.toml
Inside the configuration file, the resolver is set by default as CloudFlare. This is a good option to use; however, if you want to use a different resolver, enter “google” for Google DNS, “quad9” for Quad9, or “opendns” for OpenDNS.
To change the resolver from Cloudflare to something else, locate “server_names” and remove ‘cloudflare,’ then set it to one of the other available options. When you’ve adjusted the settings in the configuration file, save it by pressing Ctrl + O, then exit the editor by pressing Ctrl + X.
Once everything is saved, you’ll need to restart the dnscrypt-proxy service to apply your changes. To restart it, execute the following systemctl restart command.
sudo systemctl restart dnscrypt-proxy
After configuring everything, you can use the dnscrypt-proxy command to resolve using your new settings.
sudo dnscrypt-proxy -config /etc/dnscrypt-proxy/dnscrypt-proxy.toml -resolve google.co
How to enable DNS over TLS
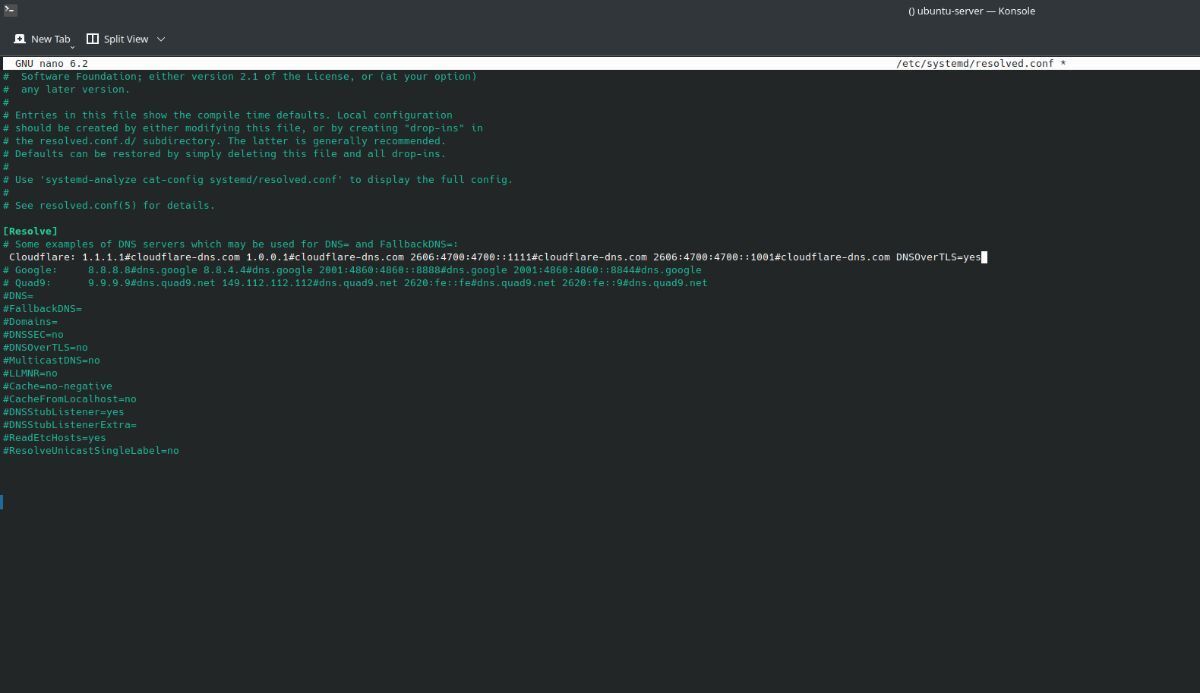
Enabling DNS over TLS is a bit simpler than setting up DNS over HTTPS. To begin, open the /etc/systemd/resolved.conf file for editing using the Nano text editor. Once it’s open, you can insert the following code into the file to enable DNS over TLS.
Google DNS
[Resolve] DNS=8.8.8.8 DNSOverTLS=yes
Cloudflare DNS
[Resolve] DNS=1.1.1.1 DNSOverTLS=yes
Quad9
[Resolve] DNS=9.9.9.9 DNSOverTLS=yes
OpenDNS
[Resolve] DNS=208.67.222.222 DNSOverTLS=yes
After you’ve added your configuration to the file in the Nano text editor, be sure to save it. You can save your edits by pressing Ctrl + O and then exit by pressing Ctrl + X.
Now that the configuration is saved, you need to restart the systemd-resolved service to apply the configuration changes. You can do this with the following command.
sudo systemctl restart systemd-resolvedWhen you’ve restarted the systemd-resolved service on your Ubuntu system, the configuration changes you’ve made to the DNS settings should come online. However, if they haven’t, you may need to give it a few minutes, as DNS changes can sometimes be slow. If you need to troubleshoot your system to ensure everything is working, run the command below.
systemd-resolve --status
