How to use KeePassXC on a Chromebook
Google Chrome has a pretty good password management tool; however, if you prefer to control your data and passwords without relying on Google’s cloud service on your Chromebook, consider KeePassXC.
KeePassXC is a local password database tool for Linux. However, as ChromeOS supports Linux apps via LXC containers, you can use it on your Chromebook to manage passwords. Here’s how to use it.
How to enable Linux support on a Chromebook
KeePassXC is a Linux application, but it works on ChromeOS. However, the Linux container system must be set up on your Chromebook before installing the program. Here’s how to enable Linux.
First, select the clock on the ChromeOS dash and the “gear” icon. Choosing the “Gear” icon will open up the ChromeOS settings. Once the settings are loaded up, find the “Advanced” section and click on the arrow.
After selecting the arrow, locate “Developers” and click on it. Then, enable the Linux development environment. This environment will give you a Debian container inside of Chrome OS in which you can install Linux programs.
How to install KeePassXC on ChromeOS
Once the Linux development environment is enabled on ChromeOS, it is time to install the KeePassXC application on your Chromebook. To start, open up the ChromeOS app menu, search for “Terminal,” and launch it.
Inside the terminal, click on “Penguin.” Selecting this will launch the Debian command-line interface. You can then run the following apt update command.
sudo apt update
After running the update command, you’ll need to install any upgrades available for the Debian container. These upgrades must be installed to help KeePassXC run its best.
sudo apt upgrade -y
With all of the upgrades taken care of, you can install the KeePassXC package on your Chromebook with the following apt install command.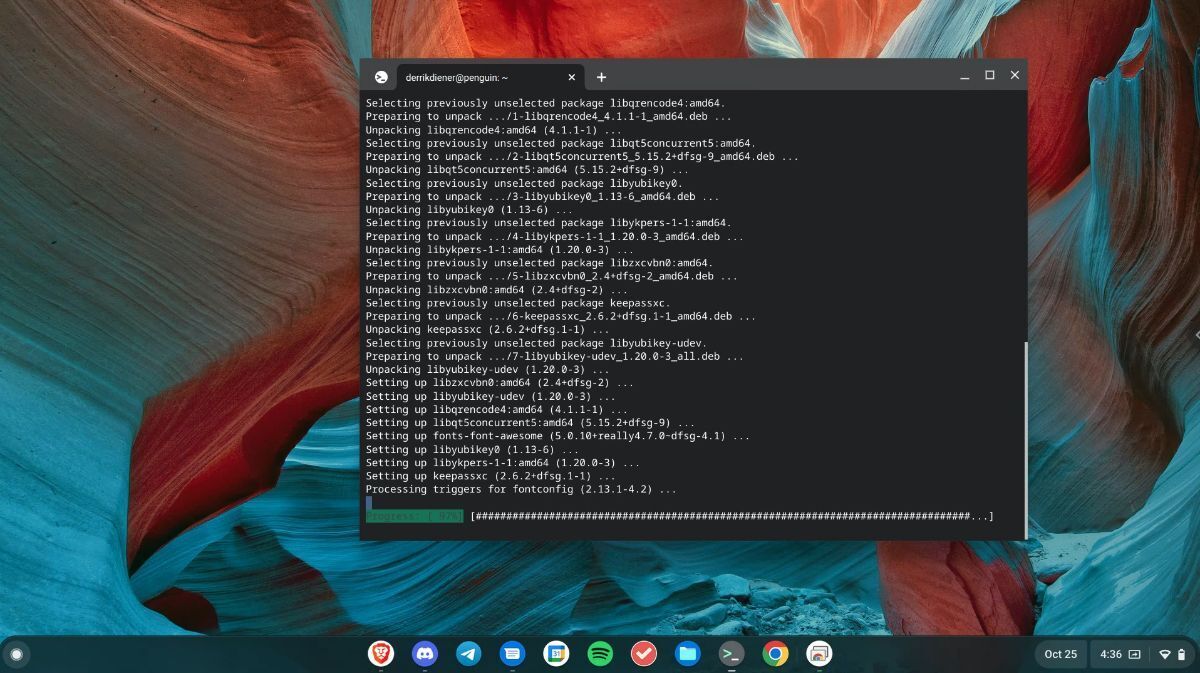
sudo apt install keepassxc
How to get started with KeePassXC on ChromeOS
Once the KeePassXC application is installed on your Chromebook, open up the ChromeOS app menu, select “Linux apps,” and launch the KeePassXC application.
When you’ve launched KeePassXC, you’ll see the welcome window. Next, select the “Create new database” option to create a new password database. You’ll then see a window that says “General Database Information.”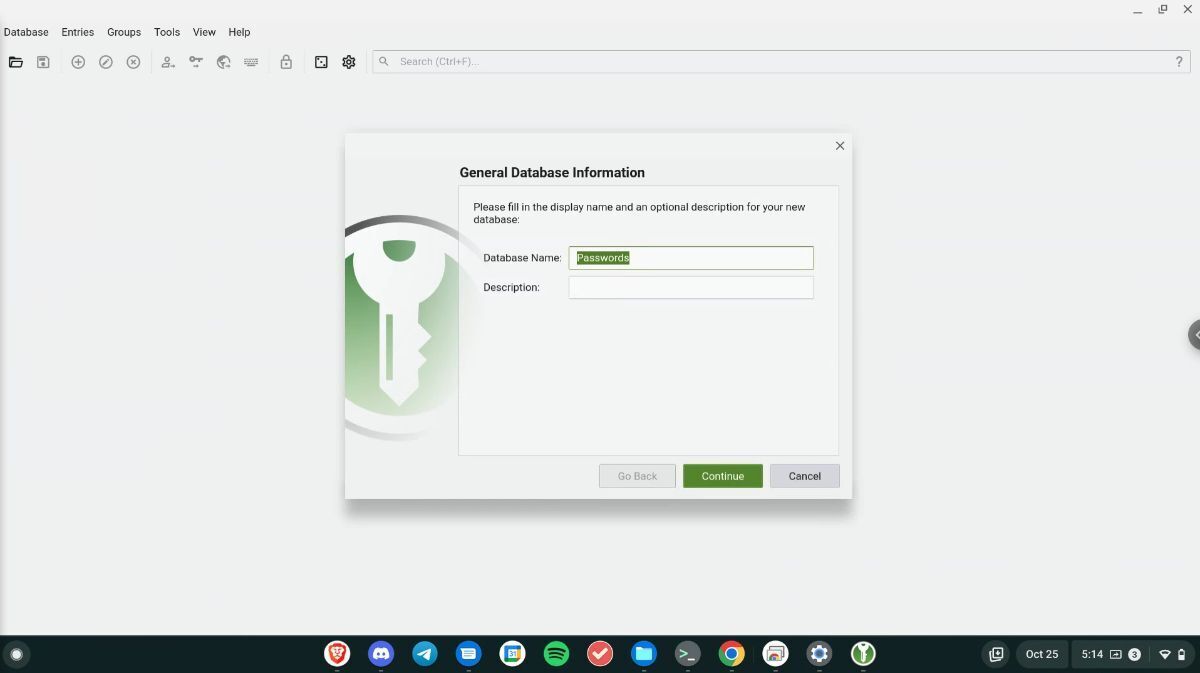
In the “General Database Information” window, find the “Database Name” and change it from “Passwords” to whatever name suits your needs. Or, leave it blank if you prefer.
Once you’ve finished entering a database name, find the “Description” box, and write in the description of your database. Alternatively, leave it blank if you do not want to add a description.
You must now configure your encryption settings. By default, KeePassXC is configured to decrypt your password database within 1.0 seconds. However, it is possible to increase decryption times to increase your security (but decryption will take longer). After choosing your settings, click the “Continue” button to move to the next page. 
Once you’ve customized the encryption settings, you must choose your database master password. Enter a strong, memorable password in the “Enter password” box, and repeat it in the “Confirm” box. Additionally, select “Add addition protection” if you so choose.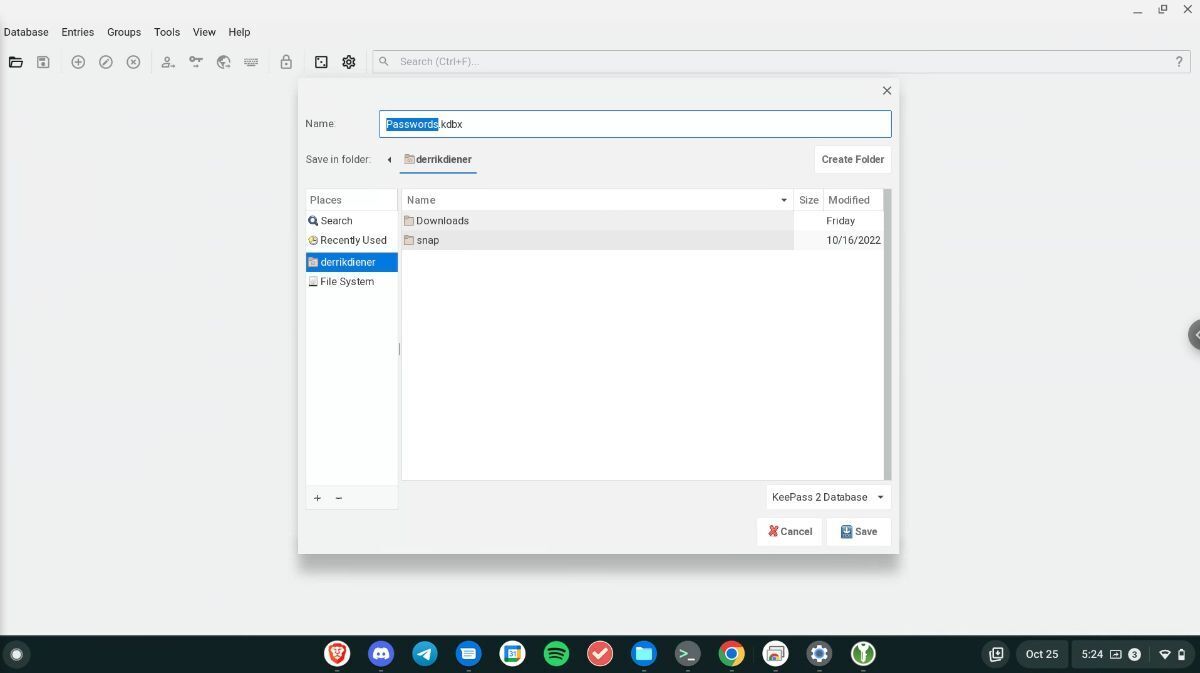
When your password is set, KeePassXC will ask you to save your “Passwords.kdbx” database file. Using the menu, save the file to the Linux container.
How to use KeePassXC on your Chromebook
To use KeePassXC, open up the app and follow the steps below.
- Once you launch the KeePassXC application from the ChromeOS app menu, you will be asked to unlock your KeePassXC database (Passwords.kdbx). Enter the password set for your KeePassXC database.
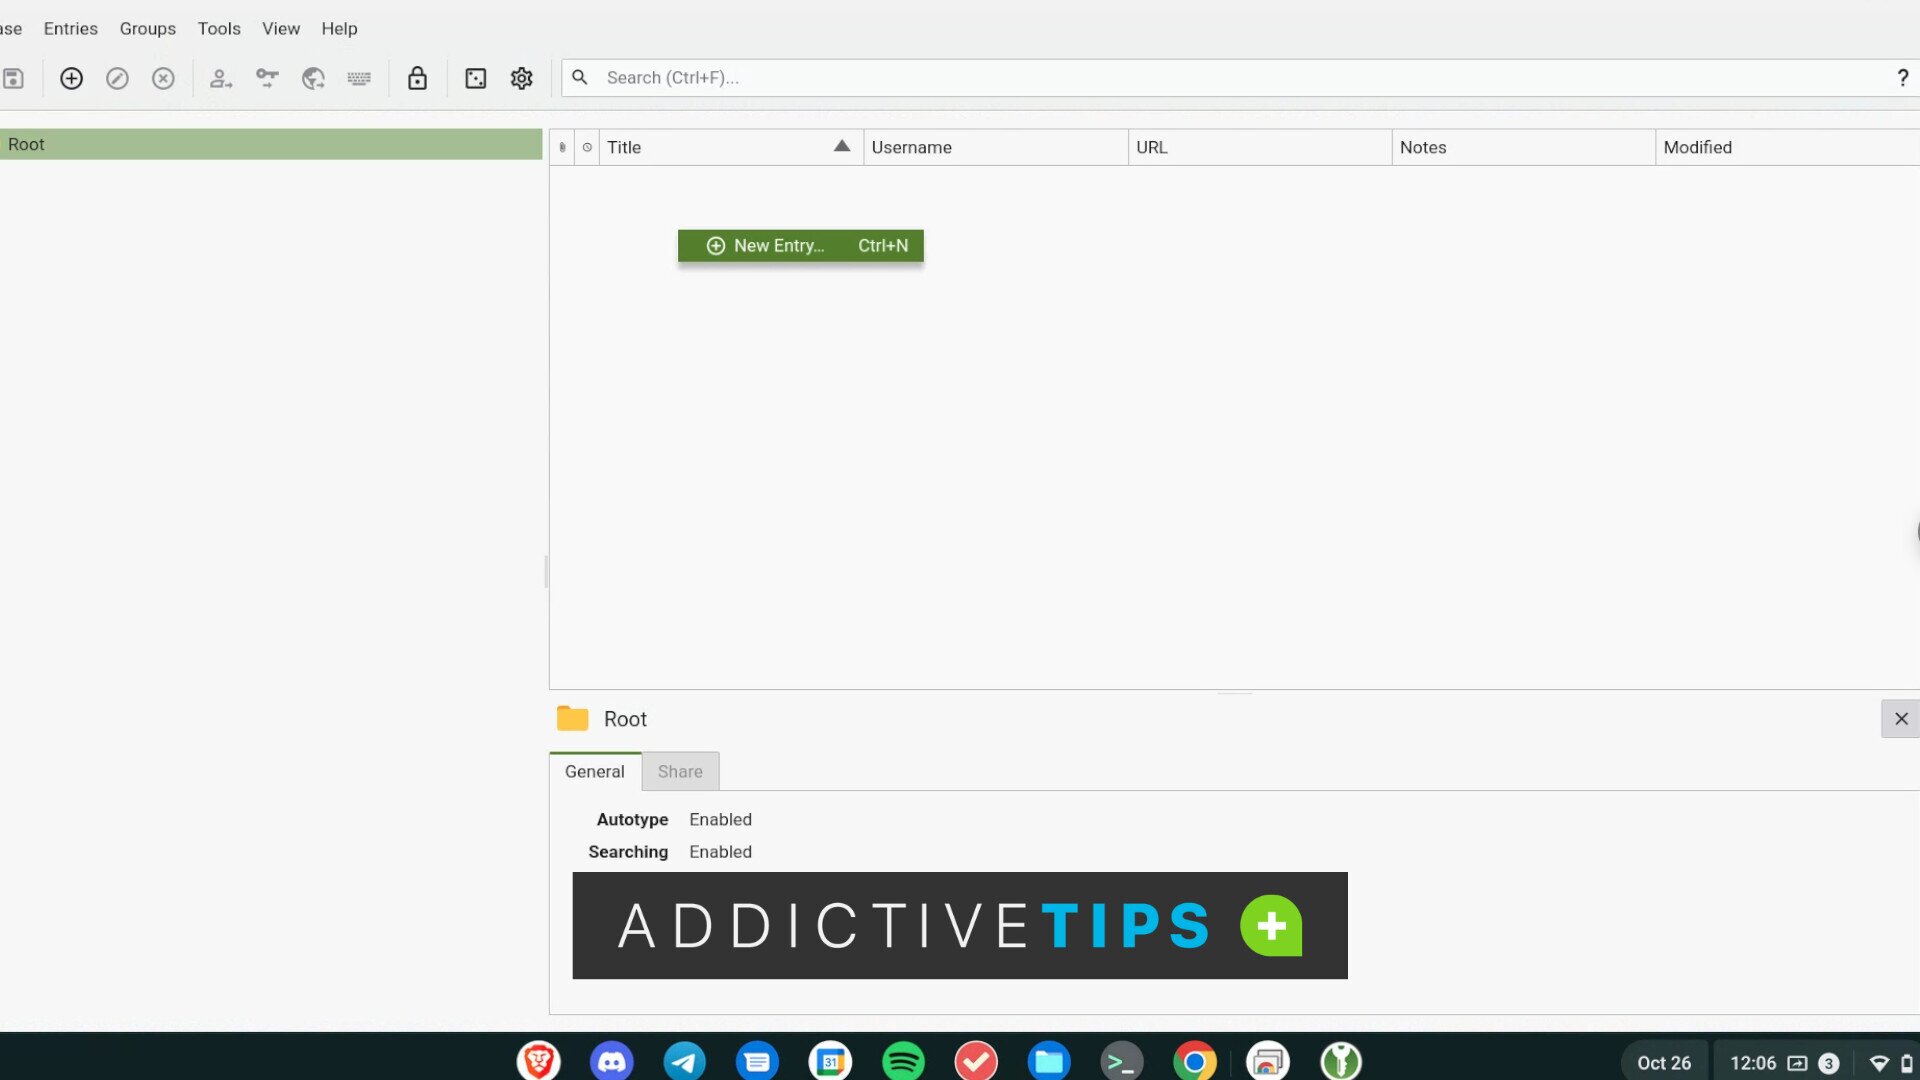
- When the database is unlocked, select the “Root” folder. Then, right-click on the blank space with the mouse. Finally, choose the “New Entry” option.
- Find the “Title” box, and type in the name of the login you’re adding (website/nickname, etc.)
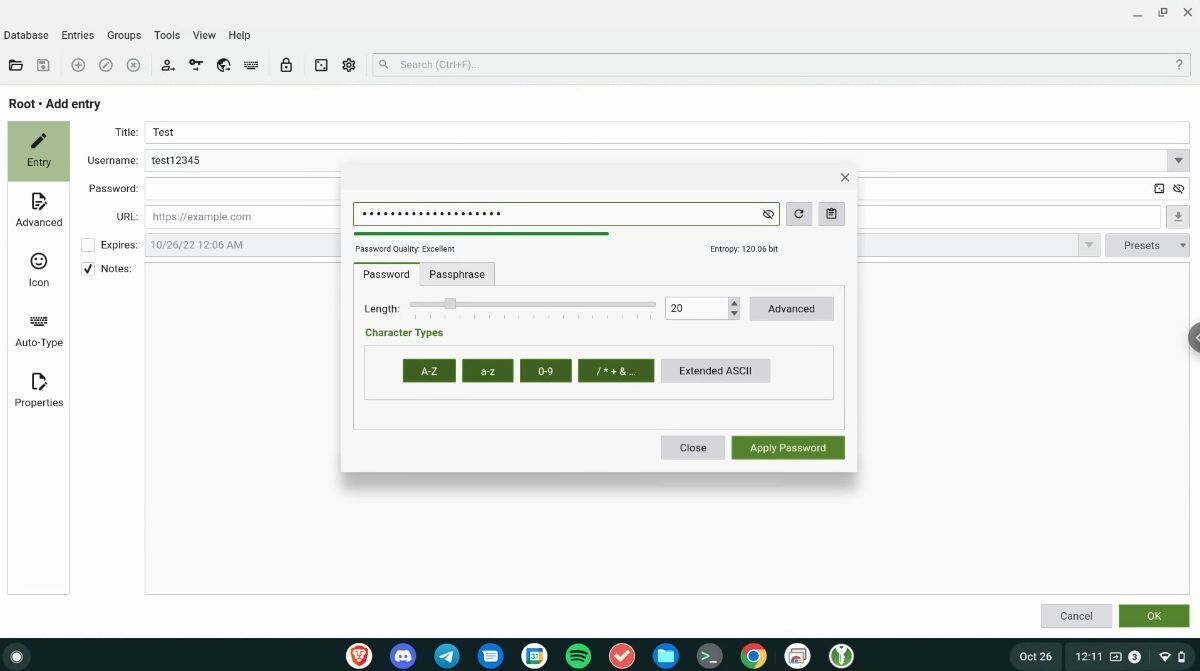
- Locate the “Username” box, and type in your username for the login you’re adding. Then, find the “Password” box, and type in the password for your login. Or, select the dice icon if you wish to generate a new password, select the dice icon.

- Find the “URL” box, and enter the URL login link to the website. For example, if you add a Facebook login, add https://facebook.com, etc. Select the “OK” button to add your password when you’ve added the URL.


Follow steps 1-5 to add all of your passwords to the KeePassXC app. Then, when you need to log in with an account, open up KeePassXC, select the login, right-click on it and select “Copy Password” and “Copy Username” to log in using KeePassXC.
