How To Remove A PPA In Ubuntu
A long time before snap packages, the new way to get software updates on Ubuntu right away was with a personal package archive. With this technology, developers could more easily deliver their programs even when Ubuntu wouldn’t let them. These days, PPAs still exist, but are used less and less. This is because adding PPA’s can be confusing, and the security around it can be iffy. In addition, PPAs often lose active support after a while, and can totally break an Ubuntu installation. So, how do you remove an added PPA from your system? Turns out, it’s simpler than many might think! Follow along as we go over the two best ways to remove a PPA in Ubuntu.
Note: users of Linux Mint, Elementary OS and other operating systems based heavily on Ubuntu also make use of PPAs. Some of these operating systems may not have the same “Software & Updates” app that Ubuntu does. As a result, users of these operating systems should follow the PPA Purge instructions for best results.
Remove A PPA – Ubuntu settings
The graphical way of removing a software repository (PPA or not) from Ubuntu is done in the “Software & Updates” app. This method is best for beginners, as it just takes a few clicks. To get started, tap the windows key on your keyboard and search for “Software & Updates”.

As the Software and Updates app loads up, it’ll take time as the system needs to refresh software sources to make sure everything is current. Once that finishes up, look in the program and notice the many different tabs. Look for “other software”. This section is where the Ubuntu operating system puts all non-essential, third party software sources. To remove any of them, select it with the mouse, then click the “remove” button.
Repeat this process for each software repository and PPA you wish to remove from Ubuntu. Once done, close the app. While closing, the Software Sources tool will again refresh the software sources to reflect changes.
Remove A PPA – Terminal With PPA Purge
A great way to deal with PPAs is in the terminal. The reason is that Ubuntu is a server operating system too, and many of these servers lack a basic Ubuntu desktop to work with. Thus, purging personal package archives from the system using the traditional Ubuntu method can be very, very tedious. Luckily, there’s a solid console alternative: PPA Purge. It makes easily removing personal package archives from Ubuntu fast.
Installation
To install the PPA Purge software, first run a software update. This will ensure that Ubuntu has the latest, most up to date software prepared for when the program is installed.
sudo apt update
Then, install PPA Purge with:
sudo apt install ppa-purge
Note: some later versions of Ubuntu may not have the program. This also goes for distributions made based on Ubuntu. If this happens to you, please go to pkgs.org and download a Debian package file directly.
Using PPA Purge
PPA Purge is very easy to use if you remember the name of a repository added earlier. However, not everyone has the ability to remember esoteric third-party software sources. The best course of action in this case is to put the UNIX piping system to work. In this example, we’ll use the Adapta GTK3 theme PPA.
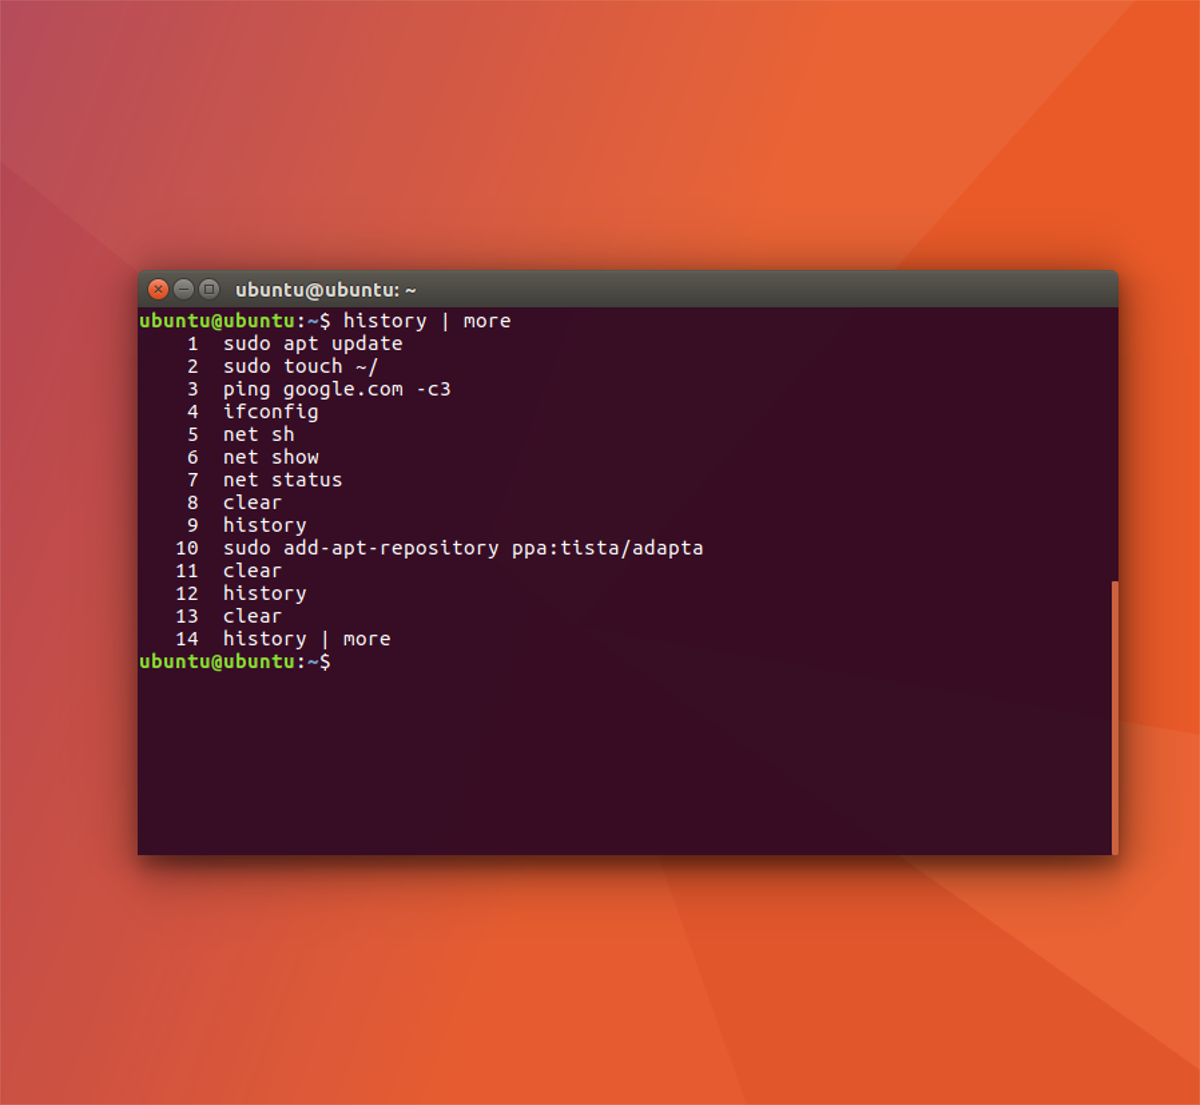
The first step is to look through your terminal history. The history function in the Linux shell is very useful, as it essentially keeps a log of each and every console command users into into Bash (and other shells).

View history all at once with:
history
Alternatively, make browsing the history a little easier by:
history | more
Going through the console history is a very good way to find the repository, as it will display the command that added it. This works in most cases, but can take a while. To make quick work of it, consider using the grep command.
history | grep "ppa:"
or
history | grep "sudo add-apt-repository"
These commands will look through the history file and single out things you’ve added into quotes. Feel free to customize the grep to whatever works best for you.
After finding the correct PPA by searching through Bash history, plug it into PPA purge to remove it from the system.
sudo ppa-purge ppa:tista/adapta
After purging the PPA from your system, run an update so that Ubuntu will reflect the changes made.
sudo apt update
Conclusion
Personal Package Archives make it very easy to get up to date software on aging versions of Ubuntu. Trouble is, sometimes they get neglected, go out of date, and pollute the update process with errors. Ubuntu developers have done a great job over the years making the need for PPAs less and less to fix this issue.
Troublesome though they may be at times, personal package archives are very useful for the average user, and that’s why it’s so important to know how to remove them.
