How to make edits to the sudoers file on Linux
The sudoers file controls how users can access root-level commands on Linux. By default, Linux operating systems set up the first user (during the installation process) as an admin and give it sudo access and sensible defaults.
For most users, these defaults work well, and there is no need to make changes. However, you’ll need to edit the file if you need to give new users sudo access, remove a user’s access, limit what users can run as sudo, etc.
Editing the Sudoers file is done with the visudo command in a terminal. To open up the Sudoers file for editing purposes, open up a terminal window by pressing Ctrl + Alt + T on the keyboard or search for a terminal in the app menu.
Once the terminal window is open and ready to use, log into the terminal with the root account.
Note: if you cannot log into root with the su command on Linux, you will need to enable root login. To do it, run sudo -s, followed by passwd.
su
When logged in as root, run the visudo command to open up the Sudoers file.
EDITOR=nano visudo
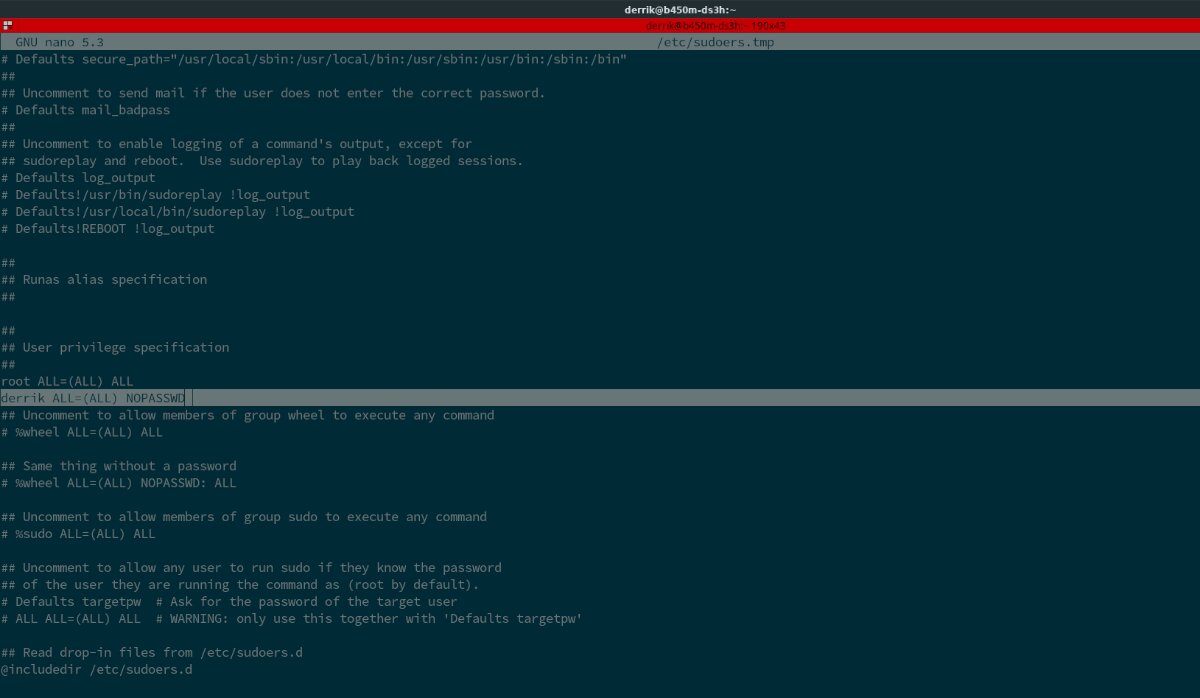
When the Nano text editor launches in the terminal, it’ll load up the Sudoers file for editing. Follow along with the guide to learn how to make edits to sudo on Linux.
Adding new users to the Sudoers file
Perhaps the number one thing users need to do when editing the Sudoers file is to add a new user. To add a new user, find the following line of code.
# User privilege specification
Make a new line under “root” and specify the new user. For example, to add the user “derrik” to sudo, you’d write:
derrik ALL=(ALL:ALL) ALL
Once you’ve finished adding your user, you can save the edits by pressing Ctrl + O.
Add users via group
If you’ve added users to sudo via the “wheel” group or the “sudo” group, you can remove users without editing the Sudoers file.
To add users, open up a terminal and run the following commands.
su
usermod -a -G wheel username
Or
su
usermod -a -G sudo username
Removing users from the Sudoers file
If you’ve previously added a user to the Sudoers file on your Linux system and wish to remove them, you can. But, first, locate the following line of code.
# User privilege specification
Once you’ve located the line of code, find the user line. For example, to remove the “derrik” user from sudo, delete the following line of code.
derrik ALL=(ALL:ALL) ALL
After you’ve deleted the line of code, you can save your edits using Ctrl + O.
Remove users via group
If you’ve added sudo access via the “wheel” group or the “sudo” group, you can remove users from sudo access without editing the Sudoers file. Instead, open up a terminal and run the following commands.
su
usermod -G wheel username
Or
su
usermod -G sudo username
Limiting what users can run
Adding a user to the Sudoers file can be dangerous as, by default, they’re allowed to execute every command with elevated root access. Do the following: if you wish to give users access to sudo but want to limit what they run.
First, find the user line. For example, limit the “derrik” user to only run specific commands as root when specified, like the code below.
derrik ALL=(root) /usr/bin/app/path/here/
You will need to add a new line to restrict each command. Press Ctrl + O to save when you’ve finished the edits.
Using sudo without a password
You may wish to edit the sudoers file to use the sudo command without needing to add a password. This feature is known as “passwordless sudo.” It is an excellent and convenient feature. However, it can be unsafe.
If you’re aware that it is unsafe but still want to do it, please follow our guide on enabling passwordless sudo on Linux.
Increasing sudo security
Those who value security may want to increase sudo security. Thankfully, it is possible to increase your Sudoer security by enabling the use_pty feature. This feature ensures that sudo must run in a sandbox, making it harder to exploit with malware.
To enable this feature, find an area of the Sudoers file with the line “Defaults.” Then, press Enter to create a new line. Then, add the following code to enable the use_pty feature.
Defaults use_pty
When finished editing, press Ctrl + O.
Increasing sudo timeout
By default, when a user enters the wrong password with the sudo command, it allows 3 tries before locking the user out. You can increase this timeout from 3 attempts to a custom amount.
Find “Defaults” in your Sudoers file, press Enter to create a new line, then enter the following code.
Defaults passwd_tries=CUSTOM_NUMBER
To save your edits, press Ctrl + O.
Show password input
One of the most annoying things about the sudo command is how it hides password input. If you wish to reveal it, you’ll need to enable password feedback. To enable password feedback, follow our guide on the subject.

