How to fix media keys not working on Linux
Lots of desktop keyboards have media playback buttons the user can use to pause, stop, skip and play music with the press of a button. For the most part, the Linux kernel, and Linux operating systems have support for these devices, due to increased Linux driver development over the years. That said, not every single keyboard’s media keys are supported out of the box, and that’s a real shame.
If you’re looking to get your play, pause, stop, and skip buttons on the keyboard to work with your favorite open-source media players, you’ve come to the right place. Follow along as we show you how to fix media keys not working on Linux!
Installing Playerctl
Playerctl is essential for enabling media keys functionality on keyboards which aren’t natively supported on Linux. Playerctl supports most Mpris-based music players, which means when bound to your media keys, will be able to control the playback of Spotify, Clementine, Google Music Player Desktop, and many, many others.
Installing Playerctl is necessary before we begin, as the software isn’t pre-installed on any Linux distributions out of the box. To get it working, open up a terminal window by pressing Ctrl + Alt + T or Ctrl + Shift + T, then follow the command-line instructions that correspond with the distribution you currently use.
Ubuntu
On Ubuntu Linux, Playerctl is only available to 19.04 users. So, if you plan to fix media keys and are on an older release of Ubuntu (like 18.04 LTS or 16.04 LTS), it may be time to upgrade.
To install the application on Ubuntu, use the following apt command.
sudo apt install playerctl
Debian
Debian Linux users have access to Playerctl in the “Main” software repository, provided they upgrade to version 10 of the operating system. So, if you haven’t already, upgrade from version 9 to 10. Then, use the apt-get command below to install Playerctl.
sudo apt-get install playerctl
Arch Linux
The Arch Linux “Community” software repository provides Playerctl, so, to install it, ensure this repo is set up in your Pacman configuration file. Once the software repository is enabled, use the installation command below to get it going.
sudo pacman -S playerctl
Fedora
Fedora Linux has Playerctl in the primary software repository for versions 29 and 30. To install, open up a terminal window and use the Dnf command below.
sudo dnf instlal playerctl
OpenSUSE
OpenSUSE Tumbleweed and Leap both have access to Playerctl via the Oss all software repository. To install Playerctl, no configuration is required. Instead, launch a terminal window and enter the following command below.
sudo zypper install playerctl
Basic Playerctl functions
Playerctl can be used to do many things with Mpris-enabled media players on Linux. Here’s a list of the functions, and how to use them.
- playerctl play – starts media playback. Perfect to set on a dedicated “play” button.
- playerctl pause – pauses media playback. Useful for those with a dedicated pause button.
- playerctl play-pause – a combination command that pauses and resumes media playback. An ideal command to bind to a play/pause media key.
- playerctl stop – stops the playback of media. Often not necessary to bind, unless the user has a dedicated “stop” media key.
- playerctl next – skips to the next media item in the playlist and automatically plays it. Good to bind to the “next” button.
- playerctl previous – skips to the previous media item in the playlist, and automatically plays it. Ideal for binding to the “back” media key.
Aside from the basic player functions in the list above, Playerctl does more things. For more information, type man playerctl in the command-line to view the program instruction manual. Or, save the manual to a readable text file with:
man playerctl > ~/playerctl-manual.txt
Assign Playerctl functions on media keys in Linux
Now that the Playerctl app is installed on your Linux PC and you’re aware of their basic command-line functions let’s bind some functions to the media keys.
Gnome Shell

Step 1: Press the Windows key on the keyboard, and search for “keyboard,” and open up the app with that name.
Step 2: Scroll to the bottom of the shortcut list and click “+.”
Step 3: Name your custom shortcut by typing the name in the “Name” box.
Step 4: Refer to the “basic commands” list in this article, and fill out the command you’d like to bind in the “command” box.
Step 5: Click “set shortcut,” and press the media key you’d like to bind the command to on Gnome.
Step 6: Click “Add” to apply the shortcut.
Repeat this process to bind each of the functions to all of your media keys.
KDE Plasma 5

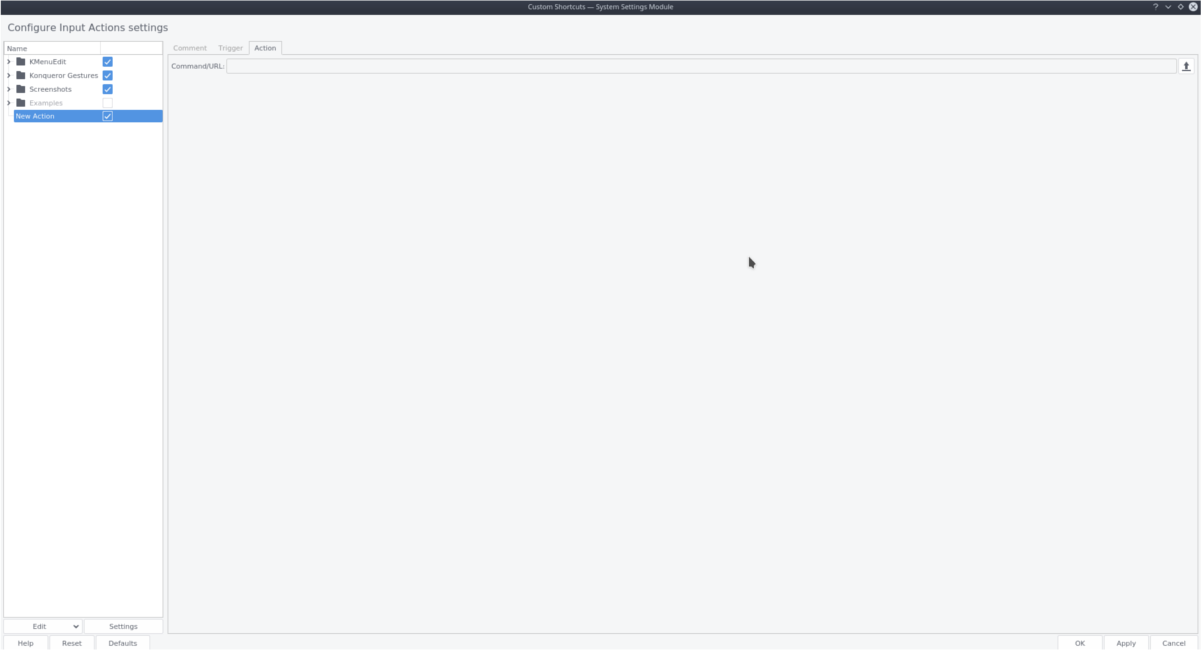
Step 1: Press the Windows key on the keyboard, search for “custom shortcuts” and open up the app with that name.
Step 2: Find “Edit,” and click it with the mouse. Then select “New,” followed by “Global Shortcut,” and finally, “Command/URL.”
Step 3: Select “Action” and write out the playerctl command you wish to add to the shortcut. Refer to the “basic commands” list above if you need help.
Step 4: Choose “Trigger” and press the media key on the keyboard you wish to bind the command to.
Step 5: Select “Comment” and write the name of the custom shortcut.
Step 6: Click apply to set up the shortcut.
Repeat this process to bind all of the media functions to KDE Plasma 5.
Mate
Step 1: Open up system settings, find “Keyboard Shortcuts” and select it to access the Mate keyboard shortcuts area.
Step 2: Find “+ Add” and select it to create a new keyboard shortcut.
Step 3: Under “Name” write the name of the shortcut you’d like to create. Then, select “Command” and write in one of the commands listed in “basic commands.”
Step 4: Click “Apply” to add the new shortcut to Mate.
Step 5: Locate the custom shortcut you’ve just made in Mate. Then, double-click on the “disabled” area to re-bind it to a media key.
Repeat this process to bind all of the Playerctl commands on Mate.
XFCE4

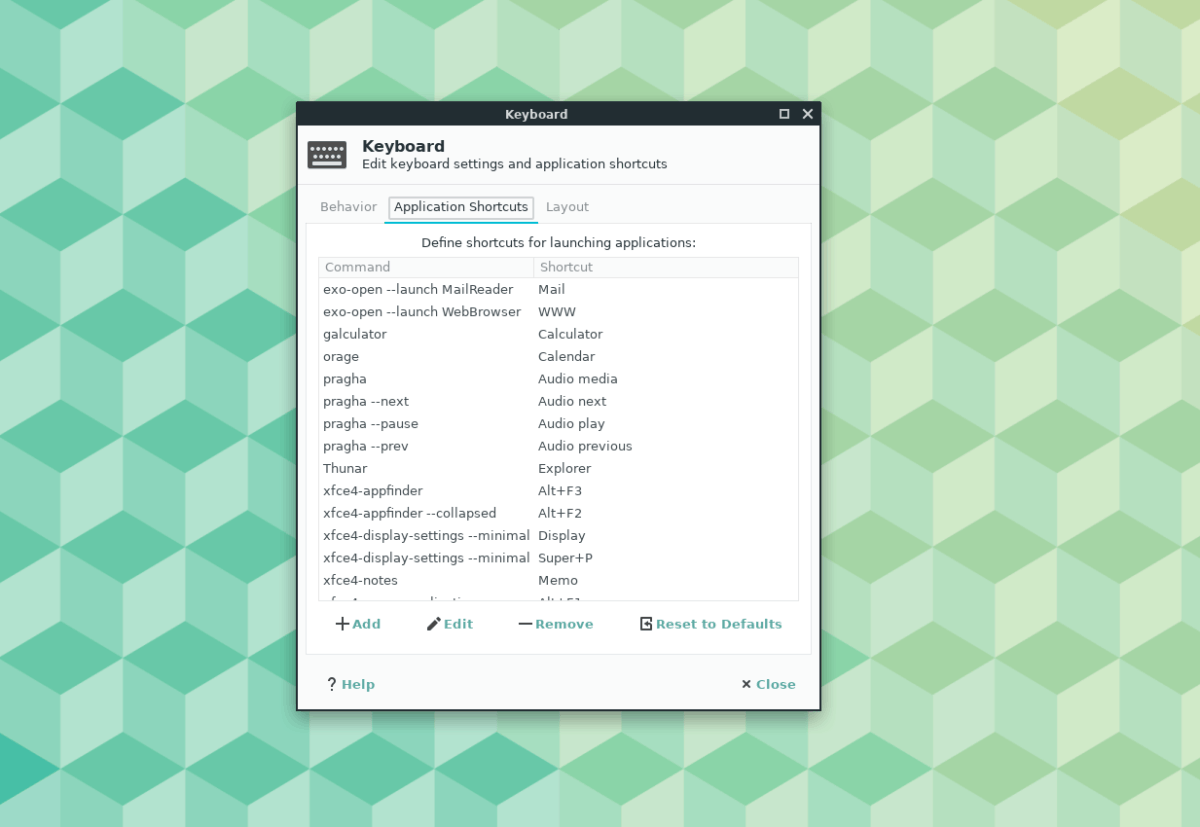
Step 1: Open up the XFCE4 system settings by pressing Alt + F2 and writing in the command below.
xfce4-settings-manager
Step 2: Find “Add” and click it to create a new custom shortcut.
Step 3: Look to the “basic commands” list and write in the playerctl command you wish to add to the new shortcut.
Step 4: Press the media key you wish to bind the command to.
Step 5: Select “Close” to close the shortcut window, and your new shortcut should instantly be working.
Repeat this process as many times as necessary to set up Playctl on XFCE4.

Hot dog, I know I am late to the party but thank you very much!! Works like a charm.
Great Post!!!