How to edit program shortcuts in Gnome Shell
Do you have a program shortcut you’d like to change on the Gnome Shell desktop? If so, follow along with this guide to learn how you can edit program shortcuts in Gnome Shell.
Method 1: Alacarte menu editor
Gnome Shell, unlike KDE Plasma 5, does not have a built-in program shortcut editor. So, if you’re on Gnome and feel the need to create a custom shortcut, or edit an existing one, you won’t be able to with the default Gnome apps. Instead, you must install a third-party application like Alacarte.
Installing the Alacarte application on a Linux PC starts by launching a terminal window. Press Ctrl + Shift + T or Ctrl + Alt + T on the keyboard. Then, follow the command-line instructions below that match your Linux OS to get the app working.
Ubuntu
To install Alacarte on Ubuntu, use the following Apt command.
sudo apt install alacarte
Debian
On Debian, users can install the Alacarte application by entering the Apt-get command below.
sudo apt-get install alacarte
Arch Linux
Arch Linux users can install the Alacarte app with the following Pacman command.
sudo pacman -S alacarte
Fedora
For Fedora Linux, install the Alacarte application by using the Dnf command.
sudo dnf install alacarte
OpenSUSE
Install the Alacarte menu editor application on OpenSUSE Linux with the following Zypper command.
sudo zypper install alacarte
Edit shortcuts in Gnome Shell with Alacarte
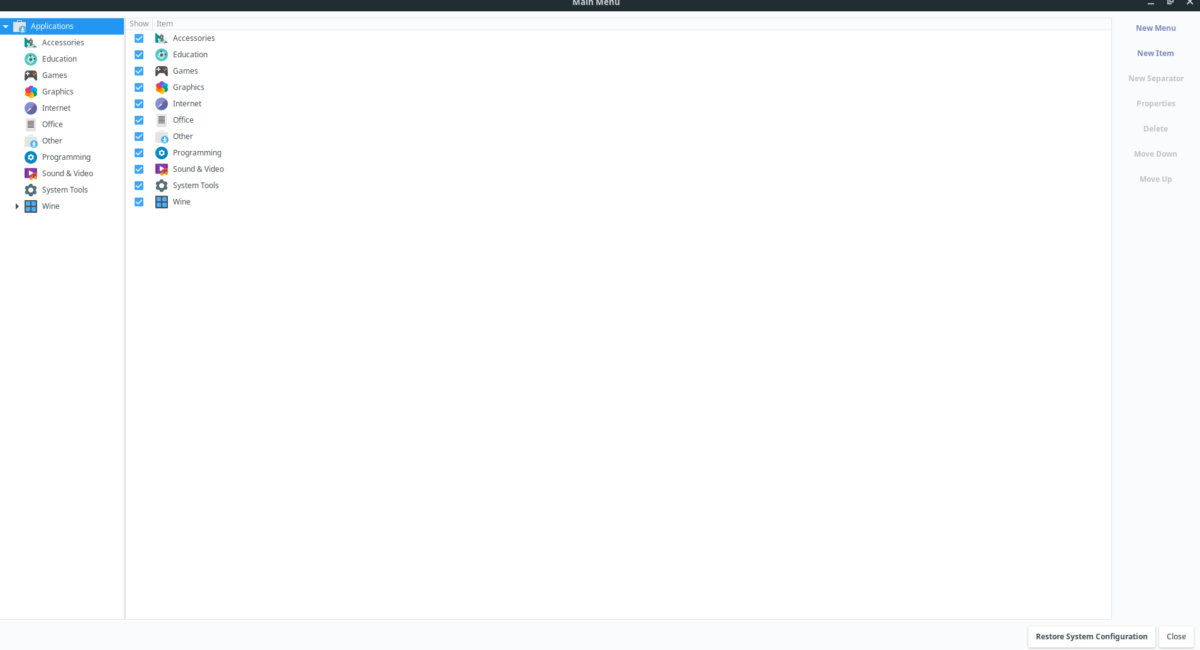
To edit existing program shortcuts on the Gnome desktop, open up the Alacarte application. The app can be opened by pressing Win on the keyboard, typing “Main Menu,” and launching the app that shows up in the results. You’ll also be able to launch Alacarte by pressing Alt + F2 on the keyboard, and typing in the command below into the app launcher.
alacarte
With the Alacarte application open, and ready to use, follow the step-by-step instructions below to learn how to modify program shortcuts on the Gnome Shell desktop.
Step 1: In Alacarte, look to the left-hand side of the program. You will see a descending list. The list is called “Applications.” It has various sub-menus, with different program categories to look through.
Find a sub-menu, and click on it with the mouse to access the program shortcuts in the menu.

Step 2: By clicking on the sub-menu, program shortcuts will appear in the main window. Sort through the different programs listed, and click on the one you’d like to modify with the mouse.
Step 3: After selecting a program shortcut with the mouse, it will be highlighted in Alacarte. From there, find the “Properties” button on the right-hand side and select it to access the shortcut settings.
Step 4: In the shortcut settings (AKA “Launcher Properties”), you will see a “Command” box and a “Comment” box. Click on either box to modify the program shortcut how you see fit.
Step 5: Once your shortcut is modified in Alacarte, click the “OK” button to save the changes. As soon as you do, the shortcut should automatically update.
Feel free to repeat this process to modify and tweak as many program shortcuts as you need. Or, to delete program shortcuts, select one in the list, and click the “Delete” button.
Method 2: Terminal
The Alacarte application is pretty useful for advanced shortcut editing in the GUI. However, if you’re a fan of the terminal, you may want to learn how to edit program shortcuts in Gnome Shell from the command-line. Follow the step-by-step instructions below to learn how.
Step 1: Open up a terminal window on the Gnome Shell desktop by pressing Ctrl + Shift + T or Ctrl + Alt + T. Then, use the CD command to move the terminal window into the “applications” directory on your Linux PC.
cd /usr/share/applications/
Step 2: To modify program shortcuts in the “applications” folder on your Linux PC, you must elevate the terminal session from the standard user to the root user. Using the sudo -s command, log into the root account.
Please note that we are using the sudo -s command, as it allows the user to log into the root account rather than su, as it will keep the terminal in the same directory while elevating the privileges.
sudo -s
Step 3: Now that the terminal session has root access via the root account, you must use the ls command, and the grep command to filter through all of the program shortcuts in the “application” directory for the file you’d like to modify.
ls | grep "name-of-app"
Step 4: Take the name of the program file and plug it into the Nano text editor. For example, to edit the Firefox app in Nano, you’d do the following.
nano -w firefox.desktop
Step 5: Look through the program shortcut and edit what you see fit. For help on editing desktop shortcut files, check out this guide here. It goes over how to create new desktop files, which should help explain what each item in the file does.
When done editing, save your changes by pressing Ctrl + O on the keyboard. You can close Nano with Ctrl + X.
When the Nano text editor is closed, your shortcut should be updated with the changes made.
