3 easy ways for Windows users to try out Linux
People are talking about Linux more and more in the mainstream these days, and even Windows users are starting to take an interest in the platform. However, trying out a new type of operating system can be scary if you’ve never used it before. Since Linux has a perception of being difficult to install, we’ve compiled a list of 3 easy ways you can try out Linux, while keeping your Microsoft Windows PC intact.
1. Linux via a virtual machine in VirtualBox
If you’ve ever wanted to try out Linux on a Windows PC, you’ve probably worried about losing your files, or even your entire Microsoft Windows installation. Thankfully, it is possible to install any Linux operating system without doing a thing to your existing Windows operating system! How is this possible? With the power of virtual machines.
“What is a virtual machine,” you might be asking yourself. Well, it’s an emulated computer running inside of a real one through special software. Thanks to this software, the virtual machine (AKA VM) allows users to experience a full OS experience in a contained environment.
The best virtual machine software to use on Windows to try out various Linux operating systems is VirtualBox. The reason that it’s a great choice is that VirtualBox is free, and there are also several pre-installed Linux OSes up on OSBoxes that can be imported into the app in seconds!
Trying out Linux on Windows with VirtualBox
If you like the sound of taking a Linux operating system or two for a test drive on your Windows PC, here’s what to do. First, head over to the VirtualBox website. Then, once there, download the latest release of the app for Microsoft Windows, and install it on your computer.
When the VirtualBox application is set up on your Windows computer, head over to OSBoxes.org, and download a Linux OS (VDI image) from the list, and extract it with 7zip. With the machine extracted, follow the step-by-step instructions below to create a runnable Linux VM on Windows.
Step 1: Click “Tools,” then select the blue “New” button to create a new VM.
Step 2: Fill out the VM’s name in the “Name,” box.
Step 3: Select the Linux option under “Type.” Do not select “Other,” as you will not be able to use VirtualBox’s automatic OS detection feature.
Step 4: Select the “Version” drop-down menu, and set it to the name of the Linux OS you downloaded from OSBoxes. Or, if you can’t find it, look through and set it to “Other Linux.”
Step 5: Under “Memory size,” set the appropriate amount of RAM the VM should have. Unsure about how much RAM to set? Try “1024 MB”.
Step 6: Under “Use an existing virtual hard disk file,” browse for the VDI VM file you extracted from the 7z archive downloaded on OSBoxes.
Step 7: Select “Create” to finish creating the VM.
Step 8: Right-click on the VM in the list, and select “Start” to start up Linux on your Windows PC through a Virtual Machine!
2. Windows Subsystem for Linux

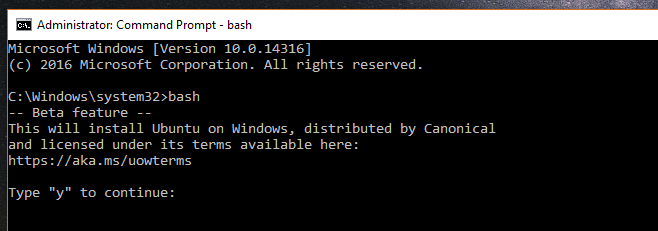
Microsoft is partnering with prominent Linux players like OpenSUSE, Ubuntu, Fedora, and Debian to deliver a Linux command-line experience on Windows 10 (via the Microsoft Store) for developers and fans of the open source platform. So, if you’re interested in taking Linux for a spin, consider this route.
The Windows Subsystem for Linux isn’t a feature that is enabled by default on Windows 10. To enable the feature, follow our guide on the subject here. Then, once you’ve enabled the Subsystem feature on Windows 10, open up the Microsoft Store, search for “Ubuntu,” “Debian,” “OpenSUSE,” or “Fedora” and install them to take full advantage of the Linux command-line from the comfort of your Windows 10 PC!
3. Ubuntu via a USB flash drive

One of the best things about Linux distributions is that if you install one to a USB drive, you’ll be able to boot from it and experience the full Linux desktop without ever having to install anything to your computer.
If you’re really interested in taking Ubuntu, or any other Linux operating system for a test drive, but you don’t want to deal with the complexities of Virtual Machines or the Windows Subsystem for Linux, this is a good option for trying out various Linux operating systems.
Try out Ubuntu on a USB flash drive
Installing Ubuntu onto a USB flash drive starts out by downloading a USB imaging application on Windows. Head over to the Etcher website, download the Windows version of the app and install it. Then, launch it on your Windows PC, and follow the step-by-step instructions below.
Step 1: Go to Ubuntu’s official website and click on the “Download” button to reveal the download options.
Step 2: In the pop-up download menu that appears when you select “Download,” locate “Ubuntu Desktop” and click on it to go to the Ubuntu Desktop download page.
Step 3: Look through the Ubuntu desktop options and download either Ubuntu 18.04.2 LTS or Ubuntu 19.04.
Step 4: In Etcher, find the “Select Image” button and click it with the mouse. Then, use the file browser window to add the Ubuntu ISO file to the app.
Step 5: Plug in a 2GB (or higher) USB Flash drive into the USB port on your Windows PC.
Step 6: Click “Flash!” to install Ubuntu to the USB flash drive.
Step 7: Reboot your Windows PC and load it into the BIOS. From there, configure the system to boot directly to the USB flash drive, so that you may access Ubuntu.
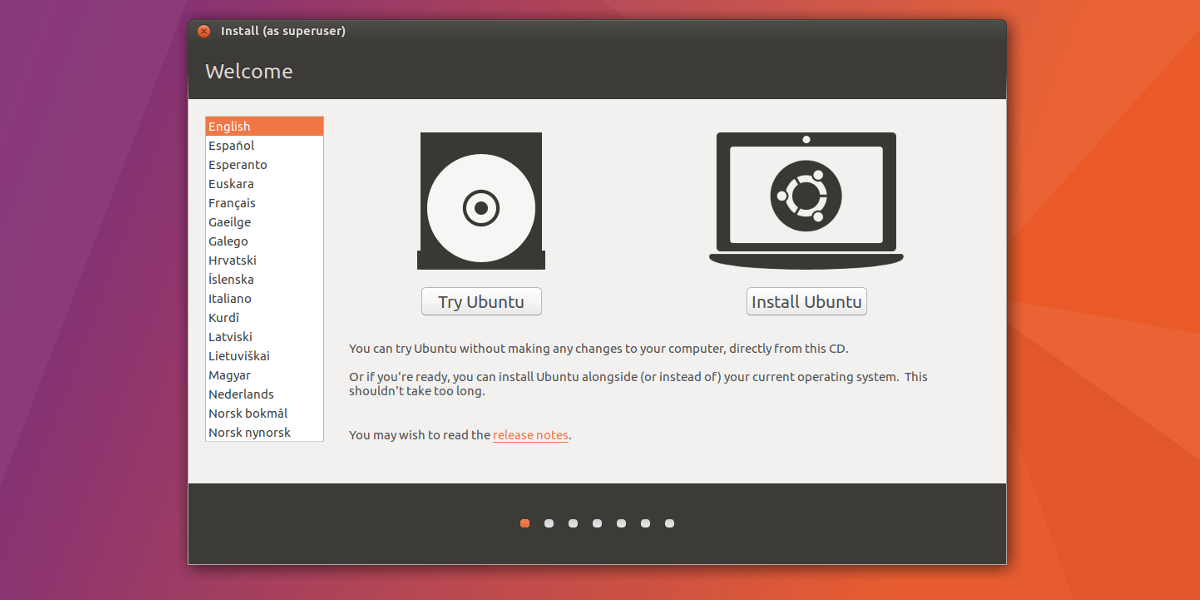
Step 8: Click the “Try Ubuntu” button to take Ubuntu for a test drive without installing it!
Conclusion
Trying out a new operating system is always scary, and Linux isn’t designed for everyone. Still, if you’ve been interested in expanding your horizons to try out Linux, the methods covered on this list are the safest options.
What’s your favorite way to try out Linux on a Windows PC? Tell us below in the comment section!
