How To Customize The MATE desktop
When Linux users say “traditional desktop”, they’re most likely referring to Mate. This is because the desktop environment is built with Gnome2 in mind. At one point, almost every Linux distribution was using Gnome 2. This isn’t the case anymore. Mate exists to carry on the legacy of Gnome 2 (after Gnome moved onto Gnome 3). Nowadays, Mate still makes waves as one of the best lightweight, and configurable desktop environments out there. It’s very popular but some new Linux users aren’t sure how to customize the MATE desktop environment.
In this article, we’ll be going over all the ways you can customize the Mate desktop and make it your own.
Interface
The interface is the overall graphical interface that Mate makes use of. The default theme looks pretty good, but it’s not for everyone.
Here’s how to change the default Mate graphical theme: start out by right-clicking on the desktop to bring up the context-menu. In the menu, select “Change Desktop Background”. Go to “theme”, and then look for the “customize” button. This brings up the theme customization menu.
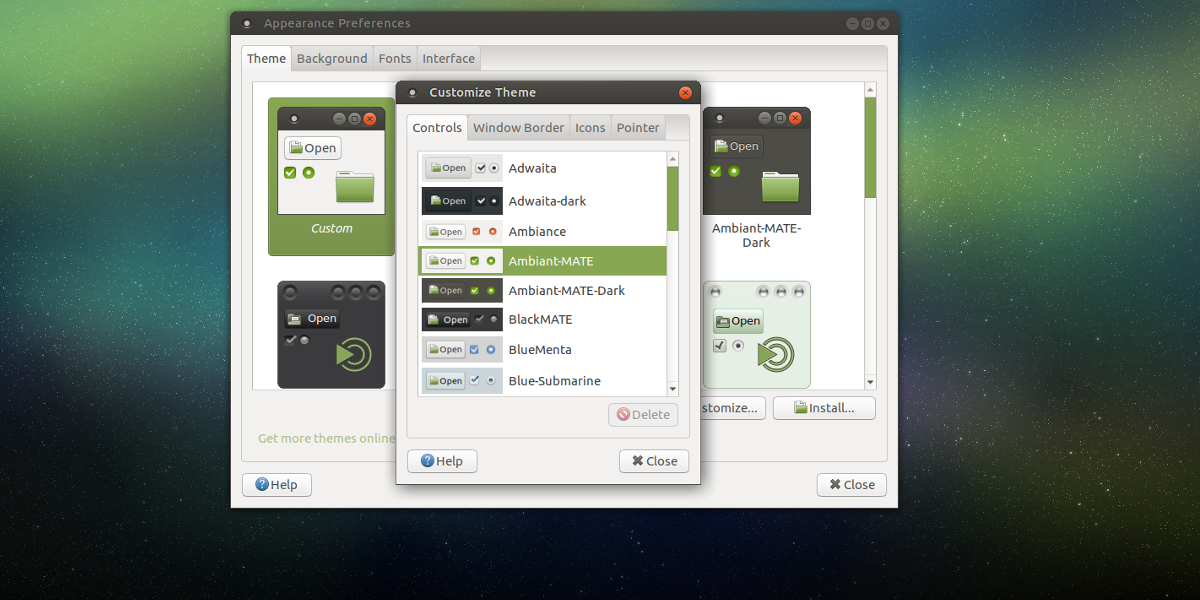
Find the “controls” tab, and browse through the list of installed themes. These themes are what we referred to earlier as “interface”. Select a theme, and then close the window.
Note: download new themes for the Mate desktop at Gnome-look.org!
Window Border
With some desktop environments, the window manager theme, and the overall GTK theme are one thing. The Mate is not one of those desktops.To customize the look of the window manager theme, you’ll need to go to the appearance area. Once again, right-click on the desktop, and select the “Change Desktop Background” button.
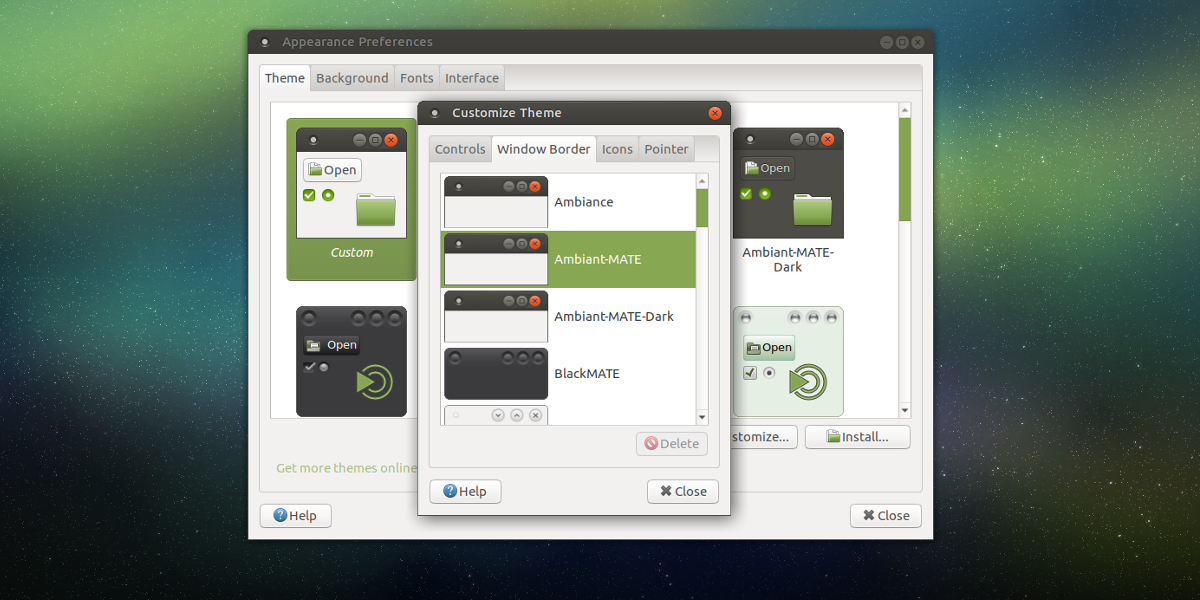
Click the “customize” button, and look for the “Window Border” tab. This tab houses all of the individual window manager themes to choose from. Feel free to mix and match with whichever desktop theme you’re using. The great thing about the Mate desktop is that it allows users to separate both themes.
Icons
An icon theme can make or break a desktop environment. Use a good one and your desktop will look really nice. Use a bad one and everything on your PC can look like a terrible eye-sore. When it comes down to it, the default icon theme for the Mate desktop is satisfactory. For most users, the theme will be good enough. However, if you’re not the type of person to settle, there’s a way to change it.
Make your way to the icon settings. Like mentioned before, get to this area by right-clicking on the desktop and selecting “Change Desktop Background”, then “customize”. In the customization menu, find “Icons”.
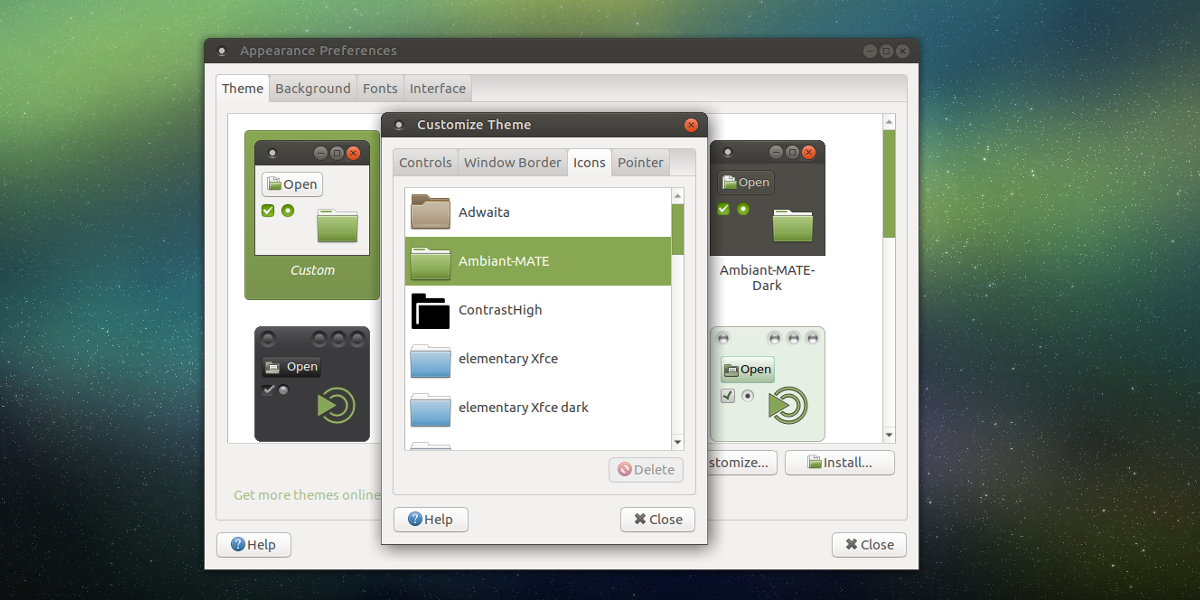
The “Icons” section is a list of all of the icon sets currently installed on the system. Browse through the list, and select an icon theme that looks good. The theme will instantly apply to the system.
Not happy with any of the installed icons on your Mate desktop? Head over to the icon themes section of gnome-look.org and download some new ones!
Panel
The traditional layout of Mate involved a panel at the top, and a panel at the bottom. Each one of these panels have totally different items on it: the top menu houses the application menu, shortcut icons and the system tray. The bottom panel holds things like the window list (aka the program switcher), and some other things.
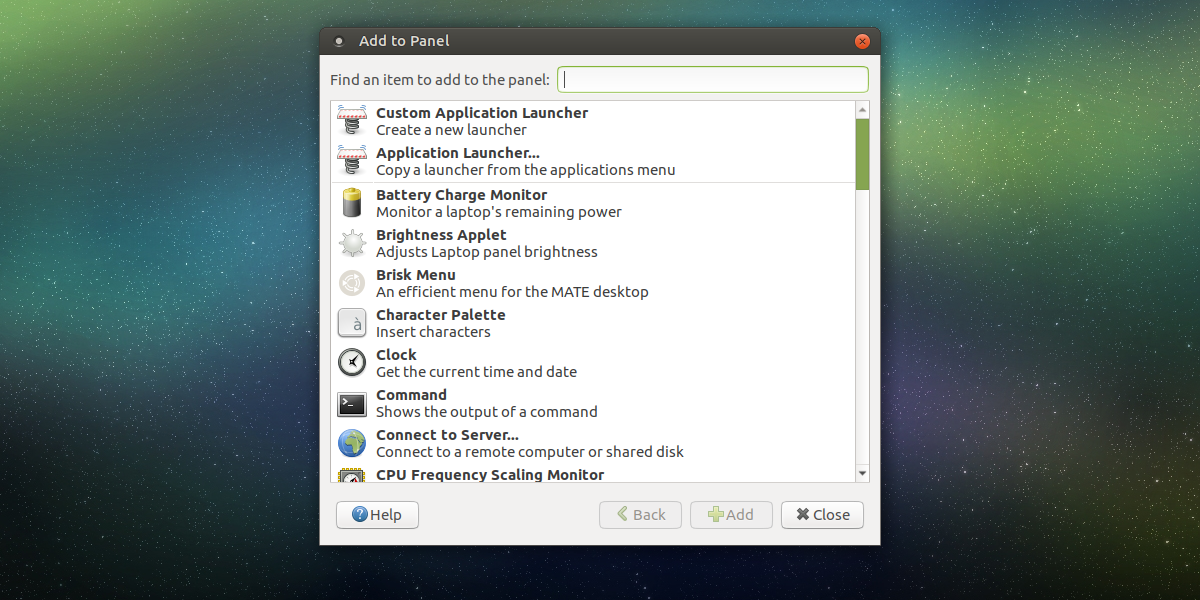
The default panel layout works, but it’s not the only way Mate has to look. Want to add new panel widgets? Right-click on a panel, and click the “add to panel” button to add new widgets from the widget menu. Additionally, delete existing widgets by right-clicking on them, and select “remove from panel”.
Along with widgets, entire new panels can be deleted and created. Right-click on a panel, and click “delete” to remove a panel. Alternatively, click “new panel” to create a fresh new panel to use.
Panel Settings
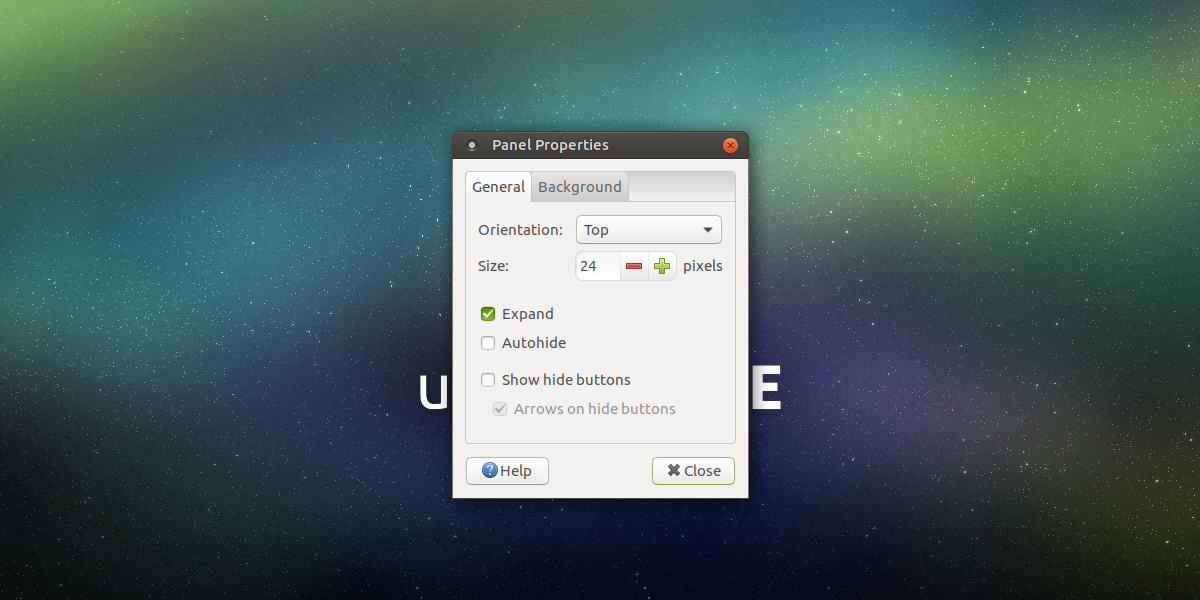
Mate has a lot of cool settings for the panels themselves, outside of adding widgets. Get to the panel settings by right-clicking on an existing one, then selecting “properties”. In the properties area, there are two tabs. The first is the “general” tab. This section of the settings allows the user to change the location of the panel, and it’s size. Change the size of the panel by clicking the + or – sign. Change the location of the panel with the “orientation menu”.
The other tab in Panel properties is “Background”. This is an area that allows users to further customize how Mate panels look. Select a solid color for the panel to use by clicking the “solid color” button. Alternatively, tell the panel to use an image as it’s background by clicking the “background image button”.
Conclusion
The paradigm that Mate exists in has been around for close to 20 years. Despite this fact, the developers still manage to keep it fresh. They include tons of great improvements, which keep both longtime and new users happy. If you’re looking for a great Linux desktop that embraces customization, Mate has your back.

I install MATE on a server but now i would like to know how to customize it for the users. Is there a one-size fits all or do i have to customize each user individually? Please advise.