How To Customize The Budgie Desktop
In the beginning, the Budgie desktop was only available on one Linux distribution. As time went by, it gained popularity and subsequently became available on a myriad of distributions. As Budgie is fairly new, not a lot of information about how to tweak it is out there. That’s why in this article, we’ll be going over how to tweak and customize the Budgie Desktop environment. We’ll cover everything from changing fonts, to installing custom themes and icons, and messing with panels.
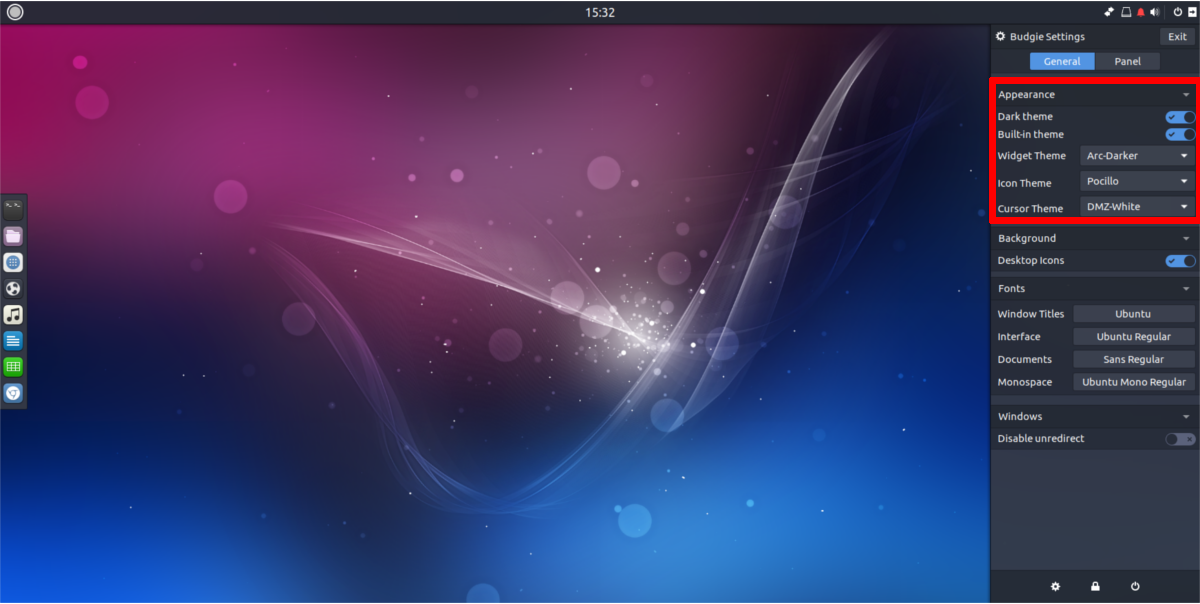
Appearance
It’s surprisingly easy to customize the Budgie desktop. Unlike some desktops, the settings to change things are not tucked away and hidden. Instead, users can easily make their favorite GTK3+ desktop look any way they want. The settings are in the panel area, and not behind countless menus.
To modify the way Budgie looks, go to the panel and click the square icon at the very end of the panel. Click it to reveal the settings pane. From here, click the gear icon. The gear icon opens to the general settings area for the desktop.

Dark Theme
For some reason, the developers of Budgie are obsessed with dark themes. They look nice, but the look is not for everyone. If you’d like to turn off the dark themes, it’s incredibly easy to do so. In the appearance setting area, find “Dark theme” and click the slider next to it to disable this feature. Want to turn it back on? Click the slider again.
Built-in theme
Budgie has a theme that is “built-in”. This setting is just little tweaks the desktop does to further integrate the stock GTK+ theme into the system. They are nice touches, but if you’re not interested in using the default theme, you may want to disable this feature. Disable “built-in” by finding “Built-in theme” in the appearance section, and clicking the slider to disable it.
Widget theme
Budgie is built in part by using Gnome Shell, and GTK3+. As a result, it makes use of GTK3+ themes. Another term for these themes are “widgets”, as they theme the way window “widgets” look on the desktop.
The stock Budgie widget theme looks great. In fact, it uses one of the more popular GTK3+ themes out there. However, not everyone has the same taste, so it’d be nice to change the settings.
Change the GTK3+ theme by going through the appearance settings area, finding “widget theme”, and selecting the drop-down menu next to it. The drop-down menu will show all installed themes on the system. Select a theme that suits you.
Icon theme
Budgie often comes with the Arc (or Pocillo if you’re using Ubuntu budgie) icon theme. It’s a stellar combination of the Faba and Moka icon sets, with a few tweaks. As a result, all icons have a nice square, sleek look. If you’re not a fan of these icons, you can change them.
Open the appearance settings, and scroll down to find “Icon theme”. Next to the icon theme area, select the drop-down menu. This will display all currently installed icon themes on the system that Budgie has access to. Change themes simply by selecting a theme from the list. The icons will change instantly.
Cursor theme
Hate the way your mouse cursor looks in Budgie? Not to worry! There’s a way to change it! In the appearance settings, find “Cursor theme”, and click on the menu next to it. This menu displays all installed cursor themes. To switch to a new theme, just select one in the list. After that, the system will switch themes.
Note: sometimes programs don’t fully accept cursor theme changes right away. Often times the entire PC has to reboot first before the changes are accepted.
Fonts
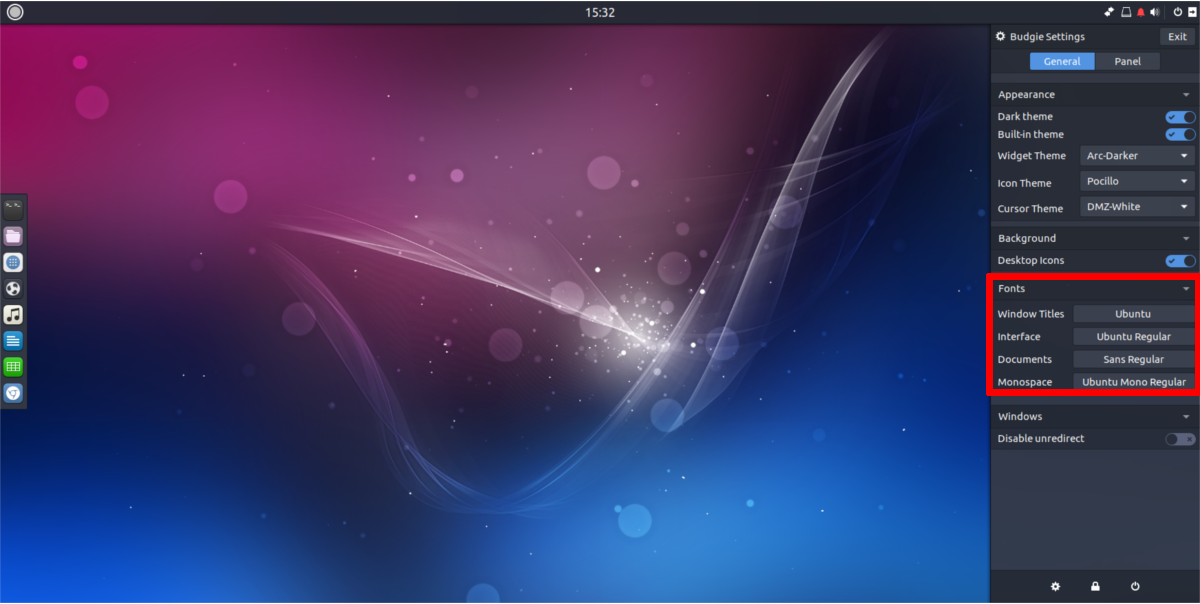
If you’re looking to change the Font settings on the Budgie desktop, the appearance area is the place to do it. Open the settings pane on the right, and scroll down to find “Fonts”.
In this Fonts area, users are given quite a lot of freedom to change the way text is displayed in Budgie. Here users can modify the window title font, the interface font, as well as the font used for documents, and the monospace font. Changing individual fonts applies them to the system right away.

Panel
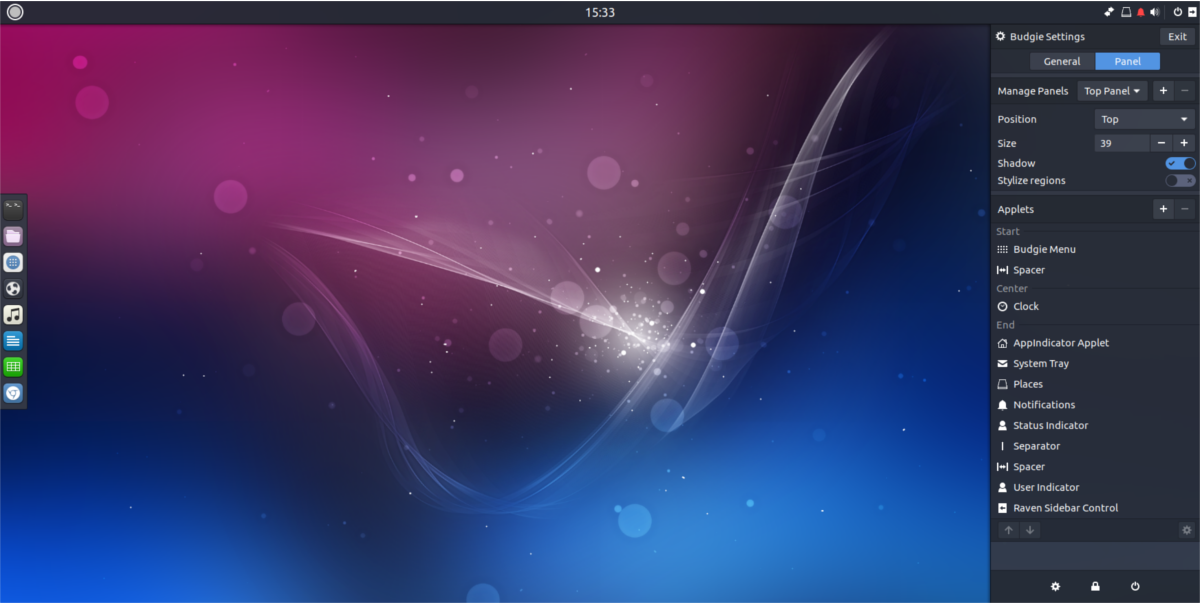
Looking to change Panel settings? Lucky for you, with Budgie the desktop isn’t locked down and it’s very easy to change the panel. To start off, you’ll need to get to the panel settings area of Budgie. Click the square icon at the end of the panel. This reveals the familiar settings pane we’ve been interacting with. Look for “Panel” and click it. This takes the user to the very in-depth area Panel configuration area of the desktop.
Here, users can create new panels, add widgets/removing widgets, tweak the size of the panel, and everything else in between.
Creating Panels
Need to create a new panel? It’s easy! In the panel settings area of the Budgie desktop, look for a + sign. It’s next to the panel orientation settings. Click this symbol, and instantly, Budgie will create a new panel to interact with.
Not happy with your new panel?
In this area of the settings, users can change the way the panel looks. Change the orientation of the panel by clicking the “position” menu, change the size of the panel by going to the “size menu”, and etc.
To delete a panel, click “manage panel”, select the desired panel, and click the – symbol to delete it.

Applets
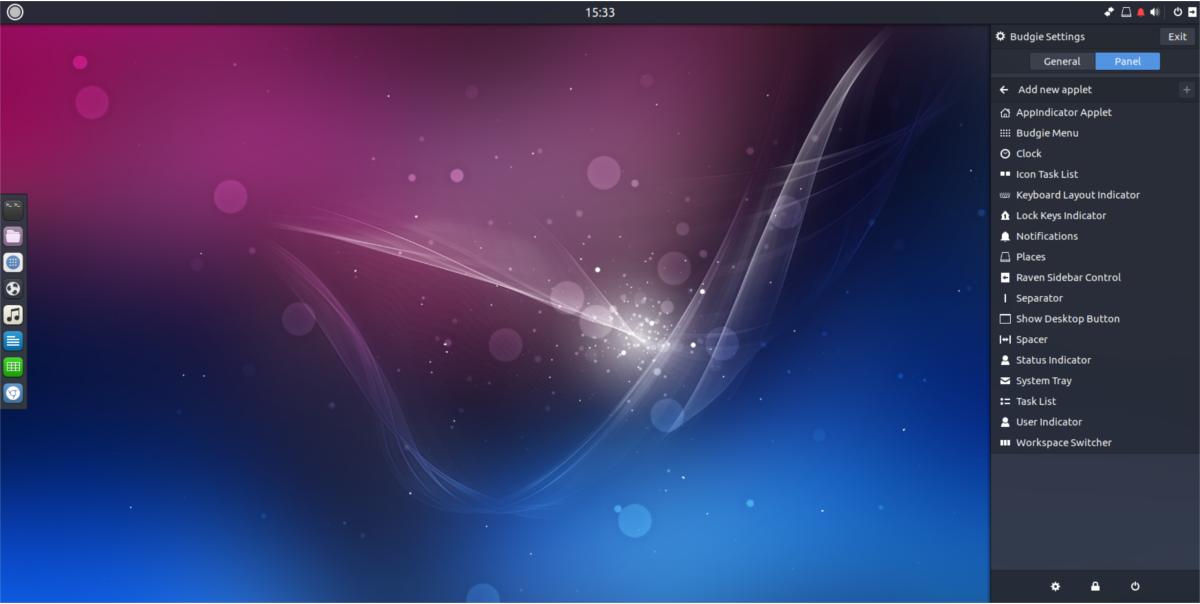
Need to add some applets to your panel? Here’s how to do it! Go down to the “applets” section of the settings, and then click the + sign. This will open a menu, where the user can select a new applet to add.
To remove an applet, click on the desired applet, then click the – sign to remove it.
It is also possible to re-position the applets. Highlight an applet, then click the up and down arrows to move it around.

Conclusion
Budgie is a solid take on the modern Linux experience. It’s defaults are beautiful, simple and clean. As it grows in popularity, hopefully we’ll start seeing more and more Linux distributions include it as one of the default desktop options.

Really love Budgie. Thanks for the insights.
Nice look and feel, yet im not amused essential applets are missing. The kill process, and network apps.
i know this post is 4 years old but iirc budgie is supposed to be used with gnome’s applications
how to move the notification panel from left to right or viec-versa