How To Create, Mount, And Burn An ISO File In Linux
ISO files are how users commonly install an operating system that doesn’t come in disc form. They’re a format that can be read easily on both Windows and Linux though most users only know how to work with an ISO file if they already have it. Most users have no idea how to make an ISO, burn them, how they work, etc. It is because of this, we’re going to dig deep and explain everything there is to know about ISO images. We’ll go over how to make them, how to burn them to USB sticks, as well as CDs and DVDs. We’ll also go over how to mount an ISO file in Linux to access the files inside.
Creating An ISO File On Linux
To create an ISO file on Linux, open up a terminal and use the mkdir command to create a directory. This directory is important, as it will be the basis of the ISO file. Everything you want to add to the ISO file goes into this folder. In this example, we’ll be making the folder directly in the home directory.
mkdir ~/iso-files
From here, use the MV command to put individual files and folders into the iso-files directory.
mv ~/Documents/file.a ~/iso-files
mv ~/Downloads/file.b ~/iso-files
mv -R ~/Home/Pictures/* ~/iso-files
With all the files and directories inside of the source folder, we can make the ISO file. This is done with the mkisofs tool.
mkisofs -o testiso.iso ~/iso-files
Running mkisofs may take some time. When it’s done, a burnable (and flashable) ISO image will be on your Linux PC.
Mounting An ISO File on Linux
ISO files are widely used because it’s an easy way to transfer a lot of data from an image to a bootable USB drive, CD or DVD. Trouble is, due to how these files are made, users can’t just “double-click” them and access the files inside. Instead, if you want to access data from an ISO, you’ll need to “mount” them, similar to how you’d mount a hard drive, or USB stick. To mount an ISO file, open a terminal, and follow these steps.
Step 1: create a folder for the ISO file to mount to. This is important, because if the ISO has nowhere to go, the contents of the file will be everywhere. For example, if you mount testiso.iso to /home/username/, the contents of the files would be everywhere in your home folder.
Instead, use the mkdir command to make a new folder to mount to.
mkdir ~/iso-mount
Step 2: With the folder made, all that’s left to do is to mount the file as a loop device.
sudo mount -o loop testiso.iso ~/iso-mount
Please keep in mind that due to the nature of how ISO files work, some may refuse to mount to Linux as “read/write” and go into “read-only mode”. This is because certain ISO files do not allow users to tamper with the files on it.
To unmount the ISO from the folder, do:
sudo umount ~/iso-mount
Burning ISO Files To USB On Linux
Linux users are exposed to a lot of disk image files. This is because virtually every single Linux operating system distributes their product as an ISO image file. To make use of this image, you’ll need to “burn it”. If you’re looking to load it up from a USB stick, you’ll need to “flash it” to a USB. Flashing means that a program scans the contents of the image and moves it to the USB.
Accomplishing this on Linux is easy and there are many ways to do it. In this guide, we’ll cover two methods. The terminal way, and a GUI way.
Terminal Instructions
Plug in a USB stick, and open up a terminal. Inside of the terminal, run the lsblk command. This command will list all of the installed storage devices. Look for /dev/sdX (replace the X with the letter the command gives it). Then pipe it into this command to flash the ISO image to your USB stick:
dd if=isofile.iso of=/dev/sdx bs=4m
You’ll know the flashing process is complete when the terminal window lets you type again.
GUI Instructions
The best way currently to flash an ISO file is to use Etcher. It’s an electron-based app. Download and extract it, then right-click on the AppImage file to run it. It’ll ask to make a shortcut. Click “yes”.

When Etcher opens, insert your USB stick into the PC. Then, move on to step 2 and browse for the ISO file you want to flash, and click “Flash!” to start.
Burning ISO files To DVD And CD On Linux
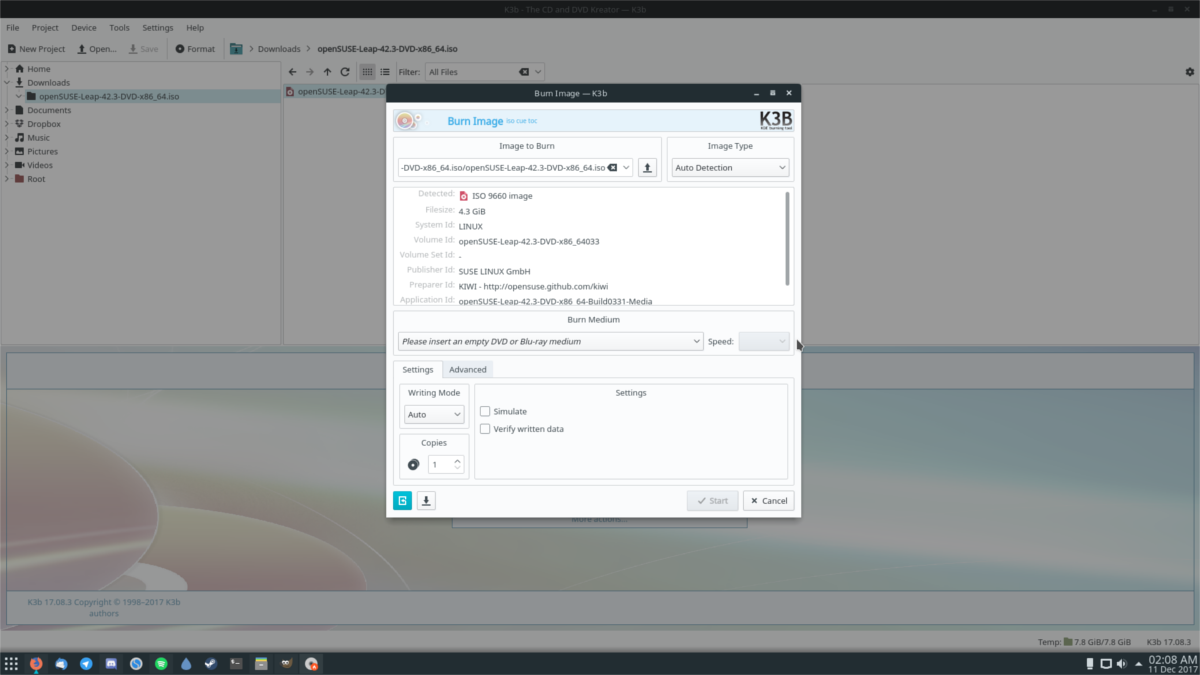
Most desktop environments still come with a DVD burner too — but not all. If you’re using KDE Plasma, you’ve got K3B. Use Gnome? Brasero is the tool to use. XFCE? Try XfBurn. On anything else? You may not have a burning tool. If this is the case, install either Brasero, K3b or Xfburn as they all work pretty well.

To burn a CD or DVD on Linux, follow these steps.
Step 1: Insert your blank disc in the disc drive and close it.
Step 2: Open the disk burning software.
Step 3: Use the burning tool to locate the ISO file you’d like to burn. Alternatively, find the ISO in your file manager, right-click on it and select the option to open it with the burning tool.
Step 4: Click the “burn” button and wait for the program to burn the data to the disc.
