Configure Docker networking on Linux
Are you new to Docker and eager to learn how its container networking works? In this guide, we’ll simplify the complex nature of Docker networking, and offer up an easy-to-understand approach to Docker’s networking features.
How to Update Your Linux Server
Before starting with Docker networking on your Linux server, it’s crucial to update the system. Begin by opening a terminal window and SSH into your server. Once connected, follow these steps:
Ubuntu Server/Debian
For Ubuntu Server, Debian, or derivatives, start by updating the software catalog with this command:
sudo apt update
This refreshes the list of available packages and their versions.
Next, install the updates using:
sudo apt upgrade -y
This command upgrades all packages to their latest versions.
CentOS/Rhel/Rocky/Alma
For CentOS, Rhel, Rocky, or Alma, updating is a one-step process. Use the following command to update your system:
sudo yum update
This installs all available updates for your RedHat-based server.
How to Install Docker on Your Linux Server
To use Docker, install it on your Linux server by following these instructions:
Ubuntu Server/Debian
On Ubuntu Server and Debian, install Docker using:
sudo apt install docker.io
CentOS/Rhel/Rocky/Alma
For CentOS, Rhel, Rocky, or Alma, use:
sudo yum install docker
Enabling Docker on Linux
Enabling Docker varies slightly between Linux distributions:
On Ubuntu and Debian, Docker should be enabled automatically thanks to the apt package manager. For Rhel variants, manually enable Docker with:
sudo systemctl start docker.service

sudo systemctl enable docker.service
Then, verify Docker is running correctly:
sudo systemctl status docker.service
Check Docker’s version with:
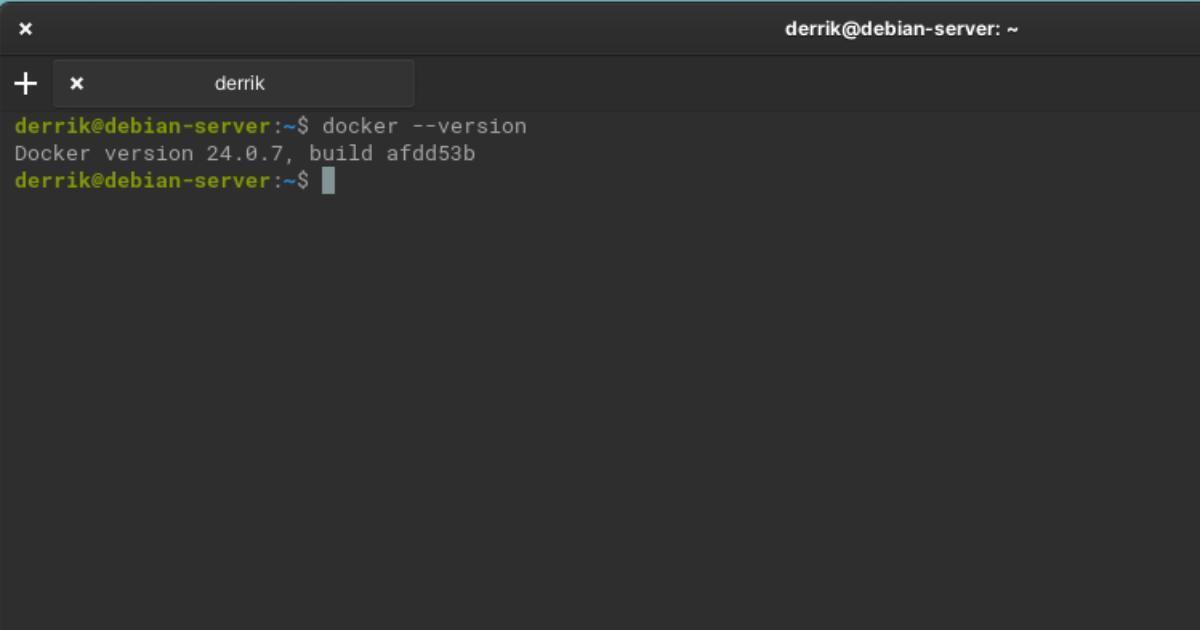
docker --version
Understanding Docker Networking Basics
Docker networking facilitates interaction between containers, the host machine, and other containers. Essential network drivers include:
- Bridge: The default network driver, it creates a private internal network for containers.
- Host: This driver removes network isolation between the container and the Docker host, allowing direct use of the host’s network.
- Overlay: Employed in Docker Swarm environments, this driver enables communication among containers across different Docker hosts.
- Macvlan: This driver permits containers to be represented as physical devices on the network.
- None: A network driver that disables all networking for a container.
Now that we’ve gone over the key Docker networking drivers, it’s important to know how you can effectively use them to apply to different container usage scenarios. Each network driver has unique usage cases and settings, which can be customized to improve the networking performance of your Docker container.
How to create and manage custom networks
To create a new Docker network, the docker network create command is employed. For instance, to establish a custom Docker network utilizing the “Bridge” driver, the following command is executed:

sudo docker network create --driver bridge my_custom_network
Alternatively, to create a “Host” network, you can use the command below. This will create a Docker container network with no isolation.
sudo docker network create --driver host my_custom_network
There are many different networking options available for your containers. Try out all the different Docker networking drivers to find something that suits your production needs the best.
Upon creating your network, the --network flag facilitates the use of this custom network with any desired container. It’s important to note that containers on the same network can communicate with each other.
Once you’ve created your custom Docker network, managing it and the Docker containers that connect to it is straightforward. To connect a container to your newly created network, enter the docker run command below.
sudo docker run --network=my_custom_network -d my_container_image
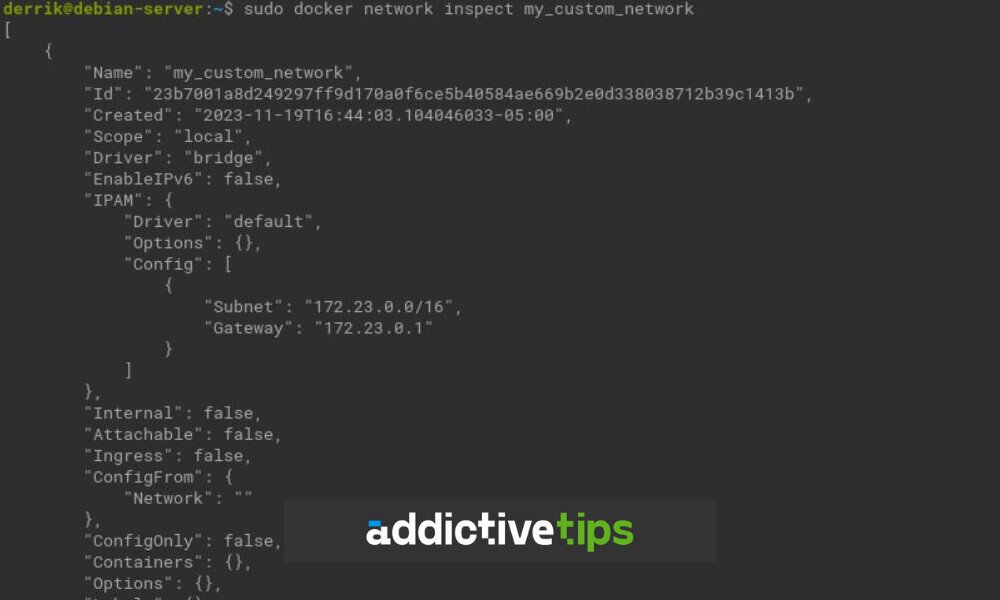
How to inspect network configurations
If you need to inspect your custom Docker network configuration, you can do so with the docker network inspect command below. This command will show you networking information, such as IP addresses of containers that are connected to it, driver details, etc.
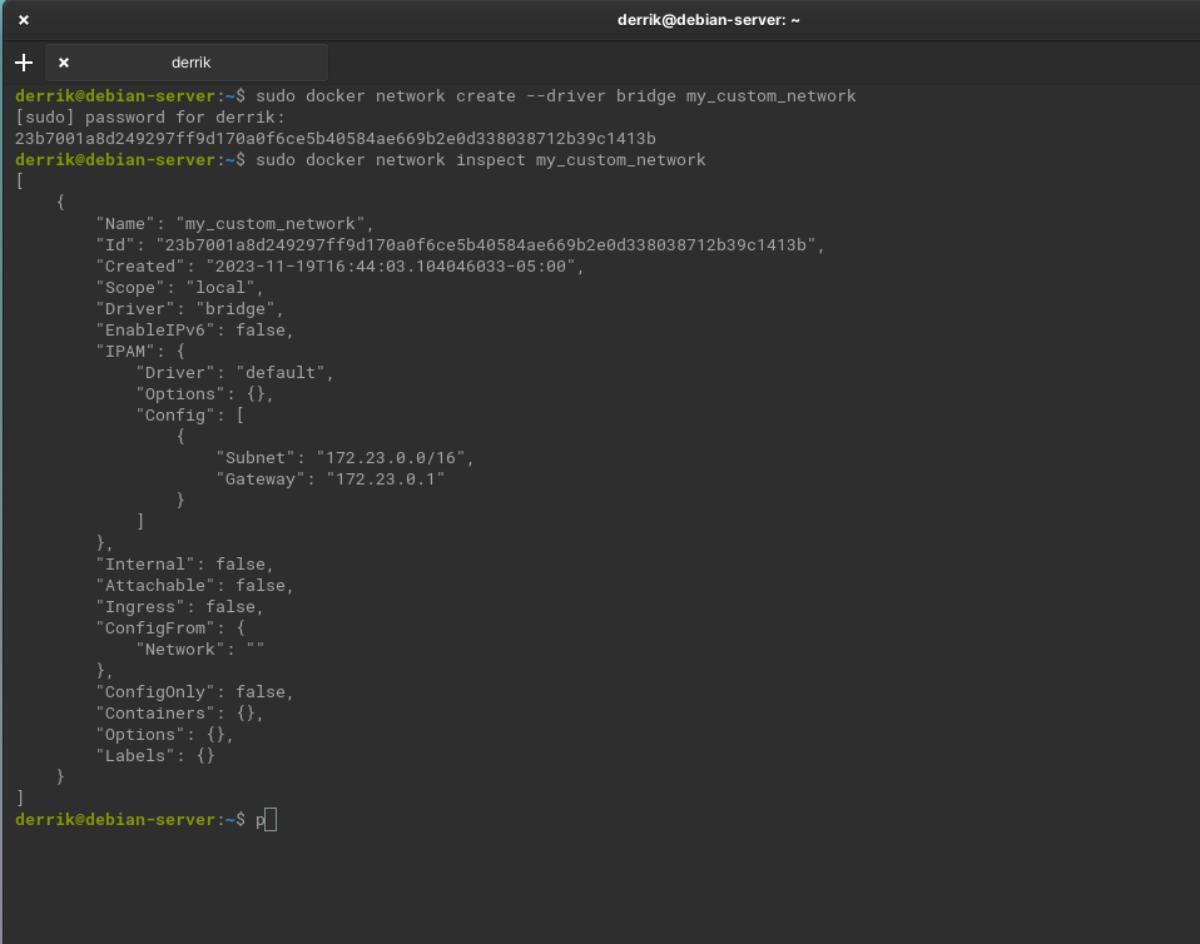
sudo docker network inspect my_custom_network
Advanced Docker Networking Configuration
Docker has quite a few Advanced Networking features, including Port mapping, exposing ports, and inter-container communication. In this section of the guide, we’ll go over how you can configure each of these features in Docker.
Port mapping/Exposing ports
Port mapping/exposing ports is a great way to allow containers to deliver services outside of themselves to the greater internet. If you wish to map a port to allow external access to services running inside a Docker container, use the following command when running your Docker container.
sudo docker run -p host_port:container_port --name my_container -d my_image
Inter-Container communication.
To ensure your containers can inter-communicate, you’ll first need to ensure that all containers are on the same network. For example, if you’re deploying a web application and the web application has a separate database container, you’ll need to connect them both to the same network so they can communicate.
sudo docker run --network=my_custom_network --name webapp webappimage

sudo docker run --network=my__custom_network --name database databaseimage
Once they’re on the same network, it’ll register the hostnames of both containers internally with DNS. This ensures you can take advantage of inter-container communication in Docker.
