Back up files in KDE Plasma with Kup on Linux
Did you know that you can integrate a useful, incremental backup system right into the KDE Plasma desktop? It’s called Kup, and it allows users to create robust backups from the comfort of KDE. Here’s how to use it to back up your files and folders.
How to install Kup on Linux
The Kup backup tool tightly integrates with the KDE Plasma desktop. However, you won’t find this program installed by default, on very many Linux operating systems. As a result, if you wish to use Kup to create backups on your Plasma desktop, you’ll need to install it on your system.
To install Kup, start by opening up a Linux terminal. You can open up a terminal window on the Linux desktop by pressing Ctrl + Alt + T on the keyboard. Or, by searching for “Terminal” in the app menu and launching it that way.
Once the terminal window is open and ready to use, the installation of Kup can begin. To get the Kup tool installed on your Linux system, follow the installation instructions below that correspond to the Linux OS you use.
Ubuntu installation instructions
To install the Kup backup tool on Ubuntu, you’ll need to install the “kup-backup” package on your computer. You can install this package using the following apt install command below.
sudo apt install kup-backup
Debian installation instructions
Those using Debian Linux will be able to install the Kup backup tool using the apt-get install command below. You’ll need to install the “kup-backup” package specifically.
sudo apt-get install kup-backup
Arch Linux installation instructions
If you’re using Arch Linux, or an operating system based on it (like Manjaro) you can get the latest version of the Kup backup tool working on your Linux system using the pacman -S command. Install the “kup” and “bup” packages with the command below.
sudo pacman -S kup bup
Fedora installation instructions
For whatever reason, Fedora Linux doesn’t officially package Kup, despite having a KDE Plasma spin. So, if you want to make use of the Kup backup tool on KDE for Fedora, you’ll need to install it via a third-party software repository.
To start, enable the repo with the following dnf command.
sudo dnf copr enable justinz/kup
After enabling the repository on your system, you can install the Kup tool. However, note that as of now this repository only supports Fedora 37 and 38. Older releases aren’t supported.
sudo dnf install kup bup
Once the packages are installed, Kup will be usable on Fedora.
OpenSUSE installation instructions
On all OpenSUSE Linux versions, the Kup tool is available for installation. To get it working, you must install the “kup-backup” package. Using the zypper in command, and install the package to your computer.
sudo zypper in kup-backup
How to back up files in KDE Plasma with Kup
Once you’ve installed Kup on your Linux PC running KDE Plasma, open up the application launcher. With the application launcher open, type in “Backups,” and click on the item that says “Configure backup plans.”
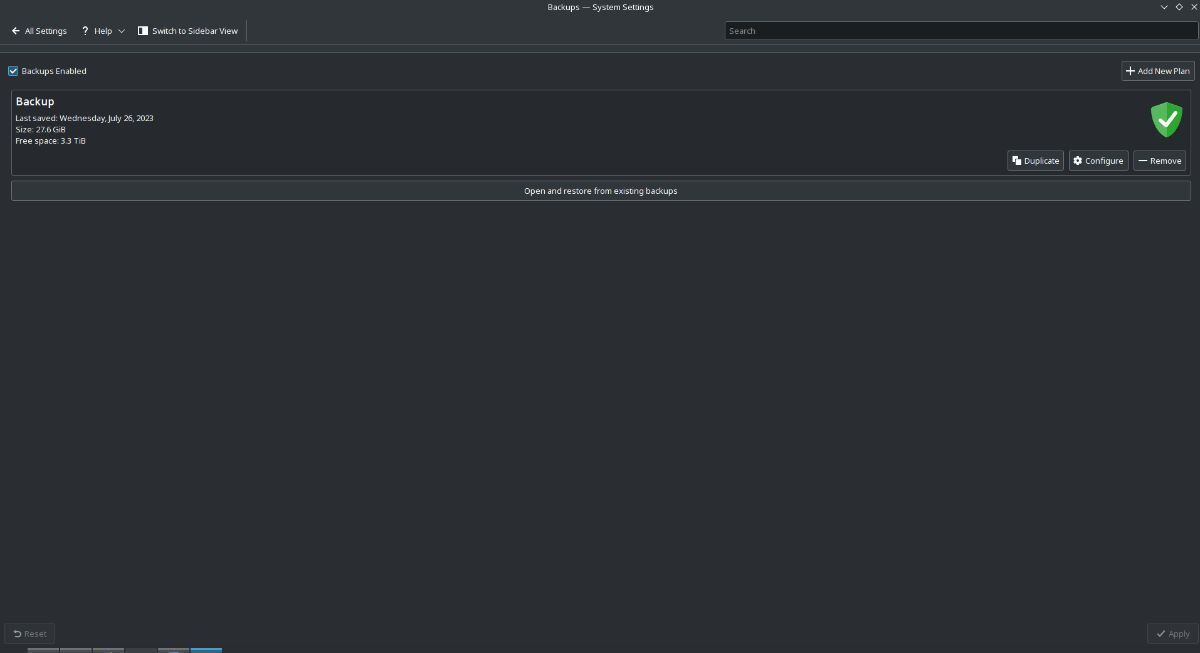
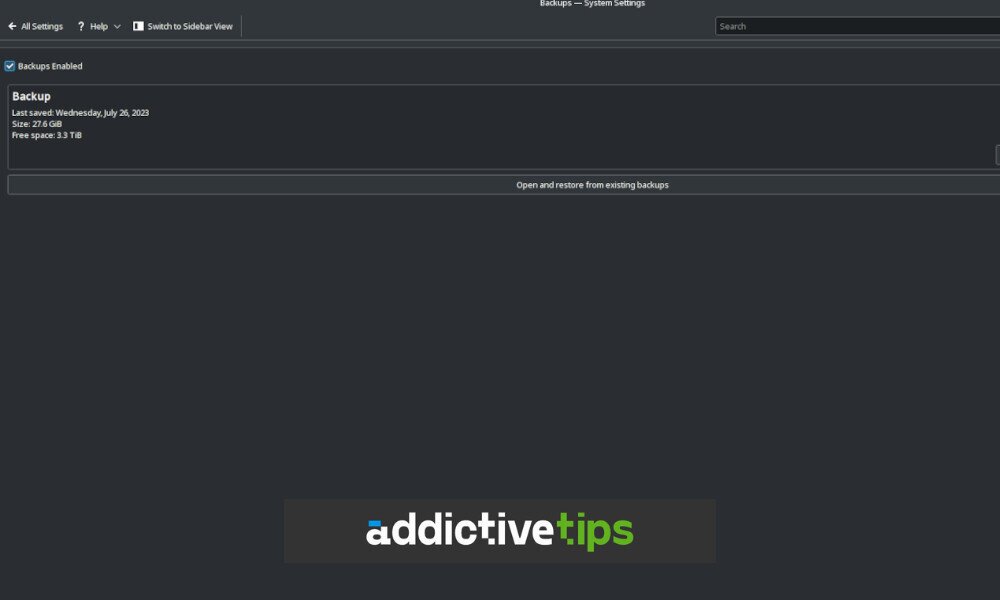
When you click on “Configure backup plans,” the “Backups” window will open inside of the KDE Plasma system settings. From here, click the “Backups Enabled” box to turn on Kup backups in KDE Plasma.
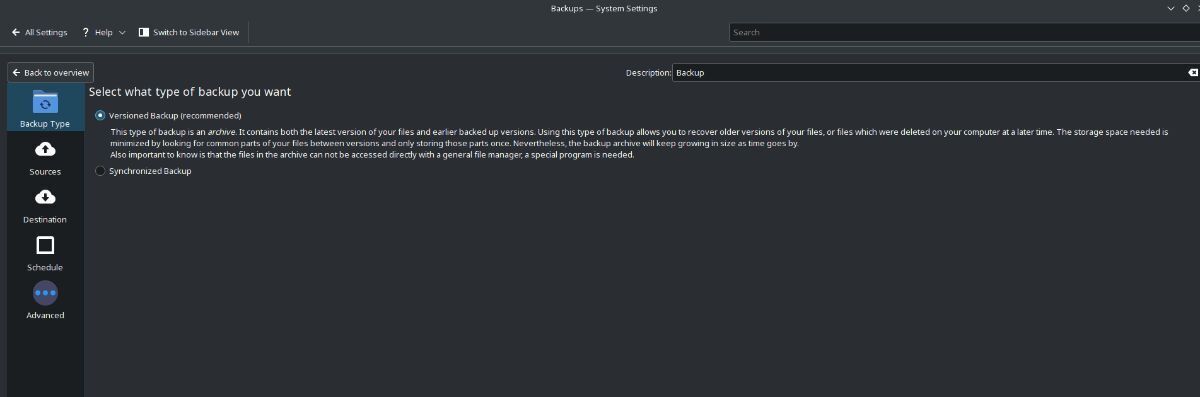
After selecting the “Backups Enabled” box, find the “Add New Plan” button, and click on it with the mouse. You’ll then be brought into the backup plan creation window. Under “Backup Type,” choose either “Versioned Backup” which is an archive backup, or “Synchronized Backup” which is a directory backup.
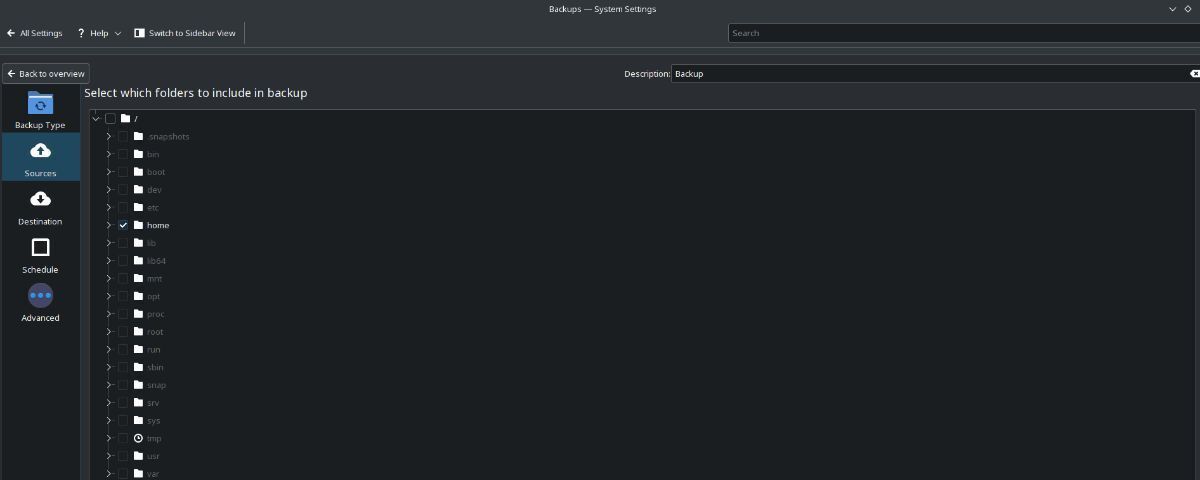
Once you’ve made your choice, select “Sources.” Then, use the file browser to choose what directories you wish to back up with Kup in KDE Plasma. You’ll only be able to backup folders that your user account has permission to access.
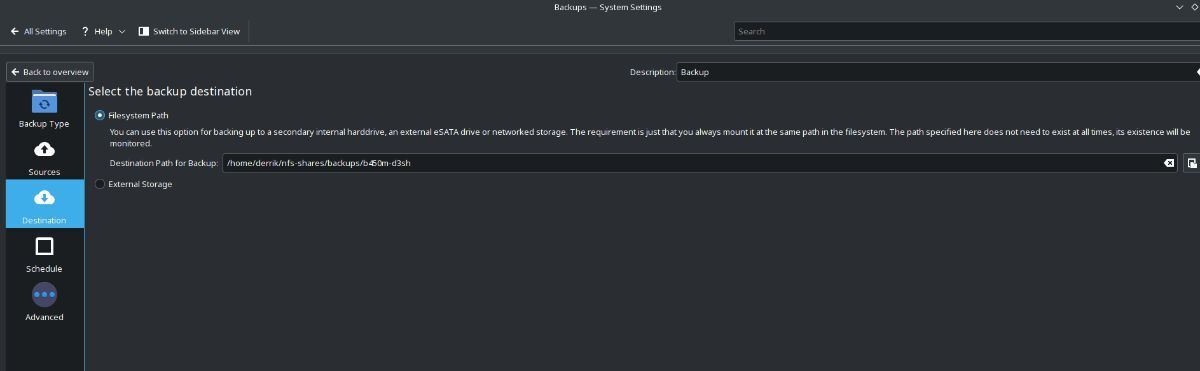
When you’ve configured the sources, it is time to configure the destination. Choose either a location on your computer, or, plug in an external device, select “External Storage” and choose where to save it on the external storage device.
With your sources and destination configured, it is time to configure the backup schedule. Select “Schedule,” and choose when you’d like to create your backups. You can choose either “Interval,” “Active Usage Time,” or “Manual Activation.” When you’ve set your schedule, click the “Apply” button to save.
Once you’ve set up your backup plan in Kup, you’ll see a notification appear in the notification center on KDE Plasma, asking if you’d like to run your backup for the first time. Select “Yes” to begin the backup process.
