Elegoo Neptune 4 Max Cura Profile Guide 2025
Cura is free 3D printing software from UltiMaker, and millions of users take advantage of its advanced settings and features. Given that it is an open-source software, even other 3D printer manufacturers like Elegoo utilize UltiMaker’s Cura and release a dedicated version based on the parameters of their printers.
However, many users prefer to use the main UltiMaker software because it includes the new features of the latest version. In this article, we’ll guide you through the steps to add Elegoo Neptune printer settings on Cura and create an Elegoo Neptune 4 Max Cura profile.
How to Add Elegoo Neptune on Cura
The latest official version of Cura is 5.7.2, and it includes all the default settings for the newest Elegoo printers:
So, the days of manually adding these printers to Cura are over. To add these printers to the software, you only need to follow these steps:
- Download and install Cura’s latest version for Windows from UltiMaker’s official website. We also have a guide on how to install Ultimaker Cura slicer on Linux.

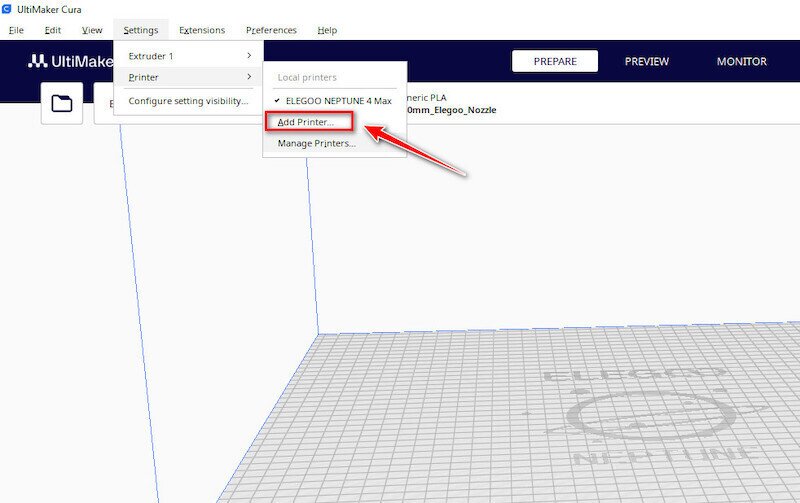
- Upon opening the app, one of the first things it asks you is to add a printer. If you don’t see the “Add Printer” page on your screen, simply from the top menu select “Settings,” then “Printer,” and finally “Add Printer.”

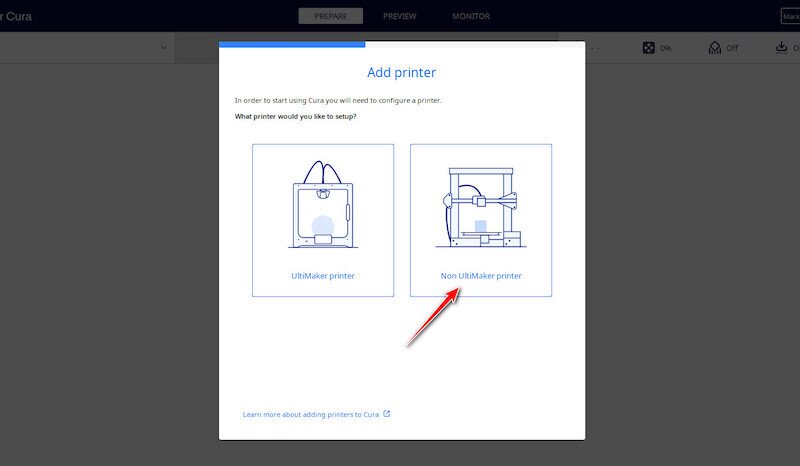
- On this page, select the right option, “Non UltiMaker Printer”.

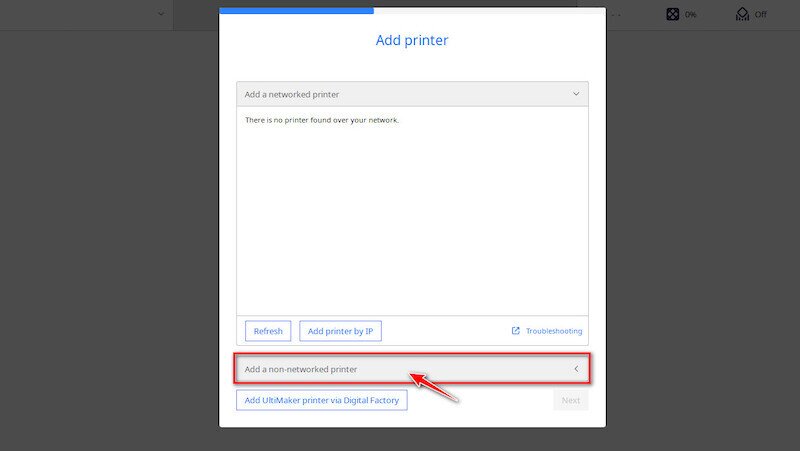
- Now click on the “Add a non-networked printer” option.

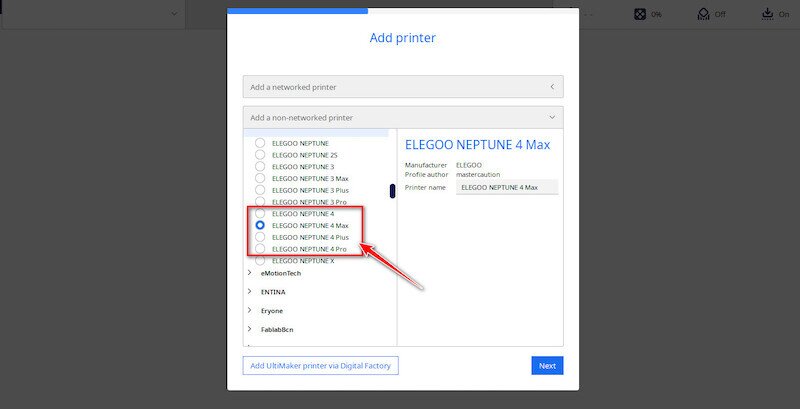
- On the next page, you’ll be presented with all the printers supported in Cura. Find “ELEGOO” and click on it to see every Elegoo printer. Choose one of the Neptune versions and click on “Next.”

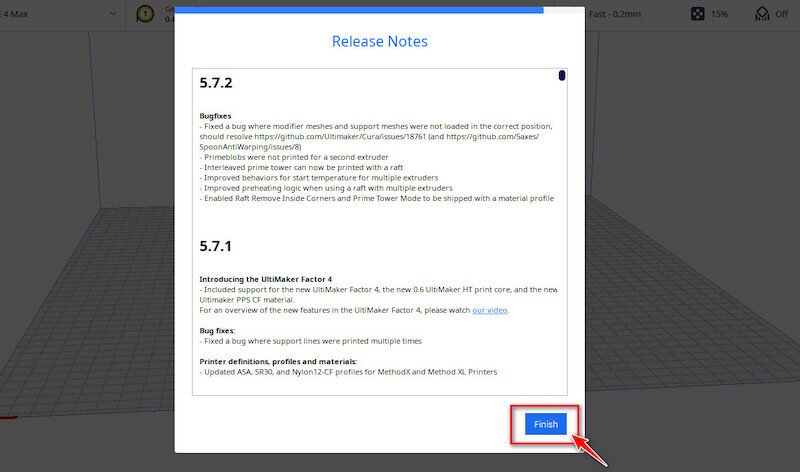
- You might see the “What’s New” page. Just click on the “Skip”. Then, if it’s the first time you’re opening the app, you’ll see the “Release Notes”. Click on the “Finish” button to complete the process of adding the Elegoo Neptune 4 Max Cura profile or any other printer model you have.

Elegoo Neptune 4 Pro Cura Profile Settings
Although the profile settings are already based on the printer you have chosen, every project may need different tweaks and parameters. You can access the profile settings from the bar in the right section of the app. If they weren’t available immediately, click on “Show Custom.”
You can see a list of settings that you can change based on your preferences. Most of the default settings for the Pro, Max, and other models of Neptune are the same.
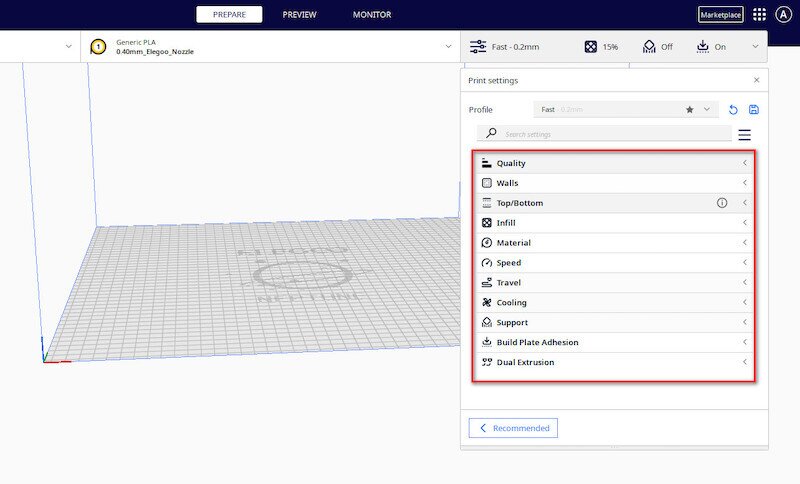
Below, we have described the most important settings from Cura’s profile section:
Quality: If you click on the “Quality” section, you can see only one option named Layer Height. This is the main setting for the amount of detail you want out of your project. The default amount is 0.2 mm but if you lower it, you get more details and the time the printer takes to print the model will increase.
Walls: In this section, by making adjustments to the Wall Thickness setting, you can determine the overall thickness of the walls in the horizontal direction. Also, the Wall Line Count setting is basically the amounts of walls.
Top/Bottom: This setting is dedicated to the thickness and the number of top and bottom layers. You can set both top and bottom thickness using the Top/Bottom Thickness option but if you change the thickness or layers of the top or bottom individually, the overall thickness setting will not be used.
Infill: One of the most important settings that determines the overall strength of the internal structure. If you increase the Infill Density, the result will be more sturdy, but it’ll use more material to print and take more time. Also, the Infill Pattern setting is crucial for the strength of a model. If you choose the lines or zig-zag pattern, less material will be used.
Material: In this section, you can set printing and build plate temperatures. This is highly dependent on the filament type. If you put 0 in the build plate section, it will remain unheated.
Speed: Set a suitable print speed for your projects to get a high-quality result. If you don’t care much about the print time, 20 to 30 millimeters per second is recommended for minimizing the chance of defects in a highly detailed print.
Cooling: You can enable print cooling using this option and choose the fan speed in order to better solidify certain filaments and boost the quality of the print. This is especially beneficial for projects with short layer times.
Build Plate Adhesion: You can utilize this setting to control the adhesion of the first layer to the build plate. There are 4 options to choose:
Brim: A single-layer flat area will be printed around the model to prevent warping.
- Skirt: A line will be printed around the model but not connected to it.
- Raft: A thick base will be printed underneath the model.
- None: No additional layer would be printed other than the model itself.
Cura Profiles
One of Cura’s most user-friendly features is the preset profiles, which automatically set the profile settings based on your project goals. You can easily use these ready-to-go profiles as your Elegoo Neptune 4 Max Cura profile.
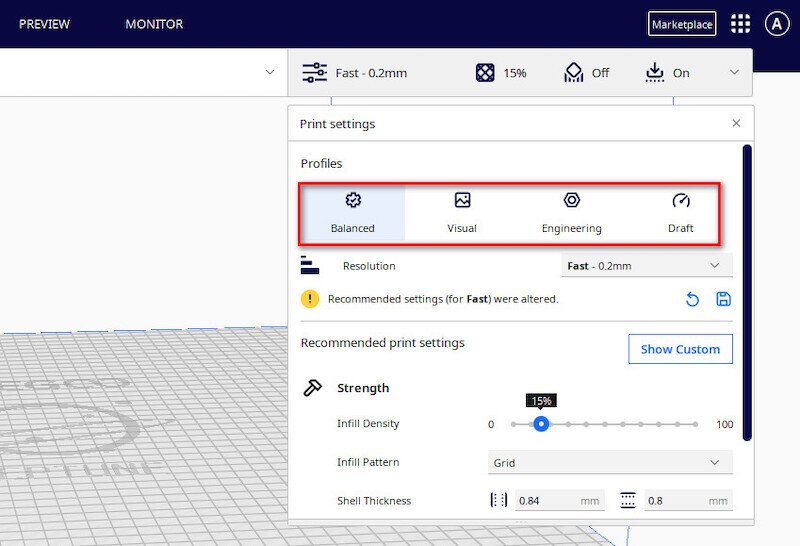
Balanced Profile
This default profile tries to balance the quality of print, details, functionality, and speed. So, when your model doesn’t need to be crafted very fast or with maximum details and accuracy, the balanced profile is the appropriate choice.
Visual Profile
In the event that your model needs to be visually impressive and high-quality, selecting the visual profile makes sense. The model will be created in more than usual time, but the surface quality will be satisfactory. This profile is suitable for printing with ABS, PETG, and PLA materials. We recommend using this profile when:
- Creating visual concepts
- Making 3D models for presentation
- Developing simple, usable products
Engineering Profile
If you don’t want high visual quality or fast results, the engineering profile brings you improved precision to craft functional models or parts that fit together easily. The recommended materials for this profile are ABS, PLA, Nylon, and CPE. Use this profile if you are trying to make:
- Spare parts that fit with other specific parts
- Highly accurate models
- Special tools
Draft Profile
This is the high-speed profile. If you choose the draft profile, all the visual and mechanical settings will be at a low value to get the productivity to the highest point. So, when you rush to get the results, the draft will be a great profile. Using ABS, PLA, and PETG materials with this profile will have a desirable output. Use this profile when making:
- Concept models
- Tests for your printers
- Multiple models in a short time
How to Create Custom Profiles on Cura
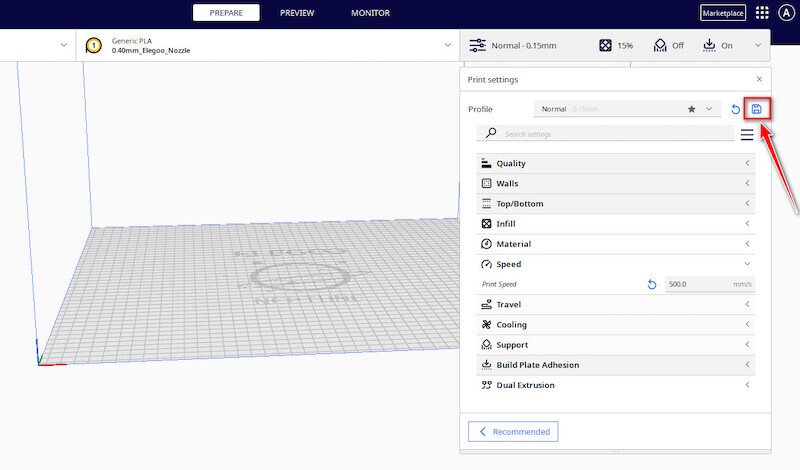
You can save custom profiles with specific settings to use in different projects. It’ll be saved in Cura, and you can apply it to your projects without hassle. To create a custom profile as your Elegoo Neptune 4 Max Cura profile, follow these steps:
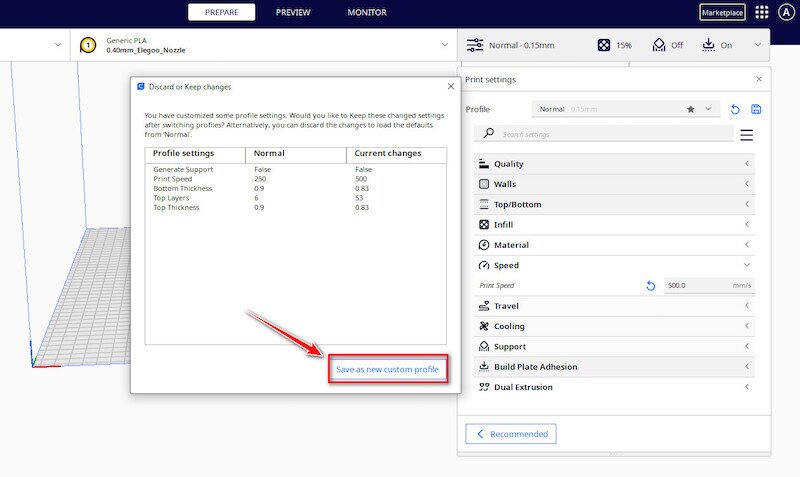
- In the print settings, enter all of your custom changes in the different settings. Then click on the little save symbol on the right corner of the menu.

- Next, click on “Save as new custom profile.”

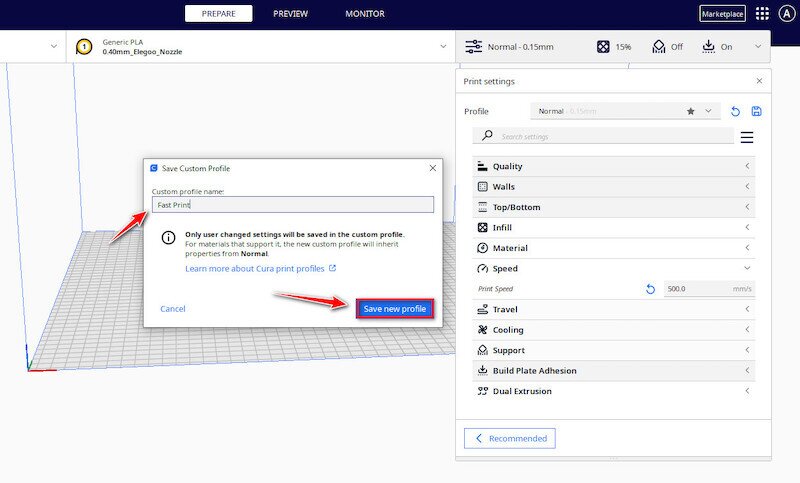
- Enter a name for your custom Cura profile and select the “Save new profile” option.

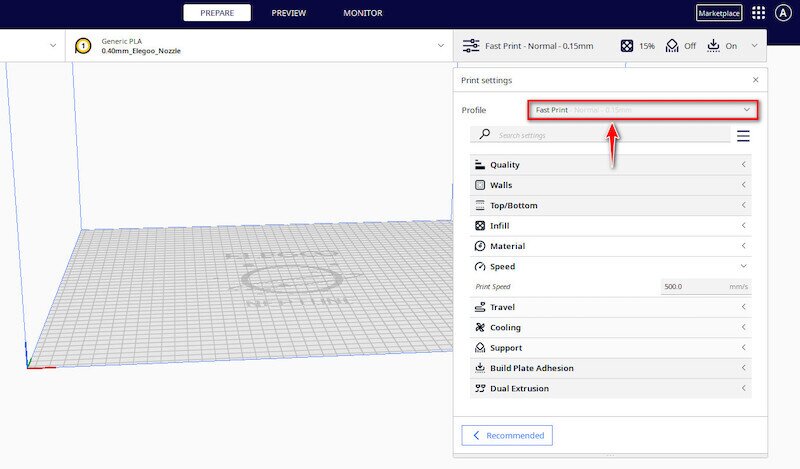
- Now, you can always select your custom profile from the drop-down menu at the top of the page.