Install xLoud Volume Enhancement Engine On Xperia X10 [Guide]
xLoud is the newest sensation released by Sony Ericsson to mainly new Xperia Android line. However, the development community went on work the first day they got their hands on it. Now there are different success stories coming from various Android portals, forums and blogs regarding successful implementation of xLoud on Xperia X10. If you remember, we recently covered Android 2.3.3 Gingerbread official rollout for Sony Ericsson Xperia X10 and you can have xLoud on your phone if you have upgraded to this version. For those who don’t know, xLoud is a simple toggle for Xperia phone that let’s you enhance loudspeaker volume while playing music, videos or in-call. For now, you can only get xLoud engine on your Xperia X10 if you have updated to the stock Android 2.3.3 Gingerbread with root access and xRecovery installed.

Here is the step by step guide to get xLoud up and running on your Xperia X10:
Disclaimer: Please follow this guide at your own risk. AddictiveTips will not be liable if your device gets damaged or bricked during the process.
- The first step, as discussed earlier, is to upgrade to official Android 2.3.3 Gingerbread and then root your phone along with flashing xRecovery – Custom Recovery For SE Xperia Phones. You can head to this post for more details.
- Download xLoud-x10 zip package and save it on your desktop.
- Connect your phone to the computer, mount SD Card and copy the downloaded zip package to SD Card root.
- After this reboot your phone in xRecovery.
- Once in the recovery, head to Install Custom Zip and from the resulting menu, flash / install the xLoud-x10.zip.
- After the installation is complete, reboot your device.
- We don’t know if it’s necessary, but in order to make this work flawless, you might need to fix permissions through xRecovery. There is a fix permissions option in xRecovery, just use that after installation is complete.
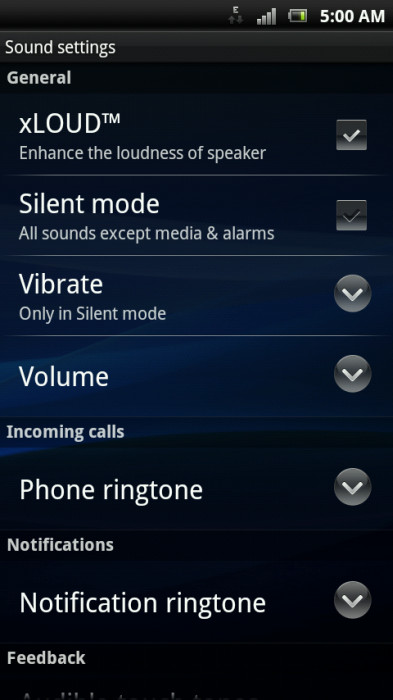
- Once rebooted, head to settings > Sound Settings and you will be able to see xLoud option right on top. Checkmark it to make it functional and play any sound file to see if you can witness any change.
In case you are having issues, then please head to the official XDA thread for more information and live developer support.

It work! After installing custom zip You must fix permissions and wipe dalvik cache in the xrecovery and then reboot. Sounds feel great!
After I installed it. My phone cannnot boot. Luckly, I did a backup day before so I can recover it from my backup by using xRecovery. Be careful, all.
after booting into recovery and selecting install custom.zip, it gets to a point and it stops.
installation aborted. cannot mount sdcard. i don’t know what is wrong