Install Honeycomb Style Clock Widget On Any Android Device

One More Clock Collection is a clock widget for all Android devices that comes bundled with 34 unique themes. It comes in both free and paid versions, with the free version being fully functional. The best part about this widget is that anyone can make a theme and add it to its theme collection, and it will be recognized by the widget.
Recently, XDA-Developers forum member nemuro shared with us a Honeycomb theme for One More Clock widget. This theme attempted to replicate the Honeycomb clock widget on any Android device but had to be added manually to One More Clock widget.
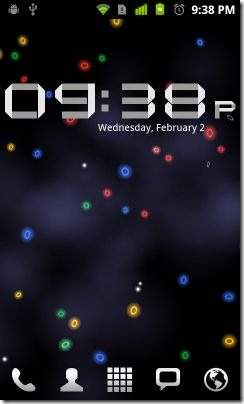
While there have been hacks and ports of the Honeycomb clock font prior to this, they have failed to replicate the effect of parts of the text being transparent and part opaque, while this theme does so to perfection, as you can see from the screenshot above. Installation screenshots are featured below.
When we first featured it here, the Honeycomb theme had to be installed manually but we were contacted by the developer of the widget today who informed us that he has released a new version in which he has included nemuro‘s Honeycomb theme by default. Hence, there is no longer any need for manually adding this theme to it.
Installation:
- Install ‘One More Clock’ from the Android Market. There is a free version as well as a paid one. Both versions will allow you to use all the included themes but the paid version might offer more customization options compared to the free one. Direct market link for the free version is provided below. If you want the paid version, you can easily find it in the market.
- Once the widget has been installed, tap and hold on your phone’s home screen and select widgets.
- From the widget list, select ‘One More Clock (4×2)’. It will add the widget to your home screen with the default settings. For us, the new version of the widget loaded Honeycomb themed clock by default. If this isn’t the case for you, perform the next step.
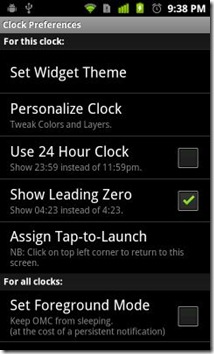
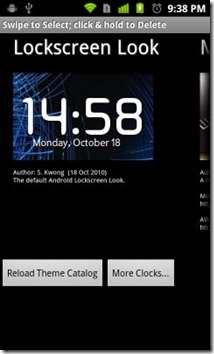
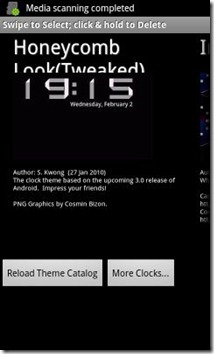
- Tap on the widget to bring up its preferences and tap ‘Set Widget Theme’. When you do this for the first time, it will generate the themes and place them on your SD card in a folder called OMCThemes. Once the theme list has been generated, scroll through it to find ‘Honeycomb Theme’, tap on it to enable it and you’re done!
You now have the Honeycomb style clock widget on the home screen of your Android device! You can then tinker with the options to further customize it. Once customized, it will appear with the text (Tweaked) appended to its name in the theme list for One More Clock, as you can see above in our screenshot.
Install One More Clock Collection (Free version)
Install One More Clock Collection (Paid version)
[via XDA-Developers]


That’s the worst looking clock I’ve ever seen. What am I missing here?