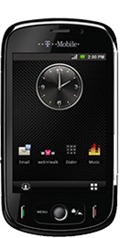
Install Android 2.3 Gingerbread on T-Mobile Pulse

Disclaimer: Please follow this guide at your own risk. AddictiveTips will not be liable if your device gets damaged or bricked during the process.
This ROM is called T-Mobile Pulse Gingerbread 2.3 and was released by MoDaCo Android forums user Tom G who built it from the Android source code released in AOSP (Android Open Source Project). At the moment, the build is slow but is the only AOSP Gingerbread build available for the T-Mobile Pulse so far. It does successfully boot and is quite stable to use.
The features working so far apart from the Gingerbread UI include RIL, WiFI, 3G, Bluetooth, audio, lights and SD card. Sensors and camera are not presently working.
To install this ROM:
- Make sure you have ADB installed. If you don’t have it, you can follow our guide on what is adb and how to install it.
- Download the T-Mobile Pulse Gingerbread 2.3 ROM from the link given below, and copy it to the root of your phone’s SD card. Skip steps 3 and 4 in case you already have a custom recovery installed on your phone.
- In case you already have a custom recovery installed on your phone, skip to step 5.
- Download the custom recovery file from the link given below and extract its contents to a folder on your computer.
- Turn off your phone and boot it into bootloader / fastboot mode by pressing the ‘Power’ button while keeping the ‘End Call’ and ‘Volume Down’ buttons pressed.
- Connect your phone to your computer via USB. In case the ADB drivers are already installed, your device will be recognized in USB mode by your computer. The text “Fastboot” on your phone’s screen should change to “Fastboot USB”.
- In case the drivers aren’t present, you will be prompted to install them. Do not let Windows search for them automatically and instead choose to manually install them, specifying the location of “google-usb_driver” subfolder inside your Android SDK installation folder.
- Double click the ‘install-recovery-windows.bat’ file from those extracted in step 4.
- If you are on a Mac, open a terminal window, browse to the directory where you extracted the files in step 4 and enter these commands:
chmod +x install-recovery-mac.sh
./install-recovery-mac.sh
- If you are using Linux, open a terminal window, browse to the directory where you extracted the files in step 4 and enter these commands:
'chmod +x install-recovery-linux.sh

./install-recovery-mac.sh
- If you are on a Mac, open a terminal window, browse to the directory where you extracted the files in step 4 and enter these commands:
- If you are on Windows, double click
- Turn off your phone and boot it into recovery by pressing the ‘Power’ button while keeping the ‘End Call’ and ‘Menu’ buttons pressed.
- Turn off your phone and boot it into fastboot mode by pressing the ‘Power’ button while keeping the ‘End Call’ and ‘Volume Down’ buttons pressed.
- Connect your phone to your computer via USB. In case the ADB drivers are already installed, your device will be recognized in USB mode by your computer. The text “Fastboot” on your phone’s screen should change to “Fastboot USB”.
- In case the drivers aren’t present, you will be prompted to install them. Do not let Windows search for them automatically and instead choose to manually install them, specifying the location of “google-usb_driver” subfolder inside your Android SDK installation folder.
- Open a command prompt window on your phone,
(https://www.flibblesan.co.uk/android/froyo/pulse-gingerbread-aosp-0.2.zip) Download T-Mobile Pulse Gingerbread 2.3

There is something missing after
“Open a command prompt window on your phone,”