Install Android 2.3 Gingerbread Keyboard On Samsung Galaxy Tab
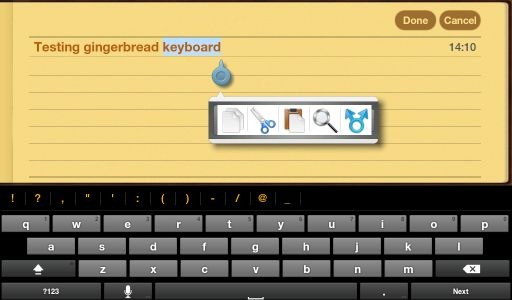
Ever since the launch of Android 2.3 Gingerbread, we have seen several of its features ported to devices running previous versions of Android and the latest in that series is the Gingerbread keyboard for Samsung Galaxy Tab. If you are the owner of this seven inch tablet and want to replace its keyboard with the Gingerbread one, read on for the download link and installation instructions.

The installation process is not straight forward as it requires you to place two files in subfolders of the /system folder and for that, your device needs to be rooted, plus you need a root level file browser. You can find it at the Android Market. Here is what you need to do to install this keyboard on your device.
Requirements:
- Make sure your device is rooted. If it isn’t, refer to our guide on how to root Samsung Galaxy Tab.
![Super Manager QR Code Super Manager QR Code]()
Procedure:
- Download Gingerbread Keyboard from the link given below and extract the contents of the zip file.
- Connect your device to your PC and mount its storage card.
- Copy the extracted files from Step 2 to the storage card.
- Launch ‘Root Explorer’ or ‘Super Manager’ on your device.
Note: In case you are using ‘Super Manager’, bring up its menu and tap ‘Setup’. Then check ‘Enable ROOT function’ and grant it superuser privileges when prompted. - Use ‘Root Explorer’ or ‘Super Manager’ to browse to the location on your storage card where you copied the extracted files in step 3 and copy the ‘LatinIME.apk’ file.
- Now browse to /system/app and paste the copied ‘LatinIME.apk’ file in the /system/app directory.
Note: In case of ‘Super Manager’, you might get asked for the access level you want when you attempt to open ‘/system’. Choose R/W from the options for read and write access. 
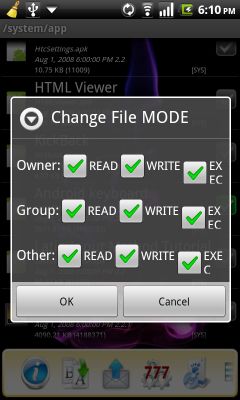
Using ‘Super Manager’: Select the check mark next to the file’s name, then scroll the toolbar at the bottom of the screen until you see an icon saying ‘777’ (see screenshot). Tap on that icon to bring up the permissions dialog, make sure all options are selected and tap ‘OK’.- Browse back to the location on your storage card where you copied the files in Step 3 and copy the ‘libjni_latinime.so’ file.
- Now browse to /system/lib and paste the copied ‘’libjni_latinime.so’ file there. Repeat step 7 for this file to grant it the required permissions.
- Exit ‘Root Explorer’ or ‘Super Manager’. You might require to reboot your phone at this stage.
- Open Settings > Language & keyboard to select the newly installed Android Keyboard from the list.
Important: Choose your language and adjust the settings to your liking before you start using it.
In case of any issues, join the discussion at this XDA-Developers forum thread.
(https://addictivetips.com/app/uploads/2011/01/Fabolous_GBKB_Fix.zip) Download Gingerbread Keyboard for Samsung Galaxy Tab
(https://www.appbrain.com/app/super-manager/gpc.myweb.hinet.net.TaskManager) Download Super Manager from AppBrain


