Install Android 2.2 FroYo On Internal NAND Memory Of HTC HD2
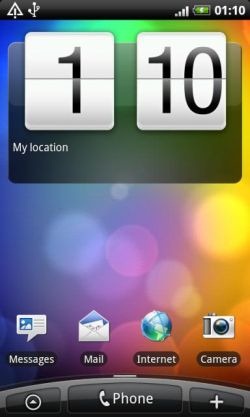
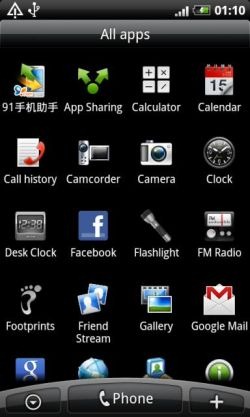
While the HTC HD2 has had custom Android builds for quite a while, all those ROMs have been made to run from the external SD card memory but that has just changed as now you can install the stock Android 2.2 FroYo ROM from the HTC Desire on the internal NAND memory of your HTC HD2. Read on for details, download link and installation instructions.
This is the first ever ROM that lets you run Android from the internal memory of HTC HD2, and is brought to you by Cotulla of XDA-Developers forums. At its core, it is the stock HTC Desire ROM with the intention of keeping it as close to that as possible but the camera software has been replaced by that for the HTC EVO 4G.
The ROM is very stable and has almost all of the Android features working. It replaces your Windows Mobile 6.5 installation and turns your device into a complete Android phone. It is possible to go back to a Windows Mobile 6.5 ROM later and to do that, you must install an official ROM with RUU.
UPDATE: The primary tool used in this guide i.e. MAGLDR has seen an update since the time of writing this guide and the newer version brings a LOT of improvements making several of the following steps unnecessary. You can still download the same ROM and install it but for the procedure, see our updated guide on how to install Android on internal NAND memory of HTC HD2 with MAGLDR.
Disclaimer: Please follow this guide at your own risk. AddictiveTips will not be liable if your device gets damaged or bricked during the process.
Before we begin:
- Make sure you have HSPL3 installed on your HD2
- Also make sure that your radio supports 576 RAM.
Installation:
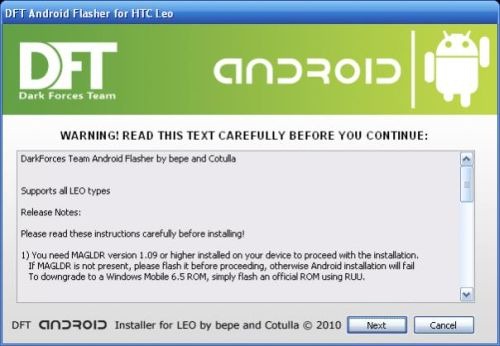
- Download the MAGLDR bootloader for HTC HD2 from the link given below and extract the contents of the zip file to your computer.
- Also download the LEO “Stock” NAND Android ROM from the link given below and extract the contents of the zip file to your computer.
- Connect your HD2 to your computer via USB, go to the folder where you extracted MAGLDR in Step 1 and run the ROMUpdateUtility.exe file. Follow any on-screen instructions until the installation of MAGLDR is complete.
- Disconnect your phone from your PC and power it on to boot into the just installed MAGLDR bootloader.
- Use the volume down key to navigate to the fourth option that says ‘4. USB Flasher’ and press the green ‘call’ button.
- Connect your phone to your PC via USB, open the folder where you extracted the ROM in Step 2 and run the DAF.exe file. Follow any on-screen instructions to complete the flashing process, confirming any Windows User Access Control prompt that you get.
- Once the installation is finished, the phone will reboot into the MAGLDR bootloader again. Use the volume down button to navigate to the second option that says ‘2. Boot AD NAND’ and press the green ‘call’ button.
- Disconnect the phone from the PC now and wait till it boots into Android. You will need to follow the on screen instructions to set your Android installation up for the first time. You now have Android running natively from the NAND memory of your HD2.
While the ROM installation is now complete, having to select the second option from MAGLDR every time you restart your phone can be a hassle. You can set MAGLDR to automatically boot your phone into Android each time you restart it, by following this procedure:
- Reboot your phone. It will boot into MAGLDR.
- Use the volume key to navigate to the eighth option that says ‘8. Services’, and press the green ‘call’ button.
- Press the green ‘call’ button again to enter the selected option that is AutoBoot settings.
- Again press the green ‘call’ button to enter the selected option that is Boot source settings.
- Use the volume key to navigate to the second option that says ‘2. Android from NAND’ and press the green ‘call’ button again.
- Repeat steps 2 and 3 to get back into the AutoBoot settings.
- Use the volume key to navigate to the second option that says ‘2. Always’.
- It will ask “Show boot menu always at boot?” Press the ‘power’ button to select ‘No’.
- Use the volume key to navigate to the ninth option that says ‘9. Reset’ and press the green ‘call’ button. Your phone will now reboot.
That’s it – now you will not see the MAGLDR bootloader every time you boot your phone, and it will directly boot into Android running from the internal NAND memory instead.
Credit goes to Jayce Ooi’s Paradise for instructions on how to automatically boot into Android from NAND.
(https://addictivetips.com/app/uploads/2010/12/MAGLDR110.zip) Download MAGLDR Bootloader for HTC HD2
Download LEO “Stock” NAND Android ROM for HTC HD2


Hi,
Thanks a lot for this instructions. I used it and I really enjoy Android on my phone. but I have a question. the front facing camera is not working while shooting photos or using video cal. how I should fix this?
thanks.
thnx from grete-greece once again!!!gio88
Been searching around and have been noticing that I am not the only one with this problem. Ever since I switched from SD to NAND builds my proximity and G sensor have stopped working. I have tried numerous ROMS, MAGLDR 1.11 and 1.12, but end up with the same result. I’m wondering if anyone has found a fix or workaround for this? Would it be a kernel issue? Any input would be greatly appreciated. Thanks!
Boom I got this to work on my HD2 and its awesome!!!!! The only thing I had to do at the end was put in the APN info which t-mobile had a link for so it was easy. Peace out windows mobile you suck!!! ha
this rom is buggy. whenever i end a call, the screen won’t turn back on. also, it says its connected to the mobile network but i don’t think the 3G is working. whenever i try to update the weather or something it tells me that i need a network connection to use this application. my phone is worse than it was with this new rom. please respond with a solution
hi i have instal but eror inte page :
booting android form nand
…
load done 123456
go go go and hang my phone not work any thing !!???
Hi Haroon,
I had installed first the sd version, but this is really awesome.
Everything is working, accept the G sensor. Do you have any idea how i Can fix this.
There are files to do so, but how do I come into system bin of the telephone?
If you have any solution, I appreciate to hear from you.
Thanks a lot.
I followed this procedure and installed froyo on my HD2 like 4 months ago. It worked awesome until now. But for some reason the touchscreen has started acting up. SOmetimes the touchscreen doesn’t work. But it only happens when the screen is locked and i try to unlock it. If it does unlock then it works just fine until i lock the screen and try to unlock it again.
So in essence it gets stuck at the unlock screen sometimes.
Any suggestions?
If you could help me with finding link to installing the Windows 6.5 back i would really appreciate.
hi all,
big issue…. can’t get into the boot menu anymore… did already a soft reset, a hard reset but without any luck. If I keep the volume up button pressed, together with the power button, it starts and the menu is visible. But…. there it comes…. if I let the volume up button loose, android starts loading very fast until it hangs with the HTC screen. So basically, I can’t use the menu and thus cannot install anything.
suggestions? I’m outa options….
thanks
I get error when load AD recovery “no boot sources”
yet sdcard is fine reads fine… what up wid dat ?
selected correct boot source in settings!
HOW TO AGAIN BOOT IN MAGDLR>???
turn unit off then hold power on, keep holding it til u see menu!
hey,
i downloaded and installed it,
working fine i think,
but my contacts are gone,
on winmo i had all of them,
but now i have got 1 contact on my sim card.
can i go back to winmo and copy all my contacs to my sim and then back to android to copy them from my sim to phone?
or is there a other way?
and downloading apps from market is very very slow.
is this normal?
greetz
hey,
is the market working?
so can you donwload and install apps on it?
greetz
Fantastic guide! However I’m running into a problem – am a mac user running windows 7 64bit in VMWare Fusion. I was able to load HSPL3 with no issues but MAGLDR1.13 is a problem. It connects in the bootloader screen (RGB color screen) and my USB connected. However it errors our 244/266 saying it can’t connect to my PDA/Phone over USB. Seems like a driver issue…
Any ideas?
I’m getting this too? were you able to find a solution?
do you know how to uninstall android 2.2 froyo on your htc hd2 internal menery
re-flash with something else!
Hi Haroon. This is awesome. It looks great. However, I experienced one problem.
I am not able to connect to data since I have flashed my HD2.
Did I do something wrong when installing this? Is there a way to fix this problem.
I have the same problem – I can’t get data on my T-Mobile network where I could with Winmo 6.5. If you get a solution, please pass it along to me. Thanks
I did this to my hd2 and it was successful. However when everything booted up it didn’t have a APN for T-Mobile US so i did it myself. Now it runs on the EDGE network which is very slow. Is there a way i can get 3G speeds? Also my picture messages don’t work either can you please help me out anyone. Any help would be greatly appreciated.
Thanks for the amazing build and the simplified instructions.
Had a question.
Is it possible to have all 3 OSs, ie Win 6.5, Android 2.2, and WP7, and then be able to choose which to load at boot up? I have been using Android 2.2 which is installed on my SD card for months and its stable. Though there are times when it fails and i have Win 6.5 to fall back upon.
I am afraid there isn’t a way to do that yet…at least not one that I have come across, ever. You can have WM6.5 running from internal memory and Android running from SD card and choose between the one you want at boot…but you can’t even have two of these installed on the internal memory or the SD card simultaneously. In fact there is no known way to run WP7 or WM6.5 from the SD card in the first place.
that is the same setup I had, works great cause u can switch.
I wish u could load wm7 in mem, then still use the sd android, problem is there is no filemanager.
Have u found a solution to get those to work? wm7 & android
update error 262?
Visit the [via XDA-Developers] link and ask there – the developers will be able to help you if you provide them with the error code. =)
hello i have a problem i hope you can help me out with everytime i run rom update my phone goes in to recovery mode what causes this and how can i stop it?
The phone will boot into bootloader mode (the 3 color screen) when updating the ROM, that’s normal. It can’t update the current operating system to the new one without removing it first and how can it remove while still running it? =)
wow….useful post.. can you provide a video about this post….
Sorry at the moment we can’t as at present, we only feature videos if they are provided by the developers of the method/ROM etc or if we stumble across them somewhere. Though we will start making videos by ourselves and featuring them soon, so stay tuned. 🙂
Thanks so much for this literate and cogent set of instructions.
After visiting lots of android how-to sites that simply copy and paste from the xda forums, I was lucky enough hit your site. Many sets of instructions for these procedures, though correct and thorough, are written in a form of tech-ize immediately identifiable to anyone who has developed a tension headache sifting through the hundreds of comments in the xda forum for a simple yet omitted description or definition. Yours are detailed enough for expediency without the obscuration techies tend to value.
I appreciate your efforts. And again, my thanks.
We are glad that you found our instructions useful. We always go the extra mile in an effort to make our instructions suitable for users with no or little prior technical experience with hacking their devices and running custom ROMs on them and at times even we end up in a state where we want to pull our hair out due to the obscure instructions provided by the developers.
Feedback like yours keeps us doing what we do as it makes us feel that our efforts are not going in vain and they are actually helping others get the best experience out of the technology they use.
We hope you will be visiting us often. 🙂