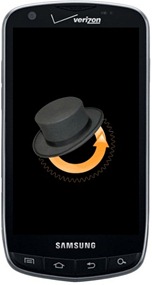
How To Install ClockworkMod Recovery On Samsung Droid Charge
Earlier we covered a guide on rooting the Droid Charge which opened up a world of options for the device. So where there’s root, there’s a custom recovery and what better recovery to have on your phone than the famous ClockworkMod recovery. With this in place, you will be able to quickly flash custom ROMs, kernels, and other packages packed in the .zip format. ClockworkMod has now been made available for the Droid Charge but quite a few glitches remain to it. More on it and how to install it on your device, after the break.
If you’re wondering what is ClockworkMod recovery and why you should install it on your device, see our guide on what is ClockworkMod recovery and how to use it on Android. As for this recovery on the Droid Charge, here’s what might be of trouble:
- The option to Backup or Restore has been removed due to instability.
- Voodoo Lagfix status is not properly read from Recovery, use adb mount to verify your lagfix status.
![Samsung-Droid-Charge-clockworkmod Samsung-Droid-Charge-clockworkmod]()
- Failed to mount /sdcard error(s) – Perform the following commands with ADB:
adb shell

umount /sdcard

rm -f /sdcard

mkdir /sdcard

exit
CWM can get over written by the stock recovery on reboots, so flash a custom kernel via ODIN before attempting to flash this recovery. Enough said, let’s get this recovery up and running on the Droid Charge.
Disclaimer: Please follow this guide at your own risk. AddictiveTips will not be liable if your device gets damaged or bricked during the process.
Requirements:
- Rooted Samsung Droid Charge.
- ODIN installed on the PC. (Download Odin)
- Samsung USB drivers installed. Download USB drivers for 32 bit Windows | For 64 bit Windows.
- (https://www.imnuts.org/downloads/charge/0302_charge_recovery.tar.md5) ClockworkMod Recovery.
Instructions:
- To begin, download the recovery from the download link above.
- Run ODIN, click on the PDA tab and proceed to choose the .tar file extracted in step 1. (Make sure the Re-Partition is unchecked.)
- That done, power of your phone (if already on) and remove the battery.
- Plug the USB cable in your phone and keep the Volume Down key pressed for about 3 seconds till you see a yellow triangle on the screen. Your phone is now in Download mode.
- In ODIN, hit the Start button to begin the flashing process.
Once the recovery is flashed, and the phone is rebooting, unplug the phone from the computer. For updates and queries, visit the forum thread at XDA-Developers.

