How to Wrap Text in Word Seamlessly With Multiple Techniques
MS Word allows you to add images to your document to illustrate crucial information in a better way. As you add images in between your text blocks, the readers become more interested in reading what you wrote, instead of just skimming the outline.
However, as you move the added image around the document to find the right place for it, you might face a problem regarding text wrapping. Fortunately, MS Word also comes with several text wrapping options for seamless picture placement in your document.
Here, we’ll discuss how to wrap text in Word using the top 3 methods to achieve the perfect layout with images and text in Microsoft Word.

How to Wrap Text in Word: Popular Methods
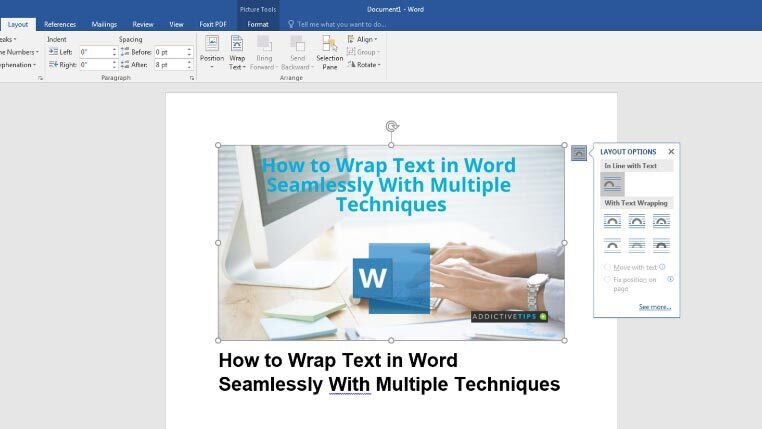
Method 1: Layout Option
The layout option provides various features to determine the text wrapping style, position, and image size to apply a text wrapping style to the Word image.
- Open the MS Word document (containing at least one image and text) where you want to perform the text wrap.
- Select the image, and the Layout icon will appear on the top right corner of the image.
- Click on the icon to find different text wrapping options. Select the one you want.
- If you want to customize the text wrap more, click on the See More… option to open the Layout dialogue box.
- Choose the Text Wrapping tab and perform additional wrap settings.
- When done, click on OK. Else, you can choose the Cancel button to exit without saving changes.
Method 2: Format Tab
The Format tab is located in MS Word’s Ribbon. You can also use its options to wrap text in word.
- At first, you need to launch MS Word and start the document where you want to work on text wrap.
- Double-click on the MS Word image. This action will open the Format tab automatically.
- Go to the Wrap Text button on the right side of the menu. Click on the down arrow and choose from multiple text wrap options to apply it.
- You can also click on More Layout Options… to customize the text and image further.
- The text will wrap around the image according to your designated design.
Method 3: Context Menu
A context menu, AKA shortcut menu, contains the basic tools usually found in the Menu tab. When it comes to text wrapping, the tailored buttons of this menu are particularly beneficial as it does not need you to move away from the main text.
- For this method too, open the document in MS Word.
- Right-click on the image directly to get a list of options.
- Choose Wrap Text, and a drop-down menu containing a list of options will appear on the right.
- Now is the time to select your favorite style for text wrapping. By hovering your mouse over each option, you’ll get a document preview to check the style.
- Like other options, you’ll get More Layout Options… for additional customization here as well.
- It’ll open a dialogue box where you can perform other settings and wrap text in Word.
Wrapping Up
This blog discussed how to wrap text in Word using different methods. When you learn to understand how the text interacts with an image, choosing the right wrapping style will be easy for you.
