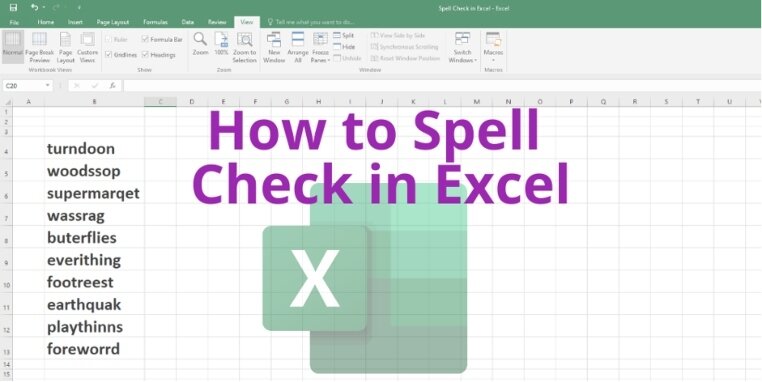
How to Spell Check in Excel
Learn how to spell check in Excel so that you don’t send out any Excel worksheet with misspelled words or phrases. The tutorial shows you multiple spell-checking methods in Microsoft Excel, like using the Spelling command, a keyboard shortcut, and Excel Macro (VBA code.)
How to Spell Check in Excel Using the Spelling Tool
If you’ve got an Excel workbook with a few texts and you need to spell check the content, follow these steps:
- Open your Excel workbook.
- Select the range of cells for which you want to perform spell check.
- If you need to check spelling in multiple worksheets, press Ctrl and then select those worksheets.
- Now, click on the Review tab in the Excel ribbon menu.
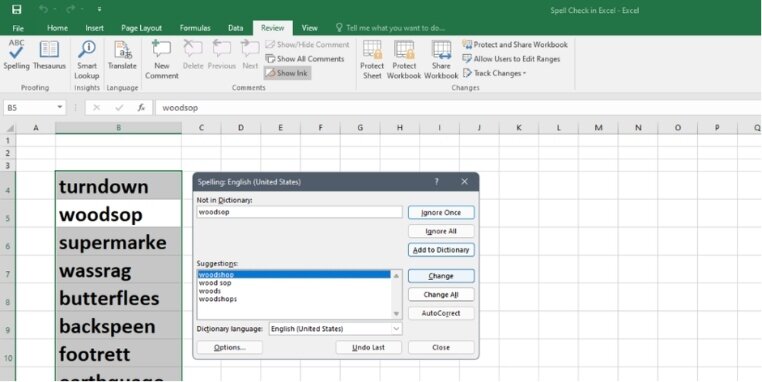
- You’ll see the Spelling command in the Review tab. Click on that to open the spell checker tool.
- The tool will automatically highlight the first misspelled word of the selected cell range.
- Click on Change to correct the misspelled words one by one.
Remember that you need to select a cell range for spelling correction. Otherwise, Excel will start scanning the entire worksheet if you select any random cell.
How to Spell Check in Excel Using a Shortcut Key
Here’s a shortcut in case you frequently need to perform spell checking:
- The shortcut key for the spell checker tool of Excel is F7.
- Select the cells or worksheets and then simply hit the F7 key. It should be in the function key section of your QWERTY keyboard.
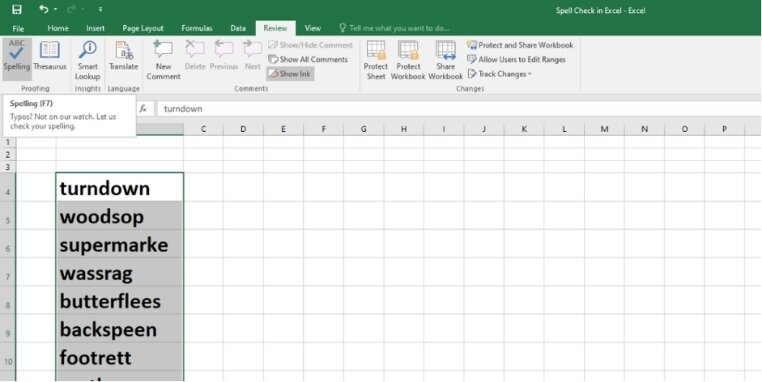
- The spell-checking tool will appear.
- Click Change to correct one word or Change All for all words.
How to Spell Check in Excel Using Excel Macro
If you’re an Excel pro and you want to automate the spell checking task, you should try this Excel Macro:
- Press Alt+F11 to open the Excel VBA (Visual Basic for Applications) editor.
- Right-click on VBAProject(Excel File Name.xlsx).
- Hover the mouse cursor over Insert and then select Module from the menu that appears.
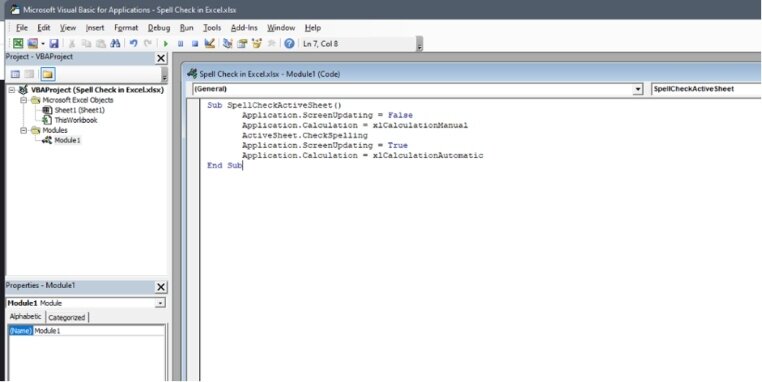
- Module1 (Code) frame will open. This is the VBA editor where you need to copy-paste the below-mentioned VBA code for spell checking.
Sub SpellCheckActiveSheet()
Application.ScreenUpdating = False
Application.Calculation = xlCalculationManual
ActiveSheet.CheckSpelling
Application.ScreenUpdating = True
Application.Calculation = xlCalculationAutomatic
End Sub
Now, follow these steps to save and execute the VBA code:
- In the VBA editor, press Ctrl+S.
- Select No in the notification box that appears.
- Now, Excel will prompt you to save the previous Excel file again.
- You’ll see the Save as type drop-down menu in the Save As window.
- Click on the menu and select Excel Macro-Enabled Workbook from that drop-down list.
- Now, click on Save to save your existing Excel file with the VBA code.
- Press Alt+Q to close the VBA editor.
- Close the existing Excel file and open the new one with Macro.
- Click on the Enable Content button to activate Macro on your Excel workbook.
- Press Alt+F8 to open the Macro menu and select SpellCheckActiveSheet.
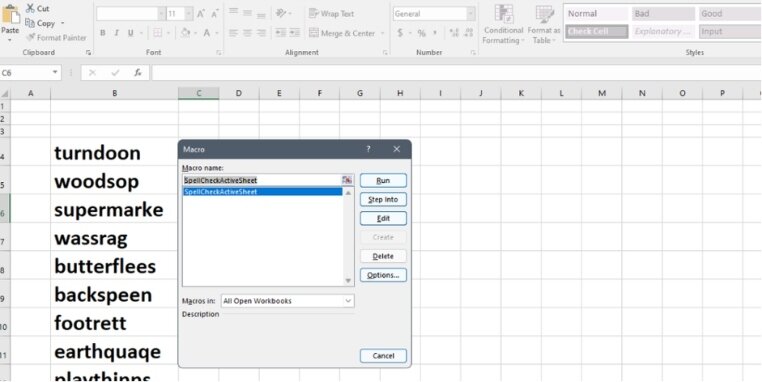
- Now click on Run to open the Spelling tool.
- Click on Change All to correct all the misspelled words.
Conclusion
Since Microsoft Excel is supposed to process numbers and mathematical formulas, that doesn’t mean it shouldn’t have a spell-checking tool. It does have a basic tool that helps you correct spelling issues.
You can utilize any of the aforementioned steps to get rid of spelling errors from your Excel workbook and showcase your credibility to your clients or co-workers.
