How To Insert Signature Line In Word 2010
Rather than creating signature line yourself, Word 2010 offers a simple and direct way to insert signature line in the document. Besides that, it offers a wide range of options which you can change according to your needs while customizing the signature line content and other relevant signer instruction.
To insert the signature line, place the insert cursor where you need to insert & navigate to Insert tab, under Text group, click Signature Line.

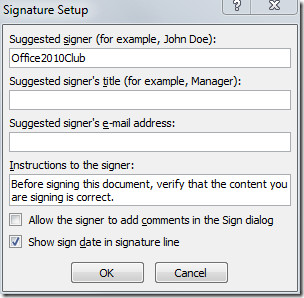
A message will pop-up, click OK to add signature details. It lets you change the instruction to signer while offering you to add suggested signer’s title.

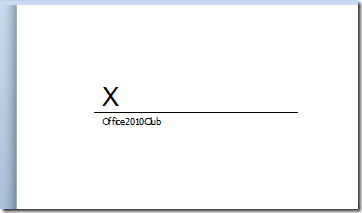
Once done, click OK to see signature line.


How do I move a signature that I placed on the wrong line in Word?
How do you remove the X at the beginning of the line?
As an alternative, to viewing the “X” with the line, right-click on the signature and select Format Picuture… In the Picture tab, change both the Brightness and Contrast to 100%, so the signature line and “X” are no longer visible. When saved as PDF, the signature placement is still detected by Acrobat Reader.
In Word, use the drawing tools to draw a line near the location of the signature if you still would like to see a line
I just tried doing this using the brightness and contrast and everything disappeared. Not just the “X”. I saved it as PDF and did not see anything. I just hope they fix this so that “X” can be removed.
You could just use underscores and then smaller font beneith it if your using it for that purpose.
I have to agree with Ernest. This feature is of no use unless the bit “X” can be removed! How do you do that?
How do I remove the big, fat “X” on the line?