How To Customize Heading Levels Shown In Table Of Contents In MS Word
The day I learned to generate an automatic table of contents in MS Word was a glorious one. It saved, and refined many an assignment and project I’d have to do. MS Word lets you auto-generate a table of contents, a table of figures, and a bibliography. The headings in MS Word are what make the auto-generated table of contents work. The headings can all have sub-headings; you can start with a level one heading and add additional sub-headings to it. By default, the table of contents in MS Word shows the first three heading levels. Here’s how you can customize heading levels shown in the Table of contents in MS Word.
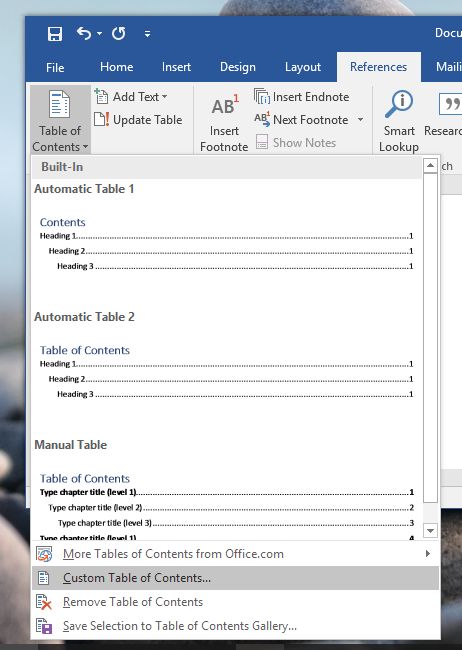
Create your document first and add the headings and sub-headings you need to give it structure. When you’re ready to insert a table of contents, go to the Reference tab on the ribbon and click ‘Table of Contents’. Scroll down the menu that opens and select ‘Custom Table of Contents’.

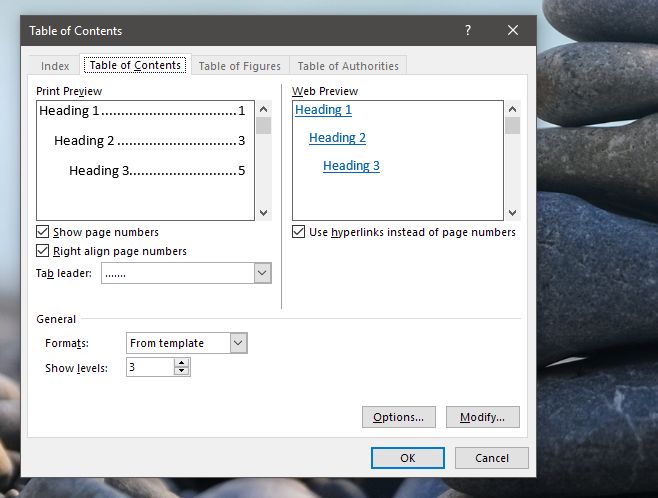
The customization window for the table of contents will open. By default the table of contents will show you headings up to level 3. If you want to show lower level headings e.g. Heading 4, Heading 5, or you just the higher heading levels e.g. Heading 1 and Heading 2, you need to change the levels shown in the table of contents.
At the bottom of the customization window is a ‘General’ section. In it, is a field called ‘Show Levels’ and you can customize it. By default it is set to 3. If you set it to 2, only Heading 1 and Heading 2 will appear in the table of contents in MS Word. If you set the value to 5, the table of contents in MS word will show headings 1 – 5, provided you’ve added them to your document.

Click ‘Ok’ and then insert your table of contents. This change will not effect all table of contents in MS Word. The setting is specific to the document you change it in.
