Excel 2010: Using Non-Contiguous Name Ranges
Excel provides a way to create name ranges for the selected cells. But sometimes there is desperate need of selecting data cells non-contiguously rather than selecting cells which are adjacent to each other. Excel also enables you to select cells non-contiguously(consisting of two or more ranges) to give them a single name range. This phenomena is also referred as name range for multiple selection. So if you are trying to apply the same formatting, to cells present in different locations, or apply a formula using different location, then non-contiguous selection may help you. In this post we will be trying multiple selection of cells for giving them a name range, and try to show how it can be productive for your datasheet with a simple illustration.
Launch Excel 2010, and open a datasheet on which you want to select non-contiguous ranges. For instance, we have included a datasheet in which we want to select ranges (not comprises in adjacent cells).

To start off with, we need to select each course from the Course field. We want to know, that how many students have taken up same course, and sum of marks obtained by the students in same course.
As you might have noticed that, the course names are dispersed in the Course field, they are not adjacent to each other. So we need to select occurrence of every course name in the table and make a category of it by giving it a suitable Name Range.
We will start from the subject Software Engineering in the Course field. For multiple selection, press down the Ctrl key on the keyboard and start selecting the cells. Now give this selection a name, referred as name range, by entering the name at the top-left of Excel worksheet, as shown in the screenshot below. We have specified name range software for the selection.
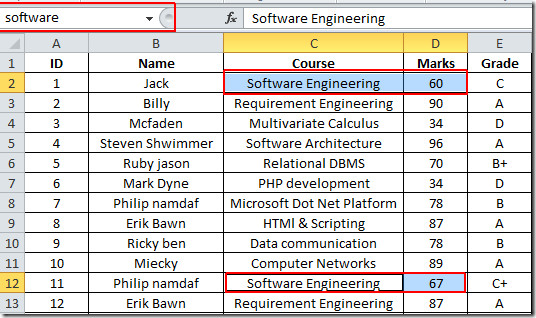
Now follow the same procedure for the remaining subjects, select them from multiple rows & give them appropriate name.
For verifying the name ranges, on Home tab, click Go To.

It will bring up the Go To dialog, we have created name ranges for the subjects and their corresponding marks. We will check name range DBMS for Relational DBMS subject in Course field. Click OK to continue.
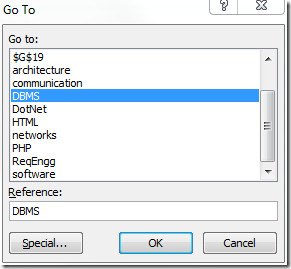
Upon click, occurrences of Relational DBMS along with marks will be selected.
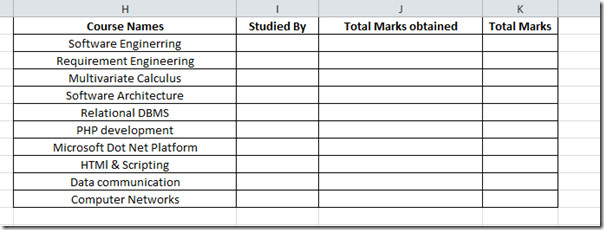
Now we want to use the non-contiguous selection in much more productive way. Make a new table in the same sheet, as shown in the screenshot below.
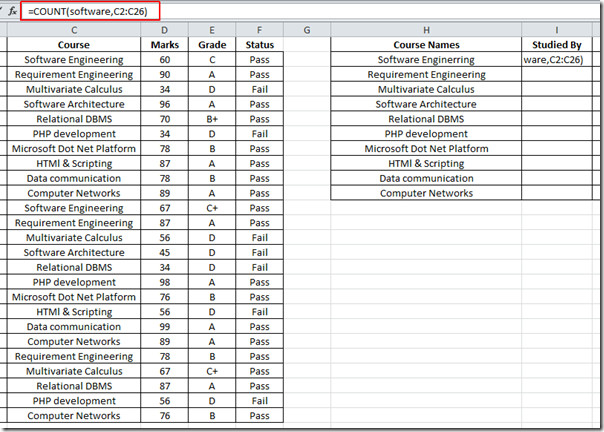
We will be puling the data from the cells by using name ranges. In the first row of Studied by field, we will be counting how many students have taken up this course. For this, we need to use COUNT function.
As you can see in the screenshot below, we are adding formula in the first row of the column Studied By, C2:C26 is the range of Course field. We are counting elements, that software name range encapsulates.
It will evaluate how many students have taken up this course.
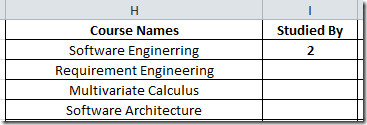
Now apply it over the field, but change the name range, that was selected for each course. It will show that how many students studied the courses.

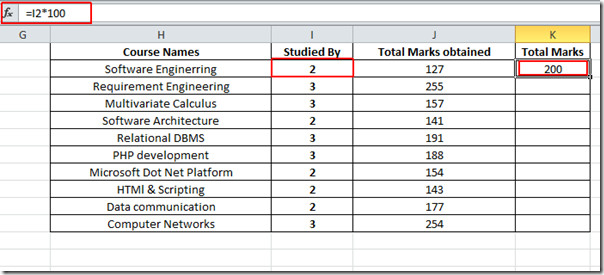
Now we will be evaluating sum of marks obtained by students in specified subject. For that we will write simple SUM formula with name range as parameter.
Apply it over the field, by providing corresponding name range of the subject. Now we will calculate total marks. For this we will multiply cell value at location I2 (contain No. of times it has studied by students) with 100, as each course carries 100 marks.
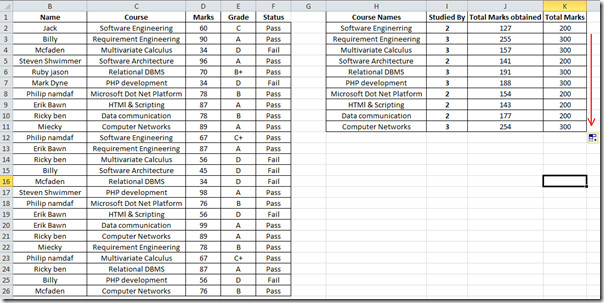
Now apply it over the Total Marks field, by dragging the plus sign at the end of the cell towards the bottom of the field, as shown in the screenshot below.
You can also check out previously reviewed guides on HLOOKUP function in Excel 2010 & COUNTIF function in Excel.



Why not just use a pivot table?