Excel 2010: Transpose/Change Rows To Columns And Vice Versa
Changing the columns into rows and rows into columns is easy, and it takes just a click to transpose a selected field to the row and vice versa. Excel 2010, like previous Excel versions, offers a an easy way to quickly transpose rows and columns. For those who are not familiar with row/column transpose feature, it allows shifting the values in a selected column to row and vice versa, preventing users from manually copy & paste each cell’s value. You may know the transpose option is accessible from the Paste Special menu, which also contains options like paste plain value, paste formula, paste formula and function, paste without borders, paste with source column width etc. Since it is associated with the Excel paste function, you first need to copy the column or row that you wish to transpose to row or column. Once the required data set in a row or column is selected, just move to the cell where you want to transpose the copied row/column, and right-click it to select Transpose from Paste Special menu. In this post we cover how to change a row into columns and vice versa.
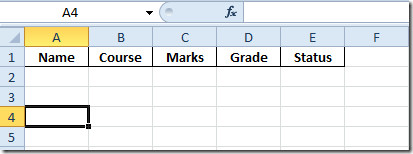
In order to transpose rows or columns, select the whole column or row and copy it by pressing Ctrl+C on the keyboard. Now, select the location where you want to transpose the copied row.

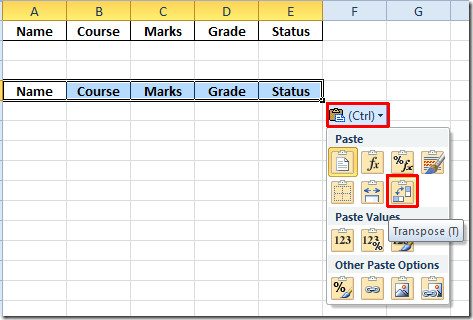
Now, all you need is to use the Ctrl+V hotkey combination to paste the copied row/column. Once pasted, click (Ctrl) menu button to reveal extended paste options. Simply select Transpose to transpose the selected row/column.

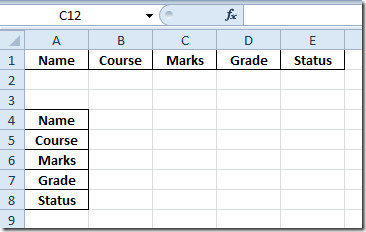
This will immediately change rows into columns. Similarly, you can transpose columns to rows from the Paste Special menu.


Thank you for sharing!
In previous versions of Excel, there were tabs for each page at the bottom of the screen. I could select a page and could change the width of columns without affecting the columns on other pages. How can I do this in Excel 2010?