M4U Kodi Add-on Install Guide – Movies and TV Streams Explained
Kodi is rapidly becoming the go-to source for people who want to stream movies or TV streams. Partly because Kodi is a flexible media player capable of running most file formats, but primarily, it is the huge variety of add-ons that are available for users to choose from and download.
Because Kodi is open source, anyone can create an add-on which will bolt onto it. And there is no shortage of developers who have given it a go. This has resulted in a plethora of add-ons which claim to be the very best at streaming movies and TV programmes.
Given the free reign that developers have, it is inevitable that some of these are great, while many others are pretty terrible. In this article, we will be profiling one of the better ones. M4U is a fairly new addition to the add-on stable, but one that has survived the recent cull which saw many favoured add-ons bite the dust.
And if you are looking around for a new or replacement add-on for your Kodi set-up, which can reliably stream high-quality movies and TV shows, M4U might just be the add-on for you.
Disclaimer: Some unofficial add-ons for Kodi may enable users to access content which is in breach of copyright laws in their country. AddictiveTips.com and its writers do not condone this in any way and urge all Kodi users to take steps to ensure they are not in breach of copyright law.
For security and privacy purposes, we also recommend that all readers make use of a VPN when using Kodi. You can find more information about this and about our recommended VPN, IPVanish, below.

What is the M4U add-on?
The M4U add-on was developed by Mucky Duck and is available from the Mucky Duck repository. The add-on offers a great range of movie and TV streams which can be viewed through Kodi on any device.
It is not a great leap forward in terms of add-on design by any means, but the simple and low-key structure to the add-on is a positive for me, as it is clean and simple to use and navigate.
The source for the content of the M4U add-on is the M4Ufree.info website, which has a superb selection of content for users of the add-on to choose from.
After installing M4U (which you can do by following the installation instructions below), you will find a home screen which allows you to choose from the following categories:
- Latest Added
- Most Views
- Hot Movies
- Best 100
- Genres
- Year
- Search
- TV
As you can see, whether you are looking for a specific title or just browsing for something of interest, it is possible to search in almost every different way you can think of. And unlike some other movie and TV streaming add-ons for Kodi, all of the M4U search options work well.
Under the TV tab on the menu, there is also a sub-menu which allows you to search specifically for TV content by such things as latest added, most viewed, search, and genre sections.
One nice touch with M4U, which is not unique, but also not commonplace either, is a marker with each stream which identifies the quality of its content. The most commonly used ones are Blu-Ray, DVD, HD, or Camera. This is really useful if you are fussy about the quality of what you are watching, which many of us are!
Another welcome touch is that once you make your choice, you are not faced with a long list of different streams to choose from. Instead, there is a single link and the movie will either play or it won’t.
In my experience, more often than not it will, which is also a welcome feature as too many movie add-ons for Kodi are awash with broken links.
The add-on itself can sometimes be on the slow side. When you click on a menu option from the home screen, it can take quite a while before the sub-menu opens up. At times, this can be annoying.
But fortunately, this slowness is not replicated in the links themselves, with most of the content I have tried appearing to run smoothly.
Hovering over a movie you want to watch will give you a very short summary of the movie plot as well as the year and a thumbnail of the DVD cover or movie poster.
Other add-ons do offer more information than this, with many linking to sites such as IMDB. But while this is an area where M4U can improve, it does still usually give you enough to decide whether you want to watch or not.
There are a couple of brief points to make about the installation process itself too. Firstly, be sure to keep the source file saved. According to the release notes, removing the source will cause the add-on to delete itself.
Secondly, as of June 4th, Mucky Duck has been updated to its latest version; M4U version 2.1.4. If you haven’t already, it is well worth downloading this update, as it patches a few of the glitches in the older versions and there is a possibility that the older version may eventually stop working altogether.
How to Install M4U Add-on
So, if you are tempted to give M4U a try, how can it be installed? Well, the process is a fairly standard and straightforward one. But the process is different depending on which version of Kodi you are using. As I know that both Kodi v17 Krypton (the latest version) and Kodi v16 Jarvis are both widely in use, the installation process for both is outlined below.
Kodi v17 Krypton
- First, you will need to open up Kodi.
- On the menu on the left side, select the option that says Add-ons.
- Next, open up Settings by clicking on the gear icon at the top of the menu. On the main screen, in the category Add-ons, you need to change the setting for Unknown sources to the On position (if you have used Kodi before, you may already have done this). Acknowledge the message warning you about this option, and click Yes.
- Return back to the home screen and click on the folder icon, which will open up the File Manager. On the main screen, scroll down the list of options until you reach Add source and double-click it.
- A pop-up box will appear called Add file source. Click on the bar in the centre of the pop-up box which says <None>. Here you are now able to enter the source repository for M4U.
- Type in https://muckys.mediaportal4kodi.ml/ and then press the Done button.
- Below that box is another which allows you to name your add-on. Enter Mucky Ducks (or whatever you want to call the repository) and then click OK to add the repository.
- Next up, you will need to return to the home screen, and select Add-ons again. You will then see the icon of an open box with an arrow pointing into it. It takes you to the add-on browser screen. Once there, select Install from zip file.
- Then click on the file called Muckys, repository.mdrepo-x.x.x.zip.
- Wait a few moments until you see a message which says that the add-on is enabled.
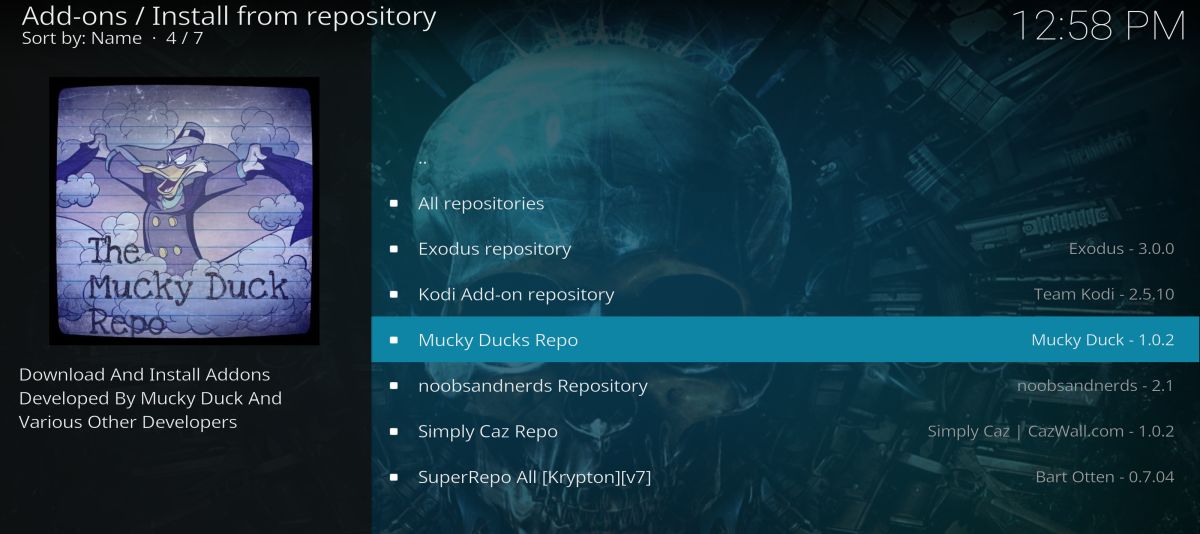
- Click on Install from repository and then choose Mucky Ducks Repo.

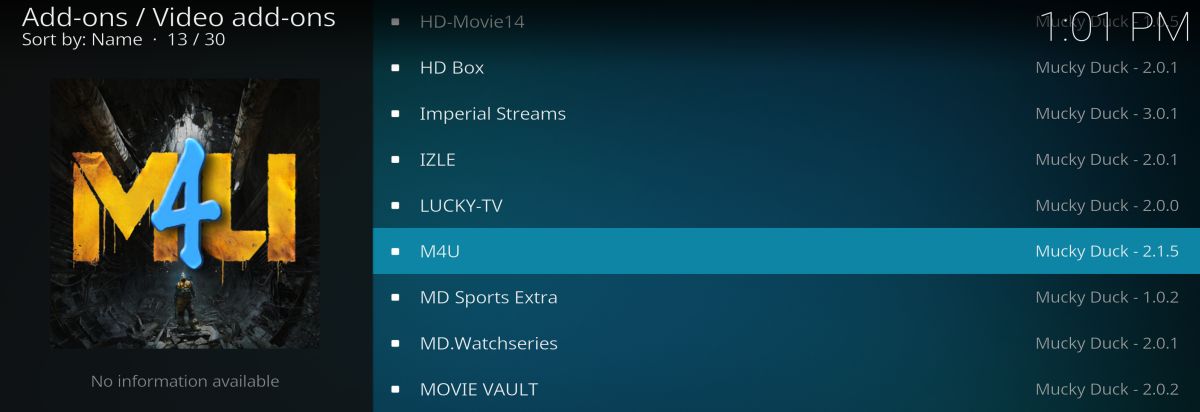
- Once there, click on Video add-ons, then search for the option called M4U. Click on it and then choose to Install.

- Wait a few moments again for a message in the top right of the screen which says the addon is enabled.
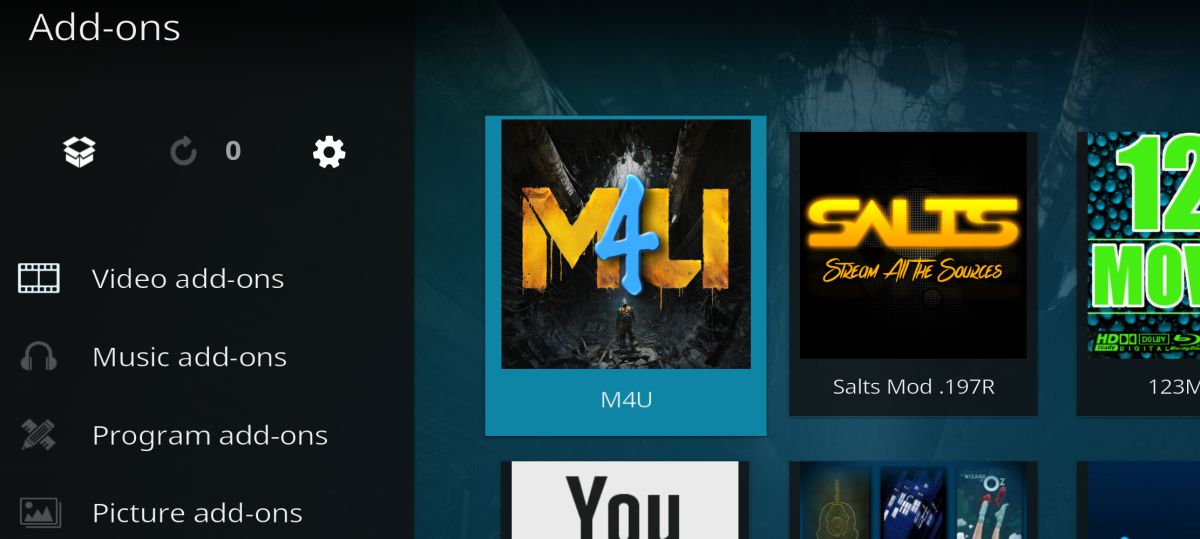
- You can then return to home screen once more and click on add-ons. The M4U add-on should now be there and ready to use.
Kodi v16 Jarvis
- Open Kodi and on the home screen, hover your mouse over the System heading, and then select File Manager.
- Click on Add source, then click inside the box that says <None>.
- Here you will need to enter exactly https://muckys.mediaportal4kodi.ml/ and then press the Done button.
- Below that box is another which allows you to name your add-on. Enter Muckys (or whatever you want to call the repository) and then click OK to add the repository.
- Return to the home screen and click on the System heading.
- Click on the heading on the left-hand side of the screen which says Add-ons.
- There will then be five options provided for you to choose from. The one to opt for is Install from zip file.
- Then click on the file called Muckys, repository.mdrepo-x.x.x.zip.
- Wait a few moments until you see a message which says that the add-on is enabled.
- Then you will need to click on Install from repository and then choose the Mucky Ducks Repo.
- Once there, click on Video add-ons, then search for the option called M4U. Click on it and then choose to Install.
- You can now return to the home screen and under the main add-ons menu option, you will find M4U installed and ready to use.
Why you should always use a VPN with Kodi
A VPN, or Virtual Private Network, is an online security and privacy tool which is an essential addition to anyone who regularly uses Kodi to stream content.

Even if a user is not aware that they are doing this, they can still fall victim to legal repercussions. It is not unknown for legal letters and financial requests to be received by Kodi users for this reason.
With a VPN, it is almost impossible to track the content that you are watching back to you. This is because when you connect through a VPN, all of your online traffic is encrypted, meaning that the content of it cannot be seen by any prying eyes.
A VPN will also pass all of your data through a server and this will change the IP address attached to the data. An IP Address is a short bit of code from which it is possible to deduce where exactly a user’s internet connection is located.
But once your information passes through another server, it acquires the IP address of that server. This makes it almost impossible to trace your activity back to your internet connection and so renders you anonymous online.
What is the best VPN to use with Kodi?
Should you inadvertently be in breach of copyright laws when using a Kodi add-on, a VPN can help to ensure you do not face repercussions. Then there is the issue of security. As open-source software, Kodi add-ons have also proved to be an effective tool for malicious developers to implant malware and other malicious software into users’ devices.
A VPN is part of the security toolkit which can be used to help stop you falling victim to such attacks. And as they only cost a few dollars a month, there is really no reason to hesitate.
There are a lot of VPN providers on the market today; some good and others not so good. Importantly, not all are good enough to work well for Kodi users, especially if you are streaming content. You need a VPN which offers fast connections, multiple server options, and strong encryption and privacy policies.
Among those available, our recommendation is IPVanish. They are a top-notch VPN provider with stellar service. Some of the PROs to using IPVanish include : 40,000+ shared IPs, 850+ VPN servers in 60+ countries / 256-bit AES encryption / Unlimited bandwidth / Zero traffic logs and up to 5 simultaneous connections on multiple devices. They also have an exclusive deal for AddictiveTips readers where you get a big 60% discount on the yearly plan – just follow this link – while offering a y-day money back guarantee at the same time.
Crucially, they have also just launched an Amazon Fire TV Stick app. As Amazon Fire TV Stick is one of the most popular devices to use Kodi on at the moment, this is a great bonus and saves users from having to employ the rather convoluted installation process needed for other VPNs on this platform.


Ipvanish doesn’t work properly on my new firestick so I’m thinking of dumping the stick