Fusion Installer From TVAddons [NEW] – Installation and Overview
If you’ve been following the Kodi scene for a while, you’ve probably heard of the Fusion installer from TVAddons. It was certainly one of the most popular sources for all sorts of third-party Kodi add-ons. It suddenly went down early last summer, victim of a lawsuit by a Canadian cartel of telecom providers. Well, like the Phoenix rising from its own ashes, TVAddons—and its popular Fusion installer—is back online.
The Fusion installer is not really an add-on but it is considered by some to be the “mother of all Kodi add-ons”. As described by TVAddons themselves, “the Fusion Installer links you to our repositories server that contains pretty much every Kodi addon repository in existence”. This is a bold—and possibly questionable—statement but true or not, the Fusion installer is one of the best sources for some of the most important repositories, containing some of the best add-ons.
Today, we’ll show you step by step how to “install” the Fusion installer and then let you know what it’s all about and what it can be used for. We’ll then briefly talk about what’s good and what’s not about it and to finish, we’ll let you know how you can make your Kodi experience even better.
Protect Your Privacy While Using Kodi – Use a VPN
Your ISP may be monitoring your online activity to ensure you are not violating their terms and conditions. And when they suspect you do, they might send you copyright infringement notices, throttle down your speed or simply interrupt your service. When using a VPN, its data encryption feature will prevent your ISP from seeing what you’re doing. Another advantage of using a VPN is that it will let you access geo-blocked content by masquerading your location.
With so many VPN suppliers to choose from, you need to carefully select the one that’s right for you. A few important factors to consider are fast connection speeds to avoid buffering, no-logging policies to protect your privacy, no usage restrictions to access any content at full speed and software that is available for all your devices.
The Best VPN for Kodi: IPVanish
After testing many VPN, the one we recommend for Kodi users is IPVanish. It has servers worldwide, no speed cap or throttling, unlimited bandwidth, unrestricted traffic, a no-logging policy and client software available for most platforms. IPVanish meets all our criteria.
IPVanish offers a 7-day money back guarantee which means you have a week to test it risk-free. Please note that Addictive Tips readers can save a massive 60% here on the IPVanish annual plan, taking the monthly price down to only $4.87/mo.
Installing the Fusion Installer from TVAddons
The Fusion installer is not really an installer per se in that it won’t install add-ons for you. It’s rather a source from which you can manually install several of the most popular Kodi repositories. Due to its different nature, installing the fusion installer different from other add-on installations. In fact, all that is needed is to configure the proper source.
Step One: Making Sure Unknown Sources Are Enabled
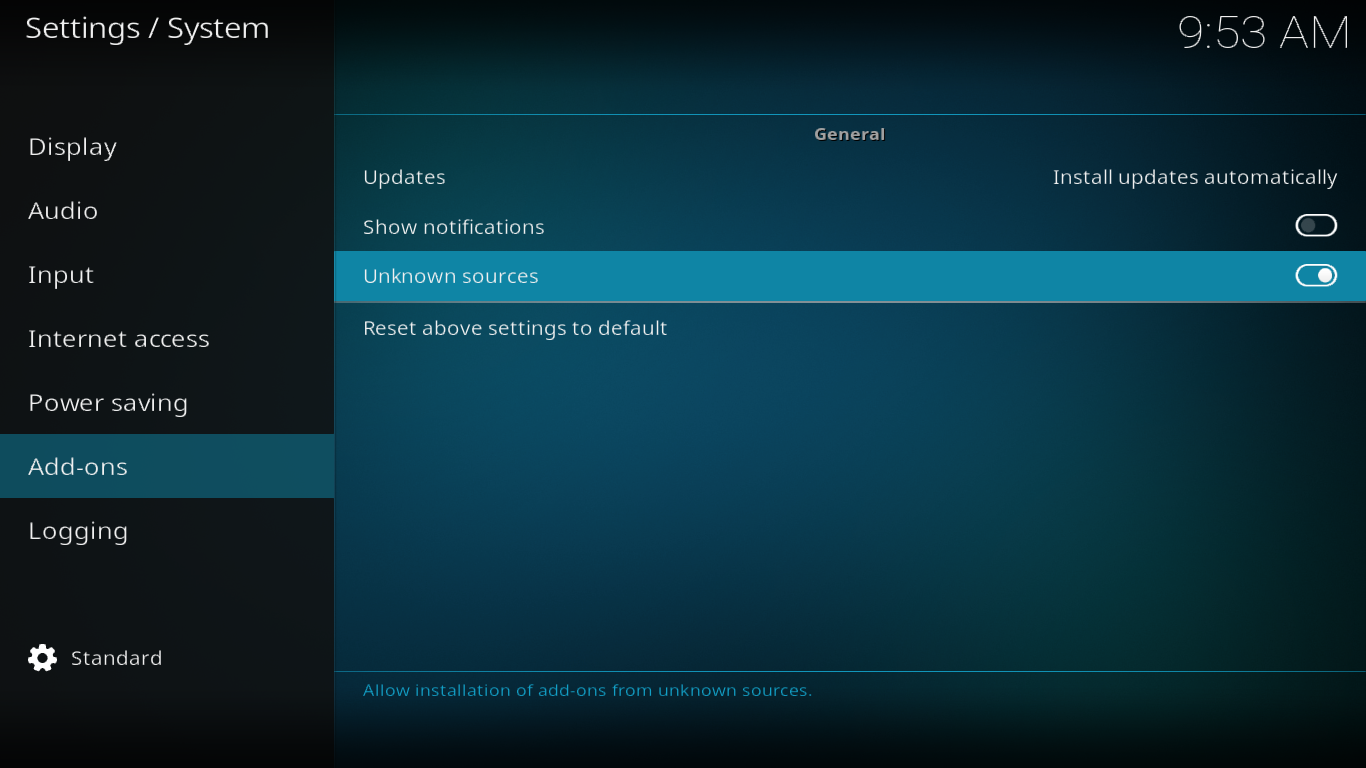
Before you begin, we must make sure that Unknown Sources are enabled in Kodi. If you’ve installed other third-party add-ons before, chances are they already are enabled. Here’s how you can verify—and change—that: From the Kodi home screen, go to Settings (the little gear icon at the top left), Click System Settings and then click Add-ons on the left pane. Make sure the switch next to Unknown Sources is on. The switch’s cursor will be white and to the right. If it’s not, just click it to toggle it.
Step Two: Configuring the Installation Source
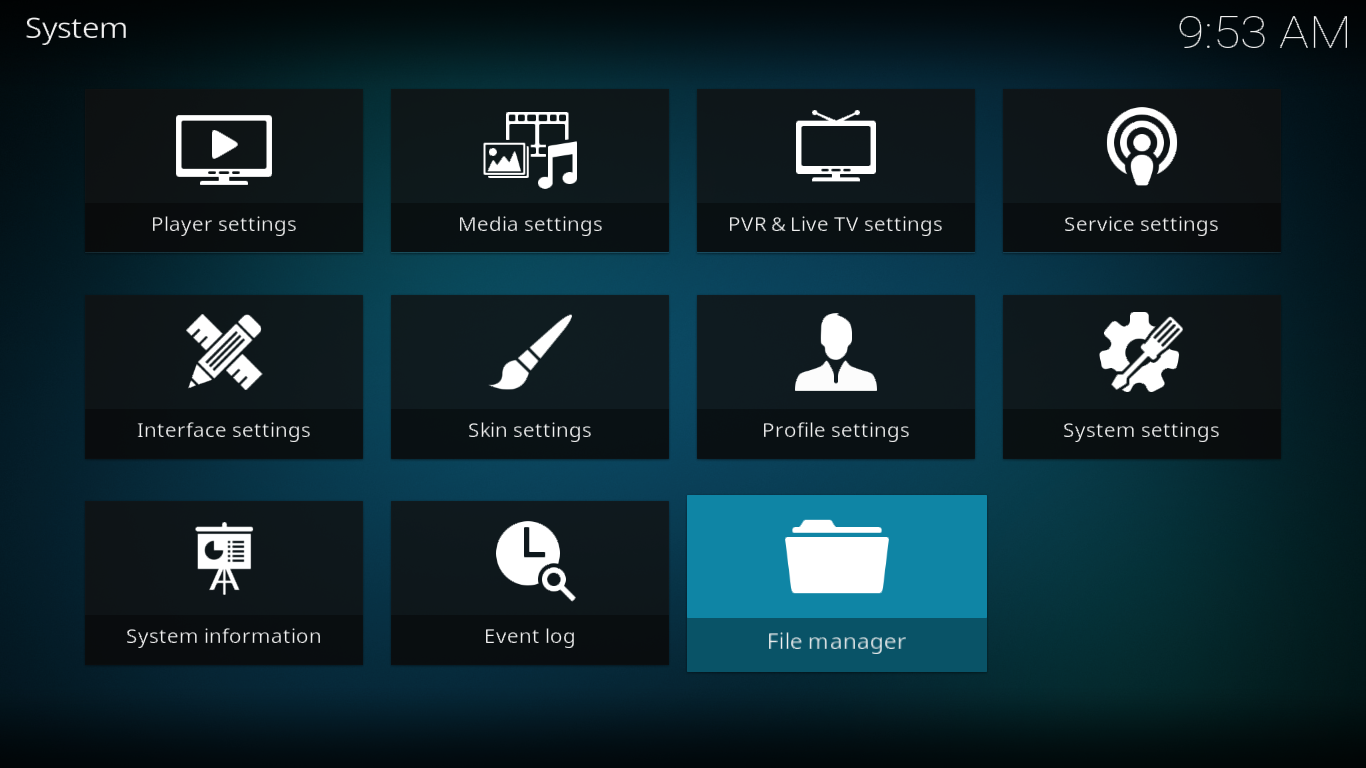
Starting from the Kodi home screen, click the Settings icon (the small gear at the top left of the screen). Select File Manager from the settings screen.
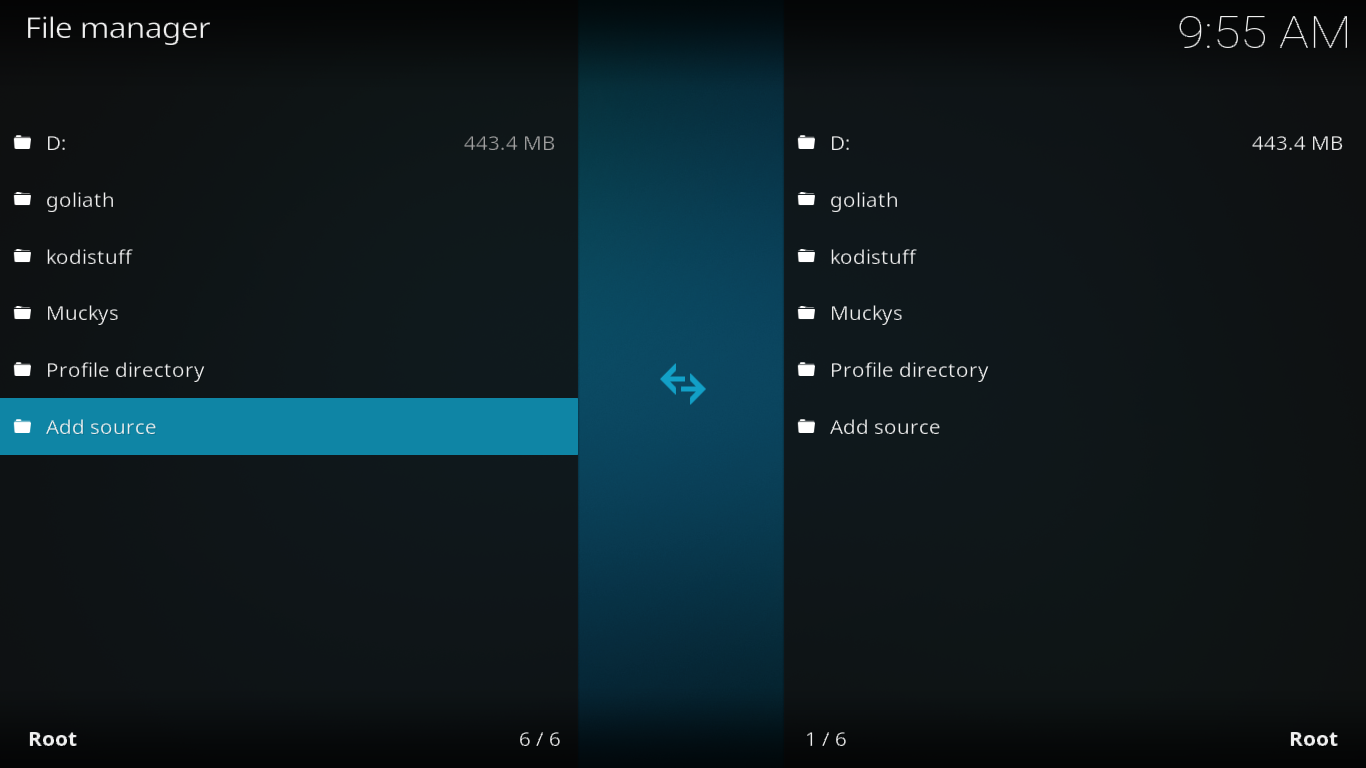
From the file manager screen, double-click Add-Source in the left pane.
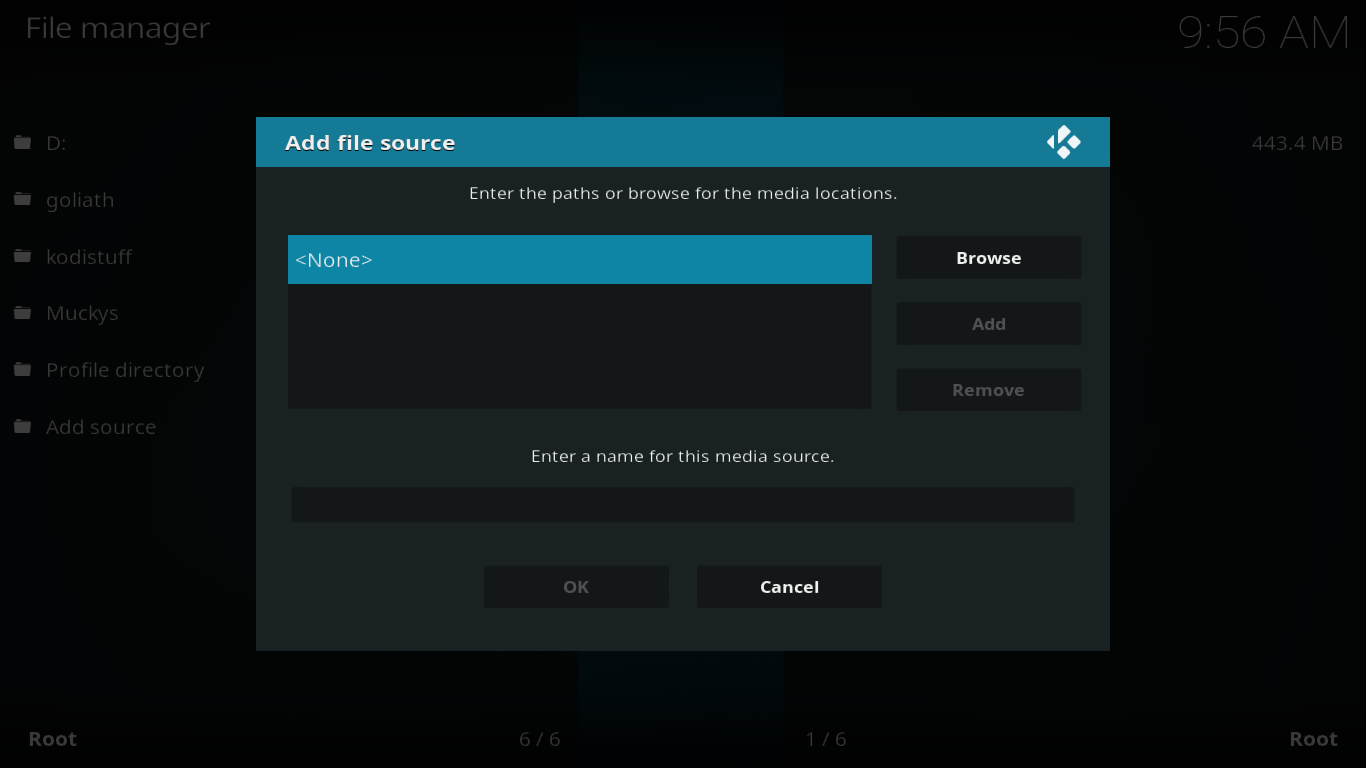
Click None in the Add file source dialog box
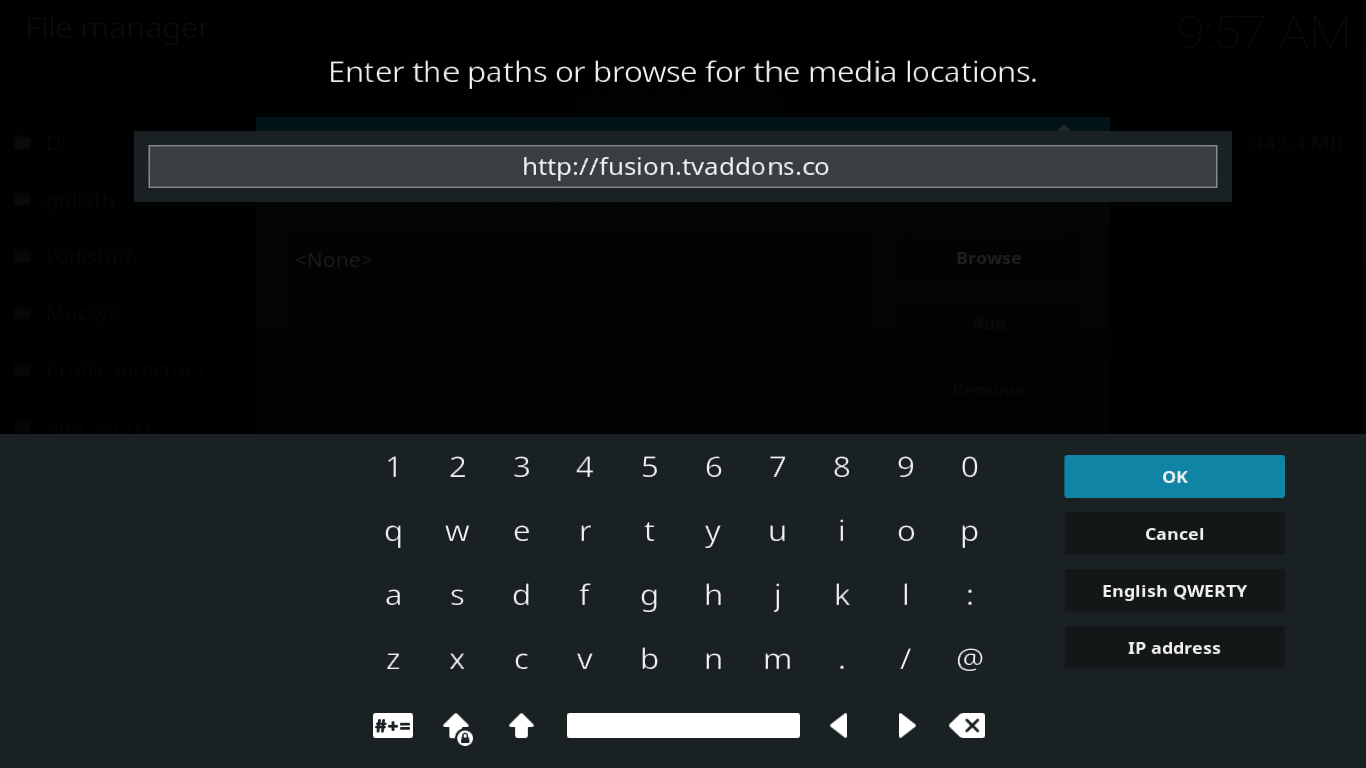
Enter the source path as follows: “https://fusion.tvaddons.co” (without the quotes) in the field at the top of the next screen and click OK.
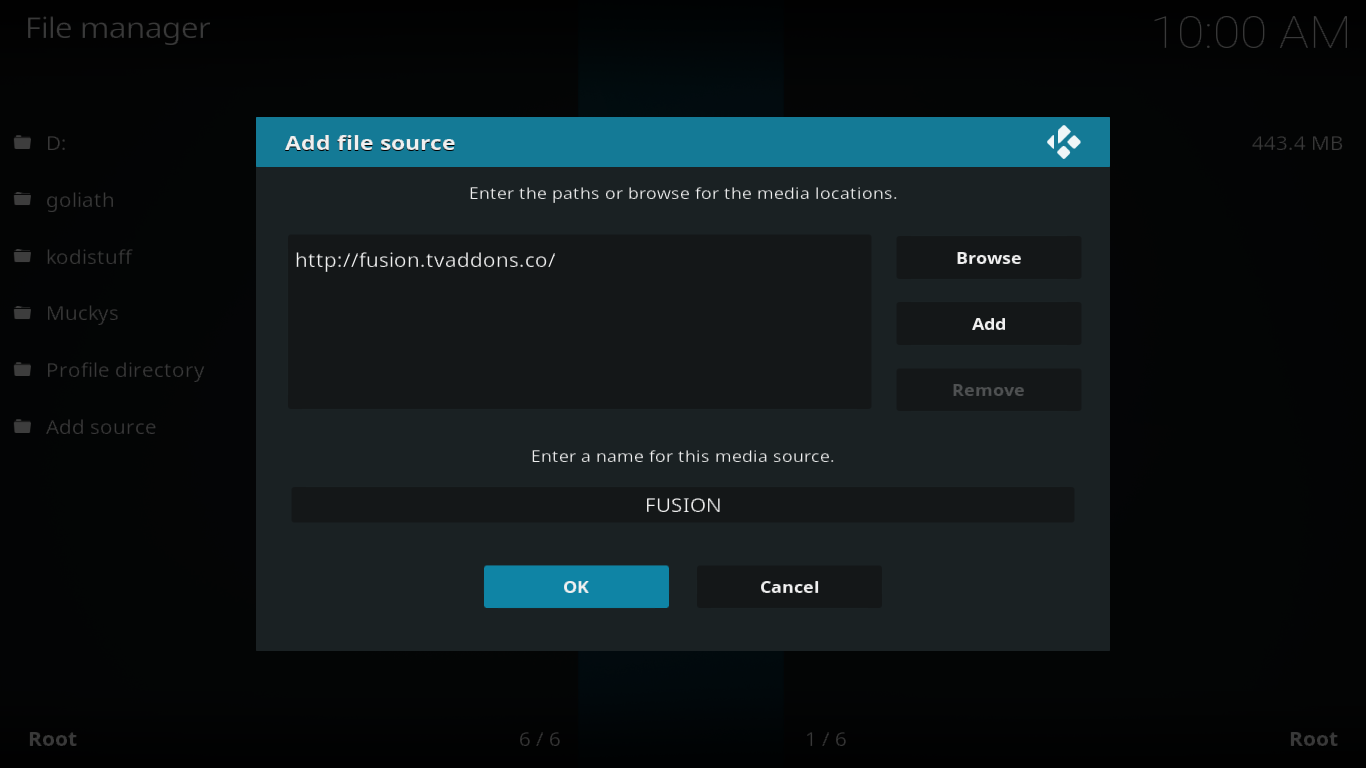
Make sure you enter a name under “Enter a name for this media source” by clicking it and typing in your name (I chose FUSION) then click OK in the name screen and click OK once more back in the Add file source dialog box.
Navigating the Fusion Installer – A Guided Tour
Now that the installation source is configured, we’re ready to have a look at what it contains.
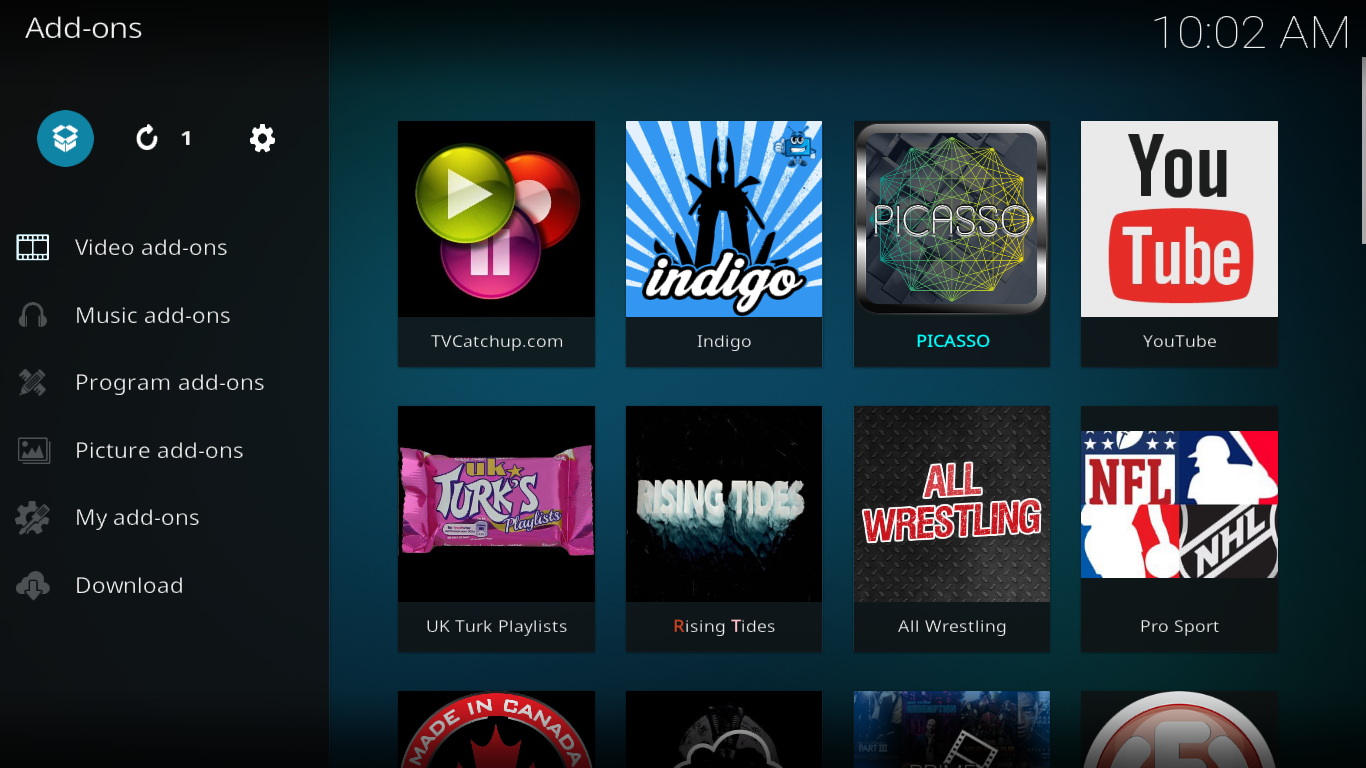
From the Kodi home screen, click Add-ons in the left pane and then click the Package Browser icon (the little open box) at the top left of the screen.
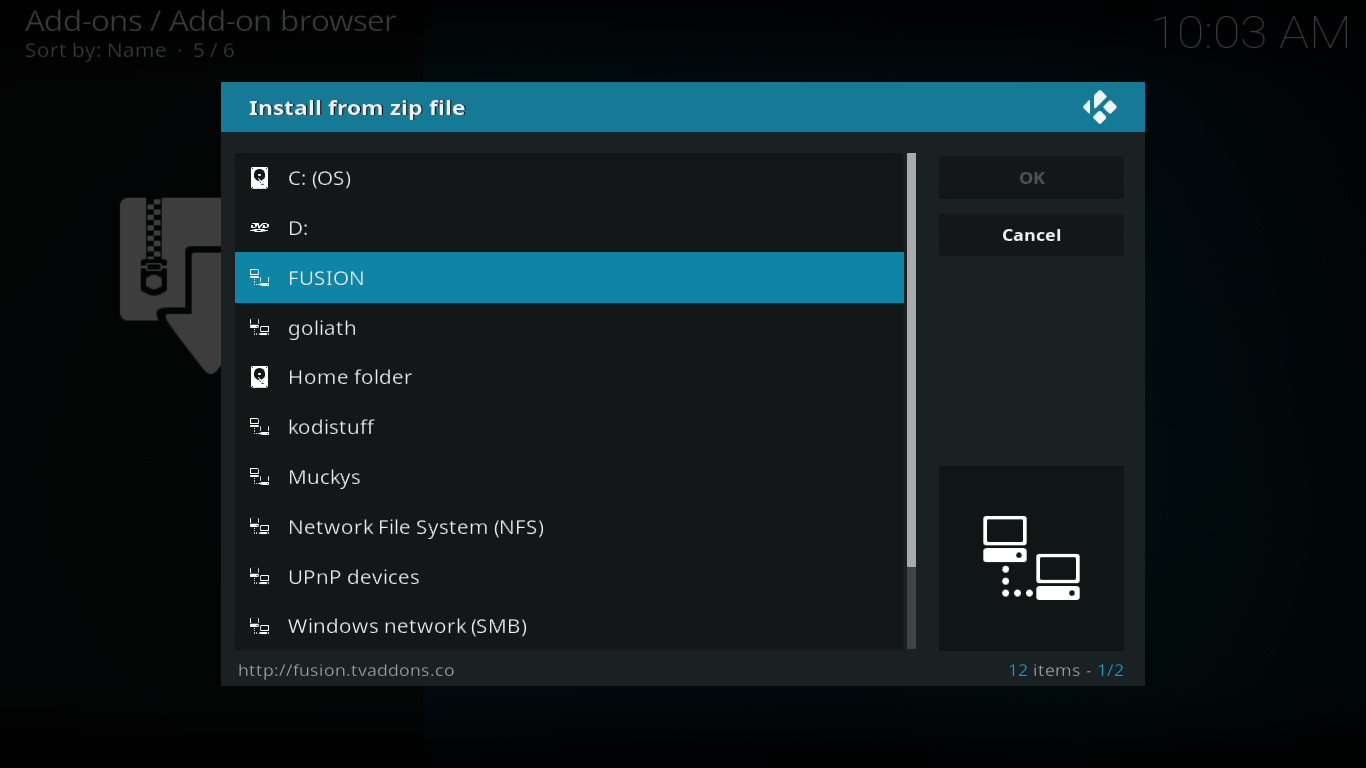
Select Install from ZIP file then, on the next screen, select the source we just added (FUSION).
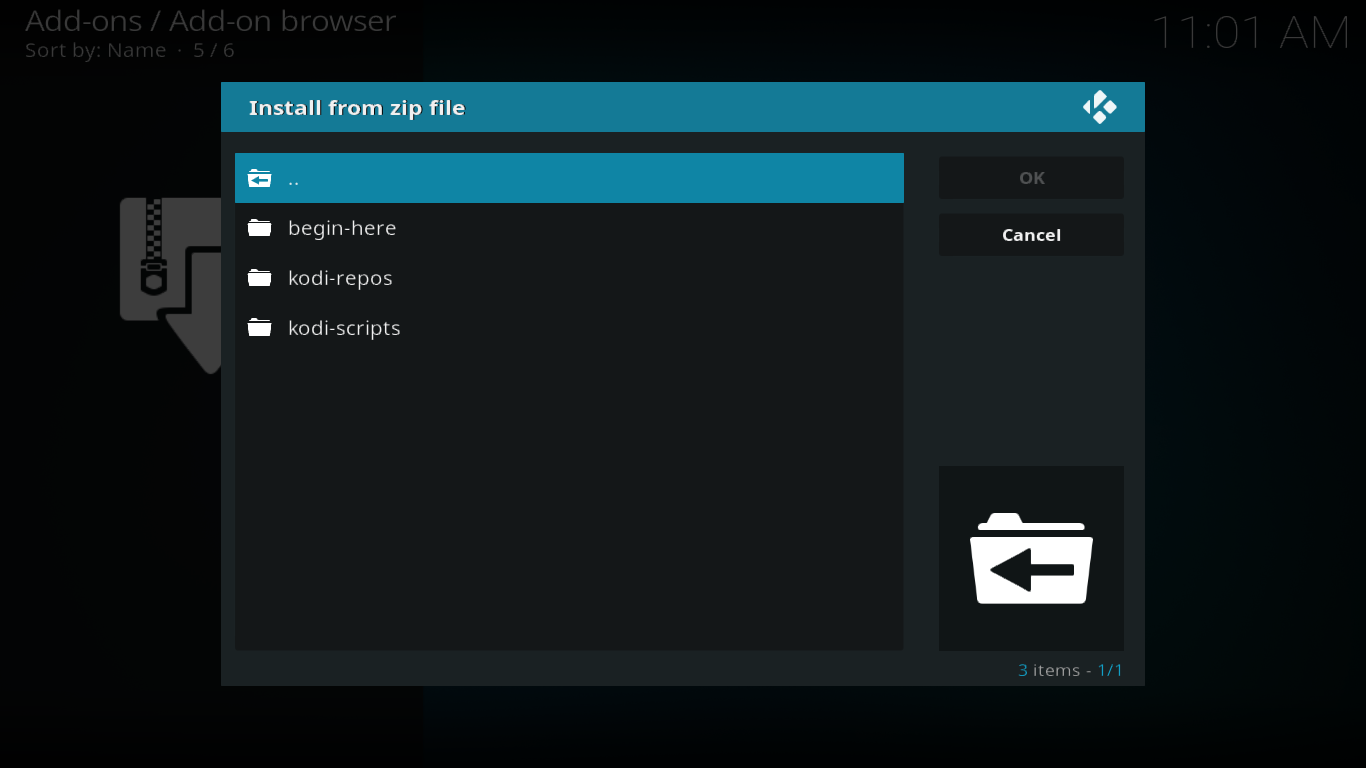
Once you click the FUSION source, you’ll see its main directory. As of this writing, it has three subdirectories: begin-here, kodi-repos, and kodi-scripts.
The first option, begin-here is where you’ll go to install the Indigo installer. This is a very useful add-on that combines several very useful Kodi maintenance utilities as well as a great add-on installer. We’ll tell you more about this great little utility in a moment. And if you want the complete picture about Indigo, we recently published an in-depth article about it: How to Install the Indigo (Fusion) Installer on Kodi.
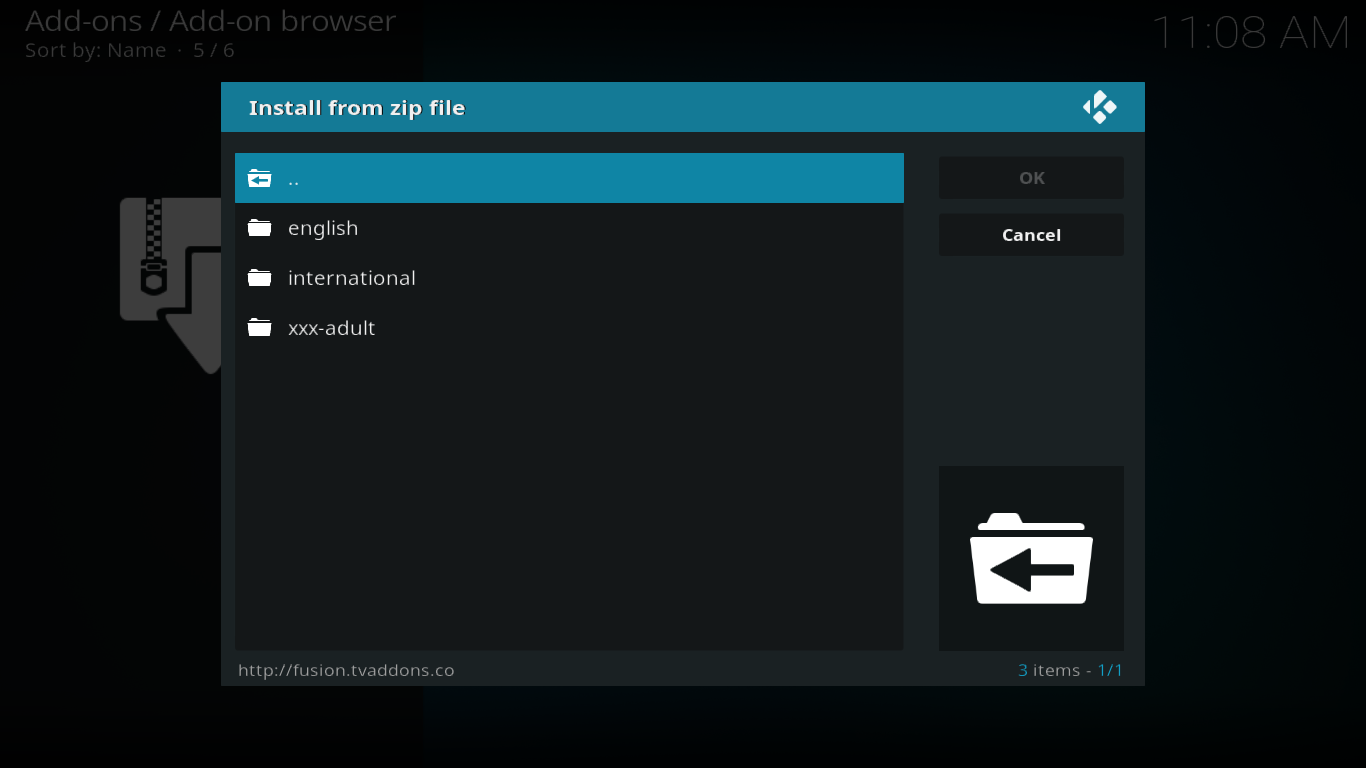
The second option, kodi-repos, is where you’ll find the bulk of the content.
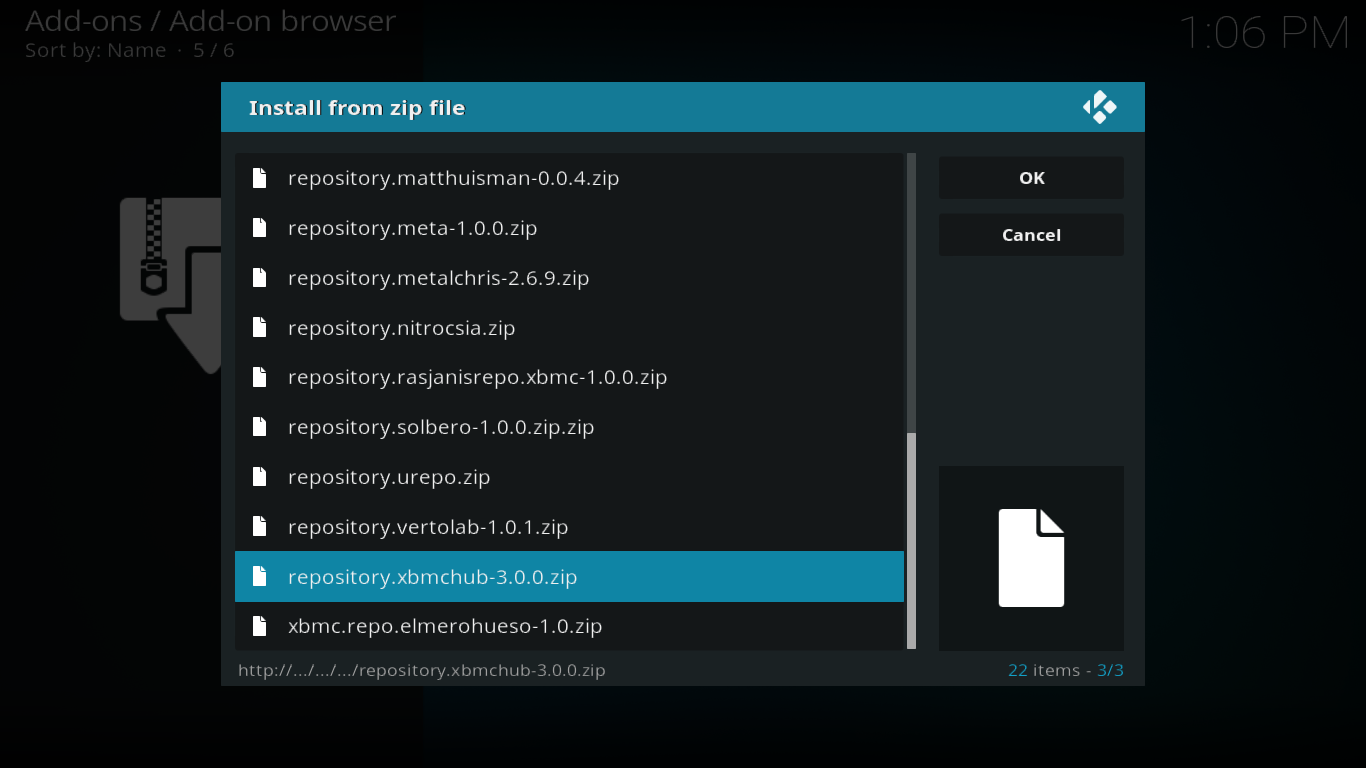
The first sub-section, English, contains over 20 different repositories for you to install, each hosting several add-ons.
The second repository from the end, repository.xbmchub-3.0.0.xip, is TVAddon’s own repository. Click it to install it and wait a few seconds. A message at the top right of the screen soon confirms the successful installation of the TVADDONS.CO repository.
Then, back to the add-ons browser, select Install from repository. And click TVADDONS.CO Add-on repository from the list of available repos to open it.
Under its five subsections, you’ll find several interesting add-ons, most of them under the Video add-ons heading. This is, for example, where you’ll find add-ons such as USTVNow or USTVCatchup.
If you head back to the Install from zip file/FUSION/kodi-repos/English listing, you could install each of them and explore them to see what each has to offer. But, with more than 20 of them, that would certainly turn into a relatively long and extremely boring task. Fortunately, there’s an easier way around that. We’ll get back to this in a moment.
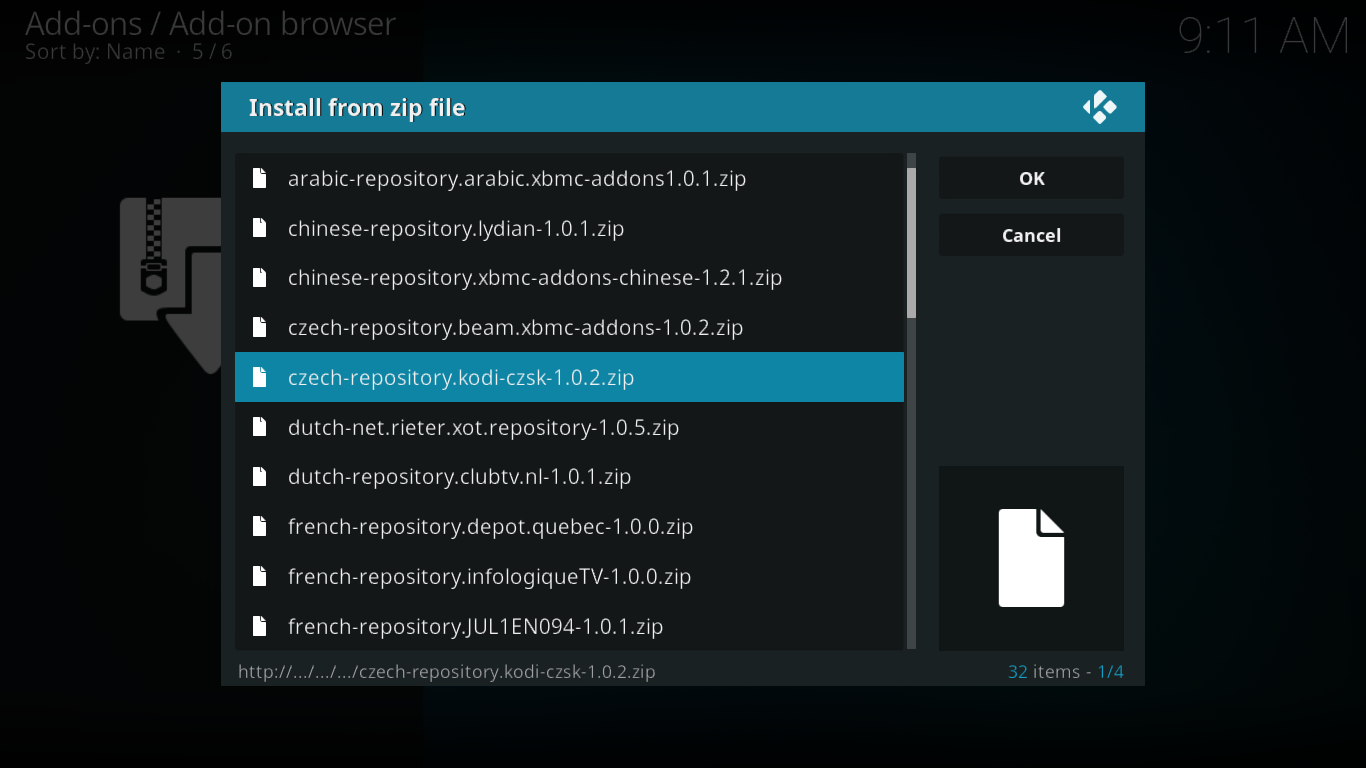
For now, the next thing we’d like to draw your attention to is the International subsection of the Fusion installer. This is where you’ll find over 30 different repositories in some 20 different languages.
If English is not your primary language, or if you fancy foreign languages, you’ve got to have a look at what’s in there.
DISCLAIMER: AddictiveTips.com does not condone or recommend the use of Kodi or any add-on to access copyrighted content to which you have no right. We’re not responsible for what you decide to do with the contents of this article. Piracy is not something we support or approve, and we strongly advise users to only access content they are legally entitled to. As a Kodi user, you must take steps to ensure you are not in breach of any copyright law.
Pros and Cons of the Fusion Installer
The very best thing about the Fusion installer is the wide array of various content it proposes. When TVAddons disappeared a few months ago, it was a major crisis in the Kodi world. There’s a simple reason to that, repositories are more than just places to store add-ons. They will also take care of keeping your add-ons up to date. And with the extreme volatility of the streaming sources, keeping add-ons current is possibly the most important task.
On the downside, it’s obvious that the Fusion installer does not provide a user-friendly way to install add-ons. It’s a great source where you’ll find tons of content but, unless you know what you’re looking for and its location within the Fusion installer, it won’t help you much. But that’s OK since this is not what it was meant to do.
Useful Alternatives
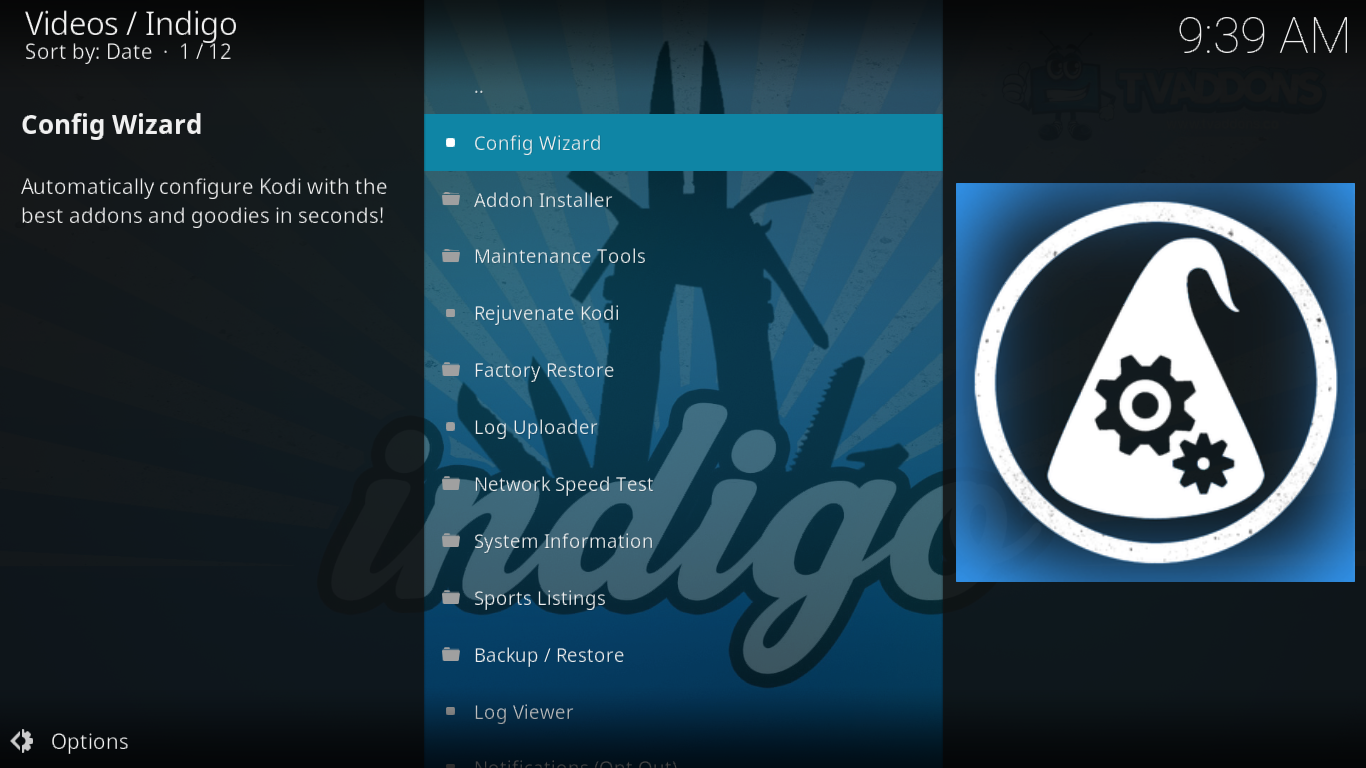
For easy installation of Kodi add-ons from TVAddons, the way to go is to use their Indigo utility. Indigo features an add-on installer that lists pretty much all add-ons from the Fusion Installer in alphabetical order and allows one to not only install them but also install each add-on’s repository as needed.
Another great feature of the Indigo utility is its Config Wizard.
In simple terms, the Indigo Config Wizard will automatically “configure Kodi with the best add-ons and tweaks”. If you’re new to Kodi, this is certainly a great place to start. It will quickly get you going with some of the most popular and useful add-ons. There is also a rejuvenate option that will do the same thing as the Config Wizard but will first remove any existing add-ons.
The Indigo installer is not the only way to install add-ons on Kodi. And when it disappeared last summer, a few alternatives quickly surfaced. We’ve reviewed a few of them last July in an article called Best Alternatives for TVAddons’ Fusion While TVAddons.ag is Down. You might want to read it and find about three reliable sources for great add-ons.
If you prefer the simplicity of installing add-ons with an installer—as opposed to doing it from a repository—we’ve also pointed a few available options in this other recent article: Best Kodi Addon Installers: What are The Top Installers for Kodi? This is a must-read for anyone who’s into installers.
Conclusion
The Fusion installer is back and it’s a great news. It will hopefully continue to be the foundation for all sorts of great add-ons from TVAddons for years to come. With the add-on installer built into their Indigo add-on, using it is a simple matter of finding your add-on from a list and clicking it. No need to fuss around with sources, repos and all that jazz. And if you don’t know what you’re looking for or are just starting with Kodi, their Config Wizard will get you up and running in no time.
Have you tried installing add-ons from the Fusion installer source? Perhaps you’ve tried their Indigo add-on instead. What are your favorite add-ons from the Fusion installer? Share your experience with us using the comments below!
