Chrome Launcher Add-on: How to Browse The Web From Kodi
Kodi already has a ton of functionality, but did you know you can actually run a version of Chrome without ever leaving the Kodi UI? We’ll show you how to get started in the guide below. It’s surprisingly easy, taking just a few minutes to read through and implement on your own.
If you’ve only used the Kodi software for organising and displaying your media, then you might not know just how much you can do with the media centre software. As well as watching videos or playing music, you can use Kodi for all sorts of functions that you might associate with a computer or tablet by installing add-ons which extent its functionality.
This is particularly helpful to know if you’re using Kodi on an Amazon Firestick or another small Android-based HTPC hardware attached to your TV. In this case, it can be annoyingly difficult to use a web browser with just your TV remote to control it. This is where a tiny but super helpful add-on can save you a lot of time and effort: The Chrome Launcher add-on for Kodi. This simply puts options into your Kodi system to open up web links using the Google Chrome browser which is installed by default on Android systems.
In this article we’re going to introduce you to the Chrome Launcher add-on for Kodi and show you how to install and use it to open up Chrome web links with your Kodi system.
Kodi Users Should Install A VPN Before Using Add-ons
In just a moment we’ll get into the details of how to install and use the add-on for Kodi, but first there is an important issue which we should acknowledge. While the Kodi software itself is totally safe to use, and is free, open source, and legal, some add-ons which are available for Kodi are created by third party developers. Because the software is open source, anyone can create an add-on for it and make it available online. Some of these add-ons allow users to access copyrighted content illegally, and using them even inadvertently could cause you to be liable for a fine or for legal prosecution.
If you’re going to use add-ons for Kodi, it’s highly advisable to use a VPN when you do. A VPN is a small piece of software which you install onto your device and which encrypts all of the data that your device sends over the internet. This encryption means that no one can see what you are looking at or downloading online, so you’ll be safe from harassment from your ISP or from copyright trolls who try to observe your internet use.
NordVPN – Essential Browser Security, and a Must-have for Kodi
It is critical to secure your connection while using Kodi, full stop. Whether you’re using the Chrome Browser launcher, streaming with official add-ons, or even exploring the world of unofficial add-ons, your ISP is watching–and they don’t approve. But NordVPN removes your traffic from scrutiny, hiding it within an impenetrable wall of encryption and shielding you from throttling, cyber-attacks, and much more.
It’s all thanks to NordVPN’s encrypted network, which encompasses more than 5,800 servers in 59 countries. Each connection comes protected by NordLynx, a cutting-edge fork of the WireGuard protocol that is geared for both speed and security. This means no brute-force hacking, no ISP throttling, and no VPN-induced latency to gum up your Kodi streams.
But even more exciting is the prospect of bypassing geoblocked content. NordVPN offers tens of thousands of spoofable IP addresses, allowing you to digitally relocate to any corner of the globe to unblock local TV shows, movies, music, game servers, and so much more. There’s no limit to how much you can do this, nor caps placed on bandwidth or speed. And, you’re free to use NordVPN as you please, as their strict no-logging policy guarantees your anonymity and shields you from scrutiny.
Read our full NordVPN review.
- Unblocks US Netflix, iPlayer, Amazon Prime and other streaming services
- GooglePlay users rating: 4.3/5.0
- 256-bit AES encryption with perfect forward secrecy
- Retains no metadata of your browsing
- Money back guarantee policy (30-days).
- They can take 30 days to process refunds.
How To Install The Chrome Launcher Add-on For Kodi
With a VPN installed and protecting you, you’re ready to install the Chrome Launcher add-on for Kodi.
Editor’s note: The following guide assumes you already have the Chrome browser installed on your computer. Otherwise, the browser launcher won’t have anything to launch!
As this add-on is difficult to find in a reliable repository, we’re going to show you how to download it directly from GitHub and install it from a zip file instead of finding it in an online repository. Here’s how to do that:
- First, go this URL in your web browser and download the zip file: https://github.com/pellcorp/kodi-repository/raw/master/plugin.program.chrome.launcher/plugin.program.chrome.launcher-1.1.5.zip
- Now save the zip file to your desktop or other easy to access location
- Go to your Kodi home screen
- Click on Add-ons
- Click on the icon that looks like an open box
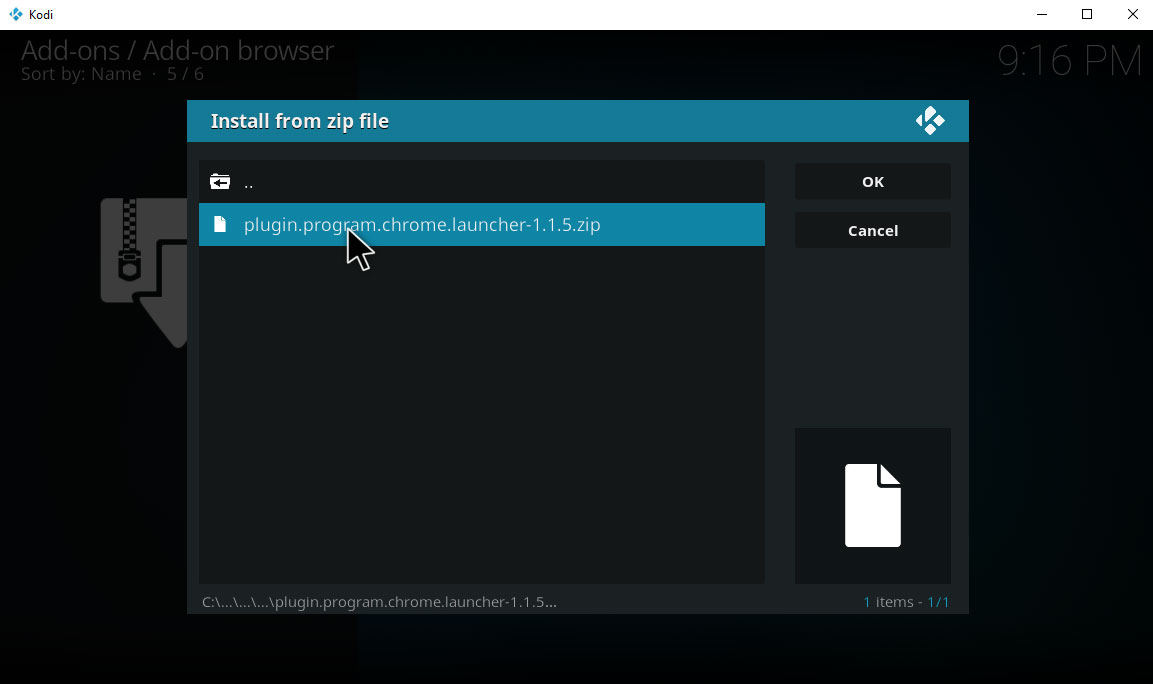
- Click on Install from zip
![chrome launcher addon - install from zip]()
- Click on where it says Browse and navigate through your device’s folders to find the zip file you just saved. Click on program.chrome.launcher-1.1.5.zip
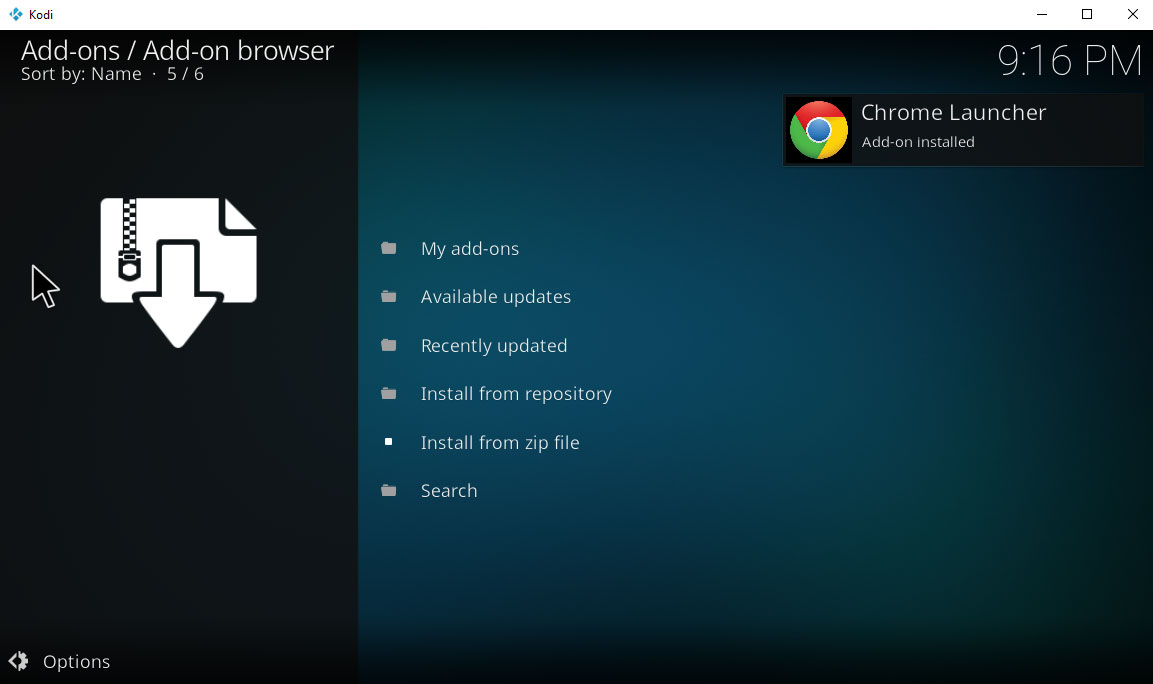
- Wait for a moment and you’ll see a notification once the add-on has been installed
![chrome launcher addon installed]()
How To Use The Chrome Launcher Add-on For Kodi
Once the Chrome Launcher add-on has been installed, here’s how you can use it to easily open up websites on your Kodi device:
- Start on your Kodi home screen
- Go to Add-ons
- Go to Program add-ons
- Click on Chrome Launcher
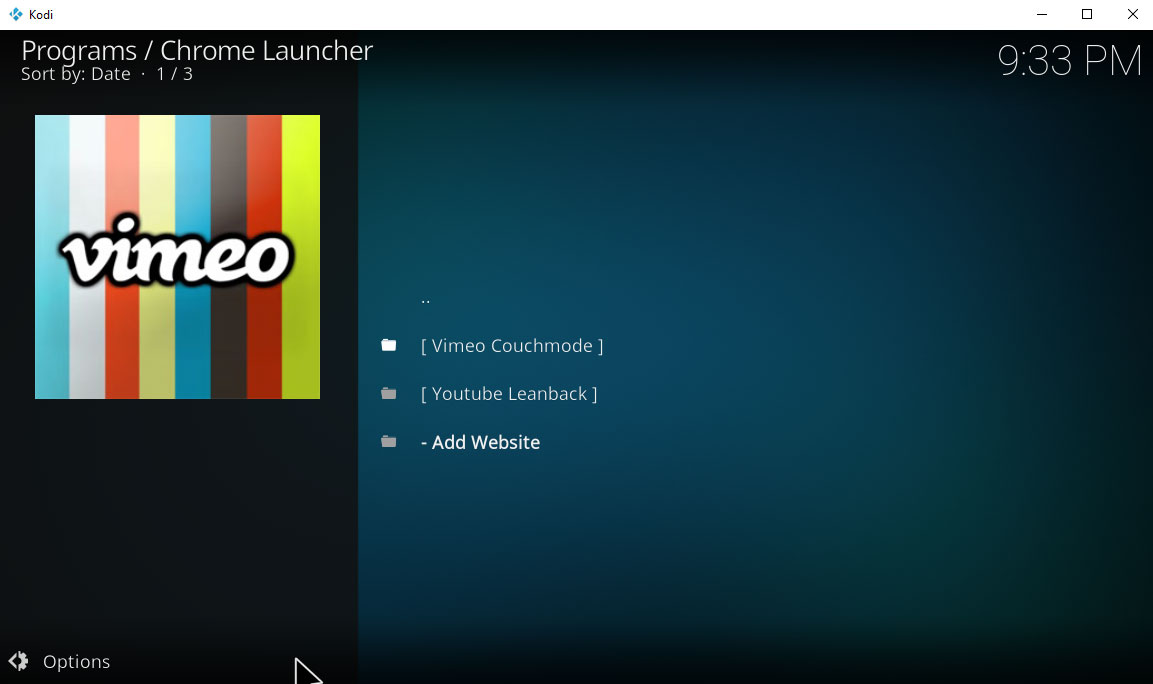
- By default, you’ll see two sites already set up in the Chrome Launcher: Vimeo Couchmode and YouTube Leanback. Click on either of these options and it will open the relevant website – Vimeo or YouTube – in the easy to use kiosk mode
![chrome launcher addon - couchmode and leanback]()
- If you want to add your own links to the Chrome Launcher, you can do that too.
- To do this, just go down to the option at the bottom of the list on the chrome launcher start page and click on – Add Website.
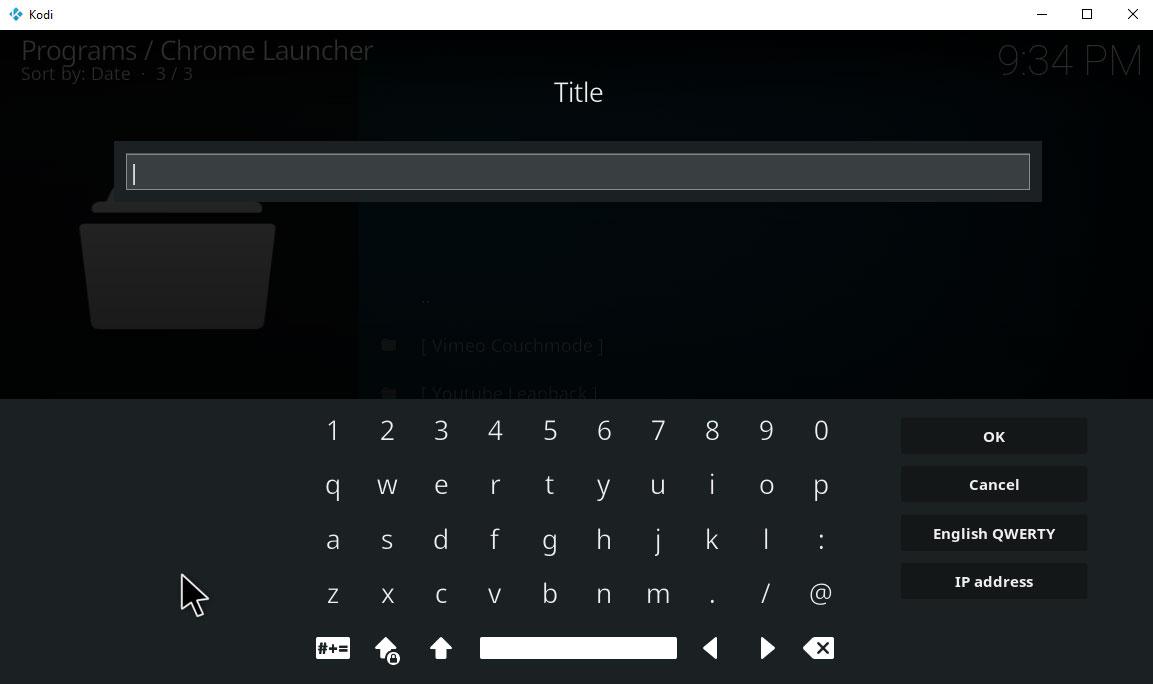
- This will bring up a text input box that says Title above it. Give the title for your new website launcher – in this example, we’ll type in Facebook and then click OK.
![chrome launcher add title]()
- Now you’ll see another text input box which asks for the URL of the site that you want to launch. We’ll type in https://www.facebook.com and press OK once again.
- Finally, you’ll get a third input box which says Stop XBMC playback? By default, it says no and you should usually leave it as such. This way, your videos or music which are playing through Kodi will keep playing even if you use the launcher to open up a website (XMBC is what Kodi used to be called, and this add-on is rather old so it hasn’t been updated in a while). In some cases, such as if you are using the launcher to link directly to a video file, then you may want to set this option to yes so that playback of your current music or video will stop once you use the launcher to start a new video. Either way, once you have entered your options then you should click on OK
- Now you’ll see another text input box which says Use kiosk mode? By default, the answer is set as yes. You probably want to leave it as yes as kiosk mode is very helpful – it opens websites a form which makes them easier to use on a big screen and/or with a pad instead of a mouse. Not every website supports kiosk mode, but when they do they are much easier to browse using Kodi in this way. However, if you want to open the original version of a website instead you can enter no.
- Now click on OK once more. Wait for just a second and you’ll see the new option appear in your list of websites which you can launch
- If you ever want to edit the websites in your launcher, just right click on the name of the site and choose Edit website settings to change the settings that we entered before or Remove Website to remove this option from the launcher.
Conclusion
The Chrome Launcher add-on for Kodi is a simple add-on in that it just does one thing, which is to open up websites from your Kodi system in an easy to read format. But for that one thing, it’s very useful! If you’re using Kodi on a Firestick or other limited Android device, then this add-on will be extremely helpful for letting you browse your favourite websites on your Kodi system. For this particular function, the add-on is ideal.
Do you use Chrome Launcher on your Kodi system, or is there another way which you prefer to integrate your browser into Kodi? Let us know in the comments below!

This description omitted the most important step – the installation of a browser. This is a browser LAUNCHER. You still have to install a separate browser, and link to it from the launcher
No wonder I can’t get it to work…
Man im shot on this whole thing. Been at this too long. I was able to get my chrome updated, dont kno if that means anything. And this tip finally allowed me to update my chrome launcher.
But it STILL TELLS ME CHROME NOT FOUND.
Im using amazon firestick. Kodi 17.6 . if anyone has anything else to add on whats messed up, id appreciate hearing it very much .