Take Pixel-Precise Screenshots In Mac OS X
One of the very basic features of an image cropping tool should be to allow very precise control, i.e., users should be able to decide how many pixels they want to trim from any of the four sides. Such a crop tool is difficult to come by for Mac, and will likely have a bloated price tag. For users who need this specific functionality for screenshots, there is Precise Screenshot. It is an excellent Mac app priced reasonably at $1.99 and available in the Mac App Store. The app comes with screenshot size presets, but also allows you to trim the screenshot area by the pixel. A red frame that you can position anywhere on your screen outlines the screenshot area, and you can choose to either use this frame or capture the full screen. Precise Screenshot also has a time delay feature for taking screenshots (both full screen and area specific), and once captured, they can be stored as files in PNG, TIFF or JPG formats, or copied to the clipboard for pasting. A number is appended to successive screenshot files, and they can be saved to any folder of your choice.
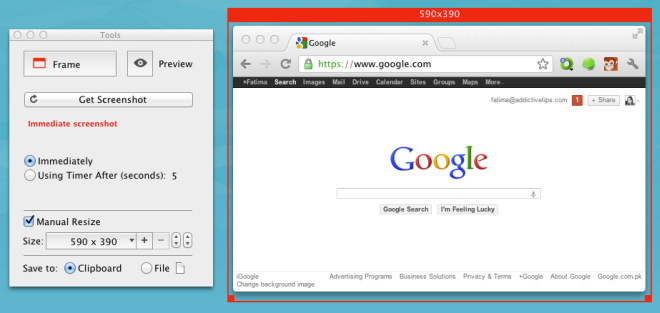
When you first launch Precise Screenshot, a Tools window and a red frame will appear on your screen. You can drag the frame around from its top bar, resize it from the corners, or go to the Tools window and use the arrow keys to change the dimensions of the frame. The first set of up/down arrow buttons lets you increase/decrease the width of the frame, while the second set lets you increase/decrease the height. The plus and minus keys let you move through the preset frame sizes.

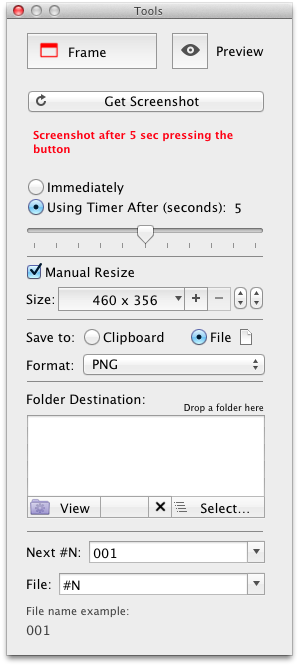
By default, Precise Screenshot saves the image to your clipboard, and captures whatever is in the frame. To capture the full screen, click the Frame button at the top of the Tools window. This will toggle the capture mode and change it to full screen. To save the screenshot as a file as opposed to just copying it to your clipboard, select File in the Save to option. The Tools window will expand to give you options for selecting the output format, the save to location for the images and what convention should Precise Screenshot follow for naming successive screenshots.
To capture the screenshot, click Get Screenshot and the app will save and preview it. The Preview button lets you toggle the preview window. To capture a time delayed screenshot, select the Using Timer After (Seconds): option. When selected, a slider will appear to let you manage the time delay interval.

The main feature of this app, as its own name signifies, is the precision with which you can select the dimensions of a screenshot. Additionally, it lets you take a time delayed screenshot of a specific area and not just the full screen, as most other apps do. For an app that provides this much flexibility, it is an excellent bargain at $1.99.
Get Precise Screenshot From Mac App Store

What?… difficult to come by? You could use preview…