How To Disable The Touch Bar On Your MacBook Pro
Apple makes great looking products and we’d be lying if we said the company didn’t know how to sell them. The highlight feature on the MacBook Pro 2016 was a new input panel called the Touch Bar that plenty of people seemed to want. This was despite the tech community voicing how it wasn’t at all impressive. If you bought a MacBook Pro with a Touch Bar and find the panel is annoying but the system still great, you can disable the Touch Bar.
There are two ways to disable the Touch Bar on a MacBook Pro. The simple solution is to have the Touch Bar always display the default system keys. It will not change keys based on which app is in focus so it’s main function is disabled but the buttons are still active. If you’re looking to disable the Touch Bar completely, there’s an app for that but the process is a bit long and not very easy to execute if you want to enable and disable the Touch Bar several times a day.
Touch Bar Control Strip
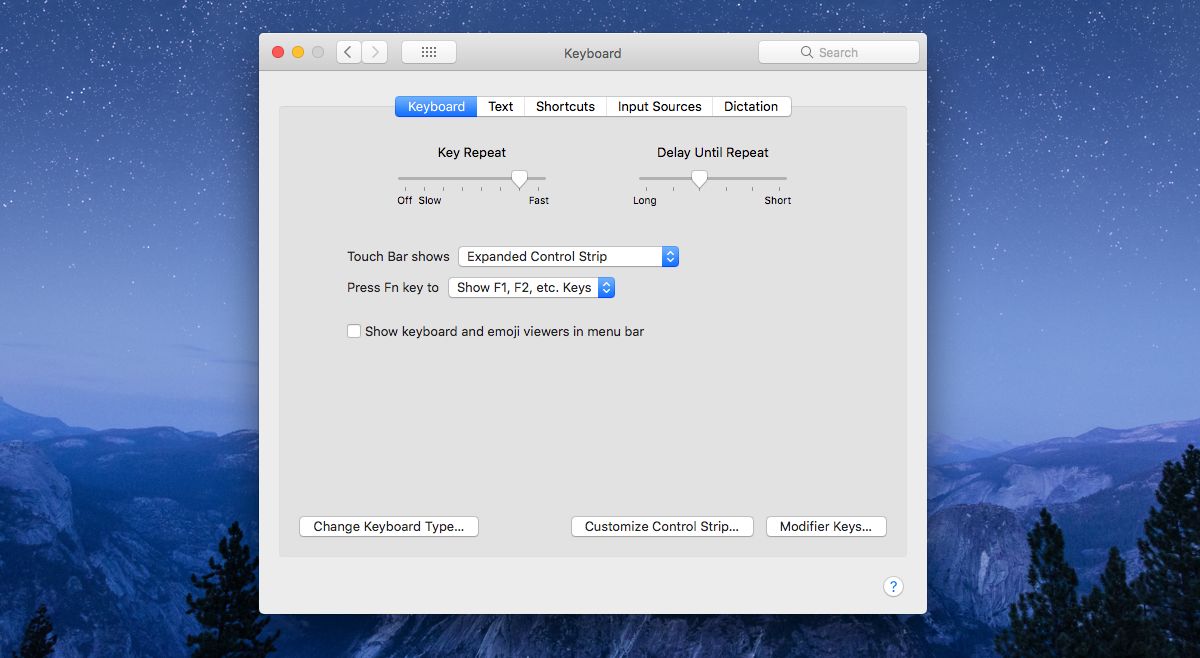
Open the System Preferences and go to Keyboard. On the Keyboard tab, open the “Touch bar shows” dropdown and select “Expanded Control Strip”. That’s all you need to do. This stops the buttons on the Touch Bar from updating all the time. All you see are the system control buttons such as the Launchpad button, mission control, etc.

Disable The Touch Bar
If the above solution isn’t what you’re looking for and you want to disable the Touch Bar completely, it is possible with an app called TouchBarDisabler.
Download the app and run it. Before it can disable the Touch Bar, it needs to disable System Integrity Protection. The app explains how to do this and it’s fairly simply. You need to first boot into recovery mode on your MacBook Pro. To do so, Restart your MacBook from the Apple button at the top left of the menu bar. When you click Restart, hold down the Command+R key and don’t release it even when you see the boot animation. You will boot into recovery mode where you will see a window showing Mac utilities.
On this screen, go to Utilities>Terminal from the menu bar. In the Terminal, enter the following command;
csrutil disable
This will disable System Integrity Protection. Boot normally and run TouchBarDisabler. Your Touch Bar is now properly disabled. If you’re unfamiliar with what System Integrity Protection is, it’s a layer of security that Apple applies to important system files. It prevents modifications from being made to these files. This means you can’t accidentally delete an important file and malicious apps will not be able to infect them too easily. If disabling the Touch Bar is critically important, this is the compromise you have to make.
