Change Mac Time Machine Default Backup Time Interval Using TimeMachineScheduler
Mac OS X native backup utility, namely Time Machine, offers the easiest solution to backup data on external storage mediums and Time Capsules, but doesn’t allow changing the default backup time interval. If you’re looking for an application that can replace hourly backup schedule with custom backup time interval, TimeMachineScheduler is what you probably need. It’s a standalone application that lets you disable the Time Machine default backup interval function, and replace it with user-defined backup schedule settings without having to fiddle around with com.apple.backupd-auto.plist. You can set backup interval from 1 to 12 hours, and skip the backup operation within the specified time range.
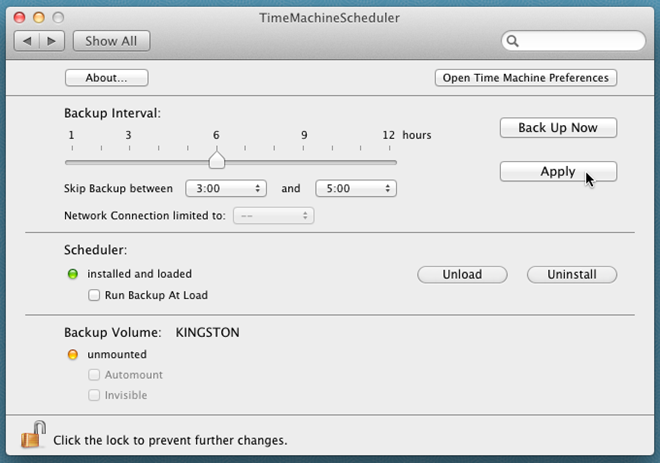
TimeMachineScheduler installs itself as a System Preference pane. Before you set the backup schedule, it’s recommended to completely disable the Time Machine. Once done, select TimeMachineScheduler from System Preferences and from Scheduler section, click Install. This will start the installation of backup scheduler. After the process is finished, you can change Backup Interval settings including both default interval and skip backup time.

First off, set the backup interval time from the slider and then specify the time when you don’t want to perform the backup operation. For instance, if you want to run backup after every 6 hour except between 3 AM and 5 AM, move the slider to 6 and then specify the time range. The application lets you hide the backup volume as well as enable auto mount option for specified Backup Volume. To change these settings, first plug in the backup drive and then launch the TimeMachineScheduler to enable/disable Automount and Invisible options.
It works on Mac 10.5 and higher.
