Actotracker Auto-Records A History Of All Activity On Your Mac
If you’ve ever come to work on a Monday and wondered what were you doing on Friday, you’re not alone. You might also have suddenly drawn a blank while working on multiple tasks, and completely forgotten what it was that you were doing. Worst still, you might have spent a considerable amount of time looking for a file or folder, only to discover that you’ve lost it again because you forgetfully closed everything. Actotracker is a free Mac app that built for keeping a record of all your activity on your Mac. It tracks wherever you go, whatever app you use, and which URLs you visit. It can also takes screenshots of apps’ states. Furthermore, you can add notes and also manually specify apps or places that Actotracker should mark. Your history is searchable and can be filtered by day, week, month, or app.
Actotracker is still in Beta, so expect a few bugs and lag. Not all of its features are working right and if you have trouble with any of them, quit and re-launch the app. We tested the app on OS X 10.8.2 and it took the app a while to start automatically recording our activity.
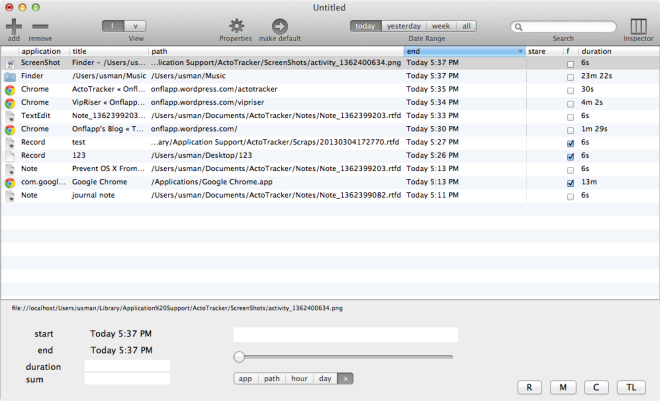
With Actotracker running, apps that you use as well as files and folders that you open start appearing as locations (paths or URLs) in its interface. The app records how long the app/file was used, and when did you last stop using it. This is all assuming that you’ve set it to monitor everything automatically. If the app doesn’t start recording the URLs you visit in your default browser or the files and folders you open in Preview and Finder, you can always add them manually.

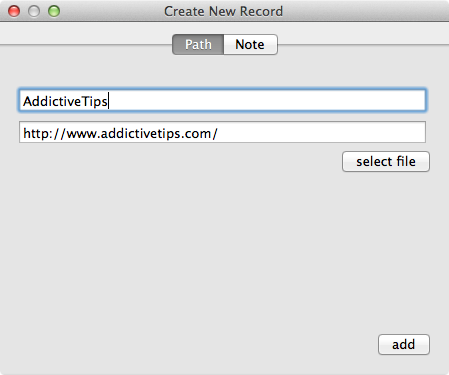
Click the plus sign at the top, drag & drop the path to a file or folder, or a URL in the ‘Select File’ field. Selecting a location via the file open dialog is rather buggy and drag & drop is the best way to add anything to it. Type in a title for the entry, and click ‘Add’.

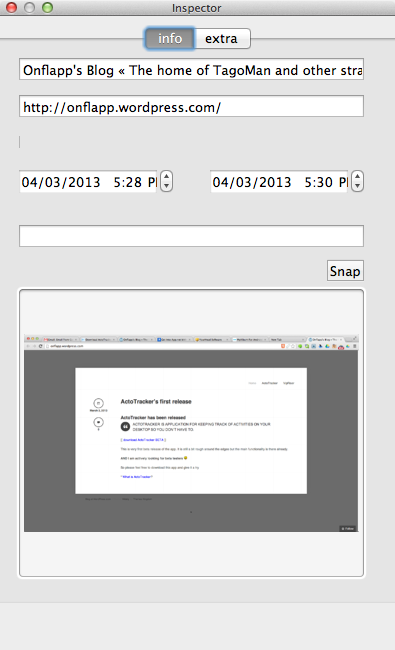
To inspect an item recorded by Actotracker, select it and click the ‘Inspector’ button at the top-right. A new window will open with the title and URL/path of the bookmark. Any screenshots that have been recorded will appear here.

Speaking of screenshots, you can enable them by going to the app’s preferences and selecting the ‘take screenshots’ option under the ‘Settings’ tab. This feature is a little buggy at the moment, so if you ever feel capturing a screenshot is important, open an item in the Inspector and click the ‘Snap’ button to capture it yourself. You will have to navigate to the app/file and take it manually using OS X’s native tool.
Clicking an entry in Actotracker will open it, letting you access it easily without having to remember things or selecting them from history sections of different applications. If it’s a file, it will be opened just the way it opens from Finder; if it is a URL, it will open in your default browser. To make it easier to track your history, you can add tags to the items as well. Select an item and click ‘Properties’ just above it. Enter tags and any exceptions that should be made (you can filter out what you want to ignore), and you’re good to go.
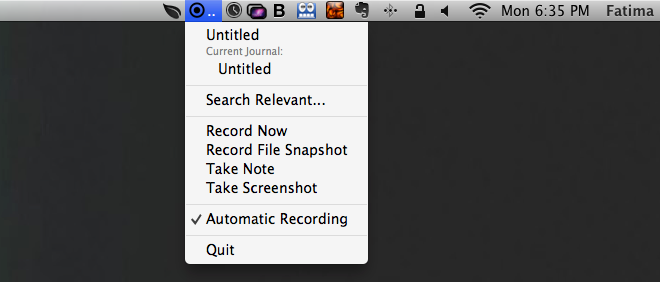
You can toggle Actotracker’s Automatic Recording mode from its Menu Bar icon. You can also start a recording by clicking the ‘Record Now’ option, or force the app to take a screenshot by clicking ‘Take Screenshot’.

The app is great in concept, but due to its several bugs, it will likely require considerable patience on your part to use it regularly. Though it is in active development, and you can help speed up the bug finding and fixing process by volunteering to be a beta tester.

Many thanks for some great comments.
Regarding the automatic recording:
ActoTracker tries to keep the impact of recording process as negligible as possible (consider what would happen if every change would end up in a journal) ActoTracker considers some changes to be more important then others. Therefore it takes time for journal entries to appear for the first time, especially if you just start recording.