How to use BlueMail on a Chromebook
BlueMail is a versatile and stylish email application available for free. Developed by Blix, it offers the convenience of managing an unlimited number of email accounts from one place. For those utilizing Chrome OS who require an efficient email client, BlueMail stands out as a commendable option. This guide will walk you through setting up BlueMail on your system.

How to Enable Linux on Your Chromebook
For Chromebook users with support for Linux apps, tapping into the capabilities of Linux on Chrome OS is achievable through a series of simple steps. Start by accessing your device’s settings menu: click on the clock on your taskbar, then on the gear icon to open the Chrome OS settings.
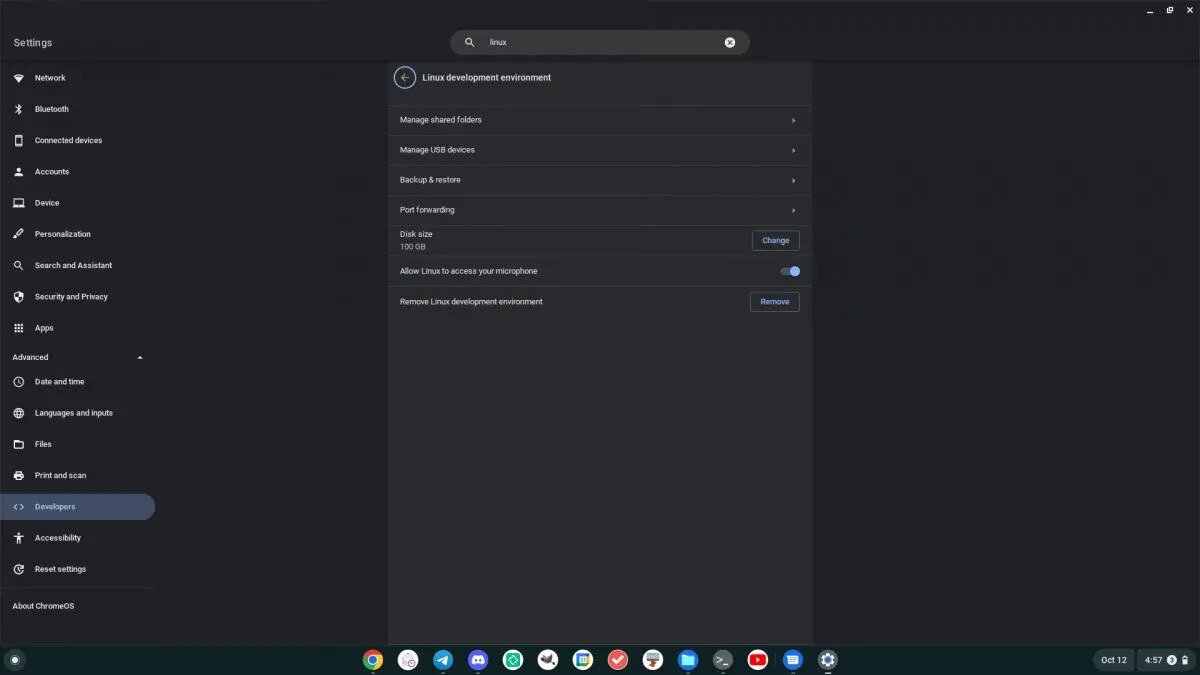
Within the settings, proceed to the “Advanced” section by selecting the down arrow next to it. This action unveils additional settings, including those for “Developers.”
Navigate to the “Developers” section to explore Linux options. Find and select the “Linux development environment.” Click on the “Turn on” button to commence the Linux LXC container setup, facilitating the operation of Linux apps on Chrome OS.
After enabling Linux, access the Chrome OS launcher. Search for and initiate the “Terminal” application. Once in the terminal, there’s no need to search for “Penguin”; opening the terminal directly grants access to the Linux command-line interface.
Updating and upgrading your Linux container is vital to secure the latest software versions. Begin with the update command:
sudo apt updateThis command refreshes your package lists and identifies available software updates. Then, proceed with the upgrade command to update your packages, which might take some time:
sudo apt upgrade -y
Following these updates, your Chromebook is prepared for installing applications like BlueMail, enhancing its functionality.
How to Install BlueMail – DEB
Installing BlueMail via a DEB package from the official website is straightforward. Open a Terminal by searching for “Terminal” in the Chrome OS app menu.
With the terminal open, initiate the download of the BlueMail DEB package using the wget command:
wget https://download.bluemail.me/BlueMail/deb/BlueMail.deb
Once downloaded, install BlueMail on your system with the apt install command:
sudo apt install ./BlueMail.deb
The installation process is typically swift. Upon completion, BlueMail is accessible from the “Linux Apps” section in the Chrome OS app menu.
How to Install BlueMail – Flatpak
Another way to install BlueMail on Chrome OS is via the Flatpak package. To start, launch a terminal and select “Penguin.” Then, use the apt install command to set up the “flatpak” package.
sudo apt install flatpak
With the “flatpak” package installed, you’ll need to set up the Flathub app store on your system. This app store makes it possible to install apps like BlueMail via Flatpak. To enable Flathub, run the command below.
flatpak --user remote-add --if-not-exists flathub https://dl.flathub.org/repo/flathub.flatpakrepo
After enabling the Flathub app store, you’ll be able to install the latest version of BlueMail on your Chromebook via the Flathub app store.
flatpak install flathub net.blix.BlueMail
When you’ve finished installing BlueMail, you’ll be able to access it in the “Linux Apps” directory in your Chromebook app menu.
How to Set Up BlueMail
To set up BlueMail, start by launching it from the “Linux Apps” folder in the Chrome OS app menu. Once it is open, find the “Continue” button on the start page, and select it with the mouse.
You’ll now need to add an email account. In the “Add Account” text box, enter your email. Common web-based email services are supported like Gmail, Hotmail, Outlook, etc.
After filling out your email address, select the “Sign in” button. When you select the “Sign in” button, you’ll be prompted to enter the password associated with your email account.
Once your email account password is entered into BlueMail, the application will automatically detect your email service provider’s connection settings. Then, it’ll launch BlueMail with your account connected.
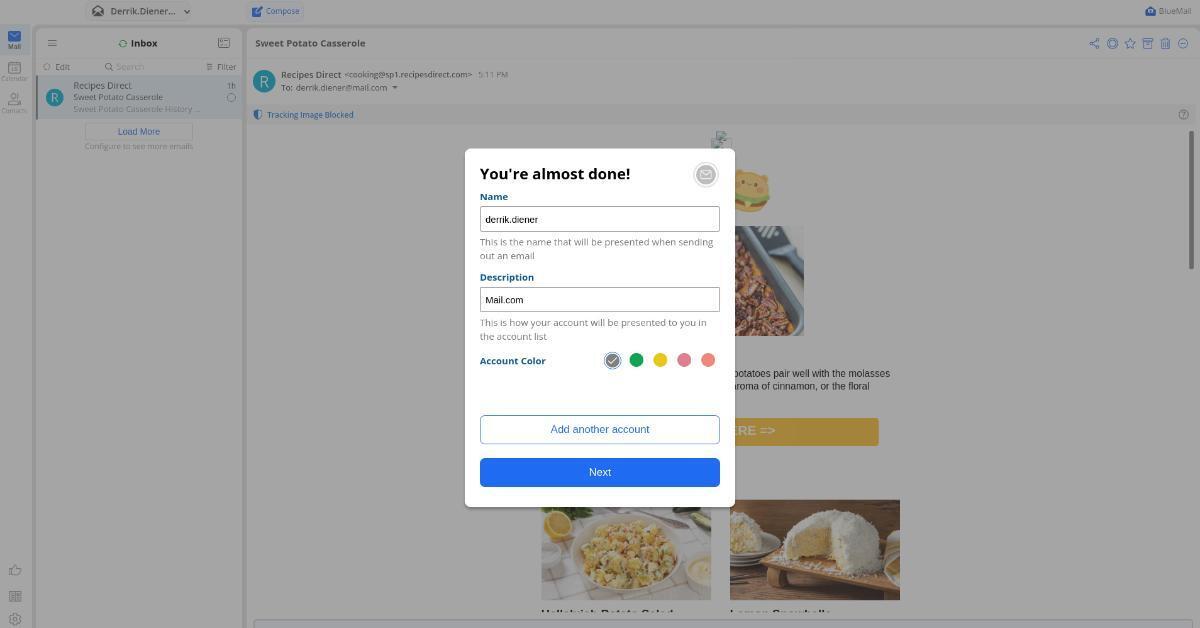
After logging into BlueMail, you’ll see “You’re almost done!,” followed by an “Add another account” button. If you wish to add additional email accounts to your BlueMail app on Chrome OS, select this button. Otherwise, click the “Next” button to move on.

With all of your email accounts loaded into BlueMail, your email will load. From here, select “Inbox” to access your emails. To write an email, select the “Compose” button. Additionally, you can access your Calendar by selecting “Calendar,” and “Contacts” to access your email contacts.
