How to sync your MEGA files on a Chromebook
The MEGA sync platform supports Windows, Mac OS, and Linux. However, officially the service doesn’t seem to support Chrome OS. Thankfully, Chrome OS supports Linux via the “Linux development environment,” so it is possible to get the MEGA sync client working.
In this guide, we’ll show you how to download and set up the MEGA sync client, and use it on Chrome OS. To start, ensure your Chromebook supports virtualization technology.

How to enable Linux on your Chromebook
Before you can use the Linux MEGA sync client to keep your files in sync with the MEGA cloud, you must enable Linux support. To enable Linux support on your Chromebook, start by selecting the clock icon in the Chrome OS dash.
After clicking on the clock in the Chrome OS dash, find the gear icon and click on it. Selecting this icon will load up the Chrome OS settings area. From here, look for the “Advanced” section, and click on the arrow to expand its options.
Inside the “Advanced” area, find “Developers” and click on it with the mouse. When you’ve selected the “Developers” section, look for “Linux Development Environment,” and click on the “turn on” button. When you select this button, Chrome OS will download a Debian Linux container for you to use.
In addition to downloading a Debian Linux container, Chrome OS will also download an app with the name “Terminal”. When the “Terminal” app is done downloading, it will open up on the Chrome OS desktop. Find “penguin,” in the terminal, and select it with the mouse.
When you select the “penguin,” button, the Chrome OS terminal app will give you command line access to the Debian Linux container. Use the apt update command in the terminal to check for any software updates.
sudo apt update
After checking for software updates in the Chrome OS container, you’ll need to install the available updates. You can quickly and easily install all software updates in the Chrome OS Debian container by entering the following apt upgrade command.
sudo apt upgrade -y
Once all of the software updates are installed on the Chrome OS Debian Linux container, it is ready to use.
How to install MEGA on Chrome OS
There are a few ways of getting the MEGA app working on Chrome OS. The best way to install the software is via the downloadable DEB from the official website. To start the installation process, open up the Chrome OS terminal. You can open up the terminal by clicking on “Terminal” in the Chrome OS app menu.
Once the Terminal app is open, find the “penguin” section, and click on it to access the terminal interface. Then, use the wget download command to download the latest release of the MEGA Sync DEB package.
wget https://mega.nz/linux/repo/Debian_testing/amd64/megasync-Debian_testing_amd64.deb
After downloading the MEGA Sync DEB package to your Chromebook via the wget command, you can install it on Chrome OS using the apt install command below.
sudo apt install ./megasync-Debian_testing_amd64.deb
Alongside setting up the MEGA Sync application on Chrome OS, you’ll want to set up MEGA Sync Thunar integration. This integration will make it easier to tell if your file is being synced to the MEGA cloud.
wget https://mega.nz/linux/repo/Debian_testing/amd64/thunar-megasync-Debian_testing_amd64.deb
Once the DEB package is downloaded to your Chromebook, you can install it (along with the Thunar file manager) using the apt install command.
sudo apt install ./thunar-megasync-Debian_testing_amd64.deb thunar
Once all packages are installed, open up the Chrome OS menu, search for “MEGA” in the “Linux Apps” menu, and launch it.
How to set up MEGA on Chrome OS
To set up MEGA on your Chromebook, start by launching the app. Once it’s launched, you can log into your account. Alternatively, if you do not have an account to use with the MEGA sync service, please go to the official website and create an account.
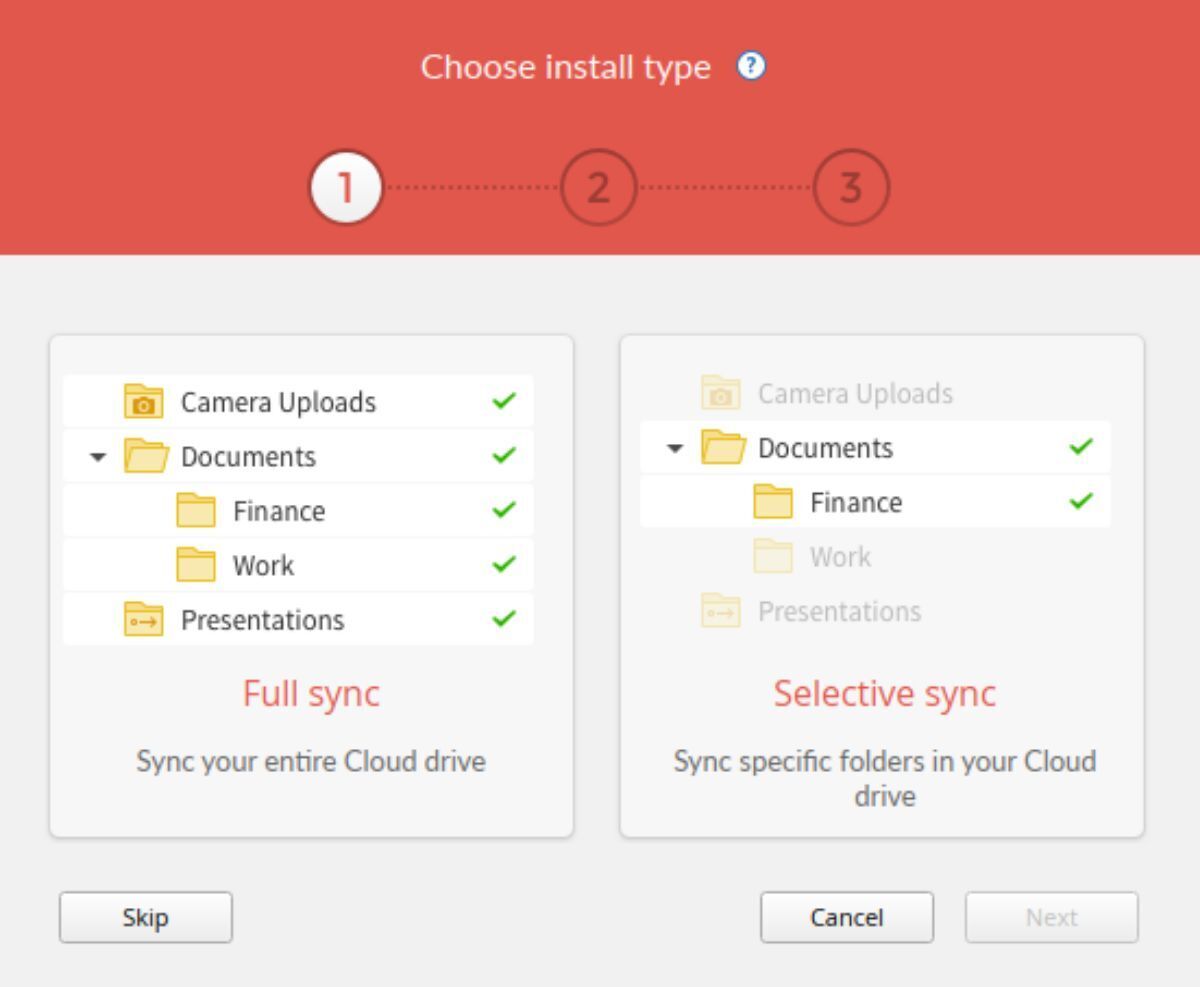
Once you’ve logged in, you’ll be asked to “Choose install type.” You can select either “Full sync,” which will allow you to sync everything, or “Selective sync,” which allows you to only sync what you choose.
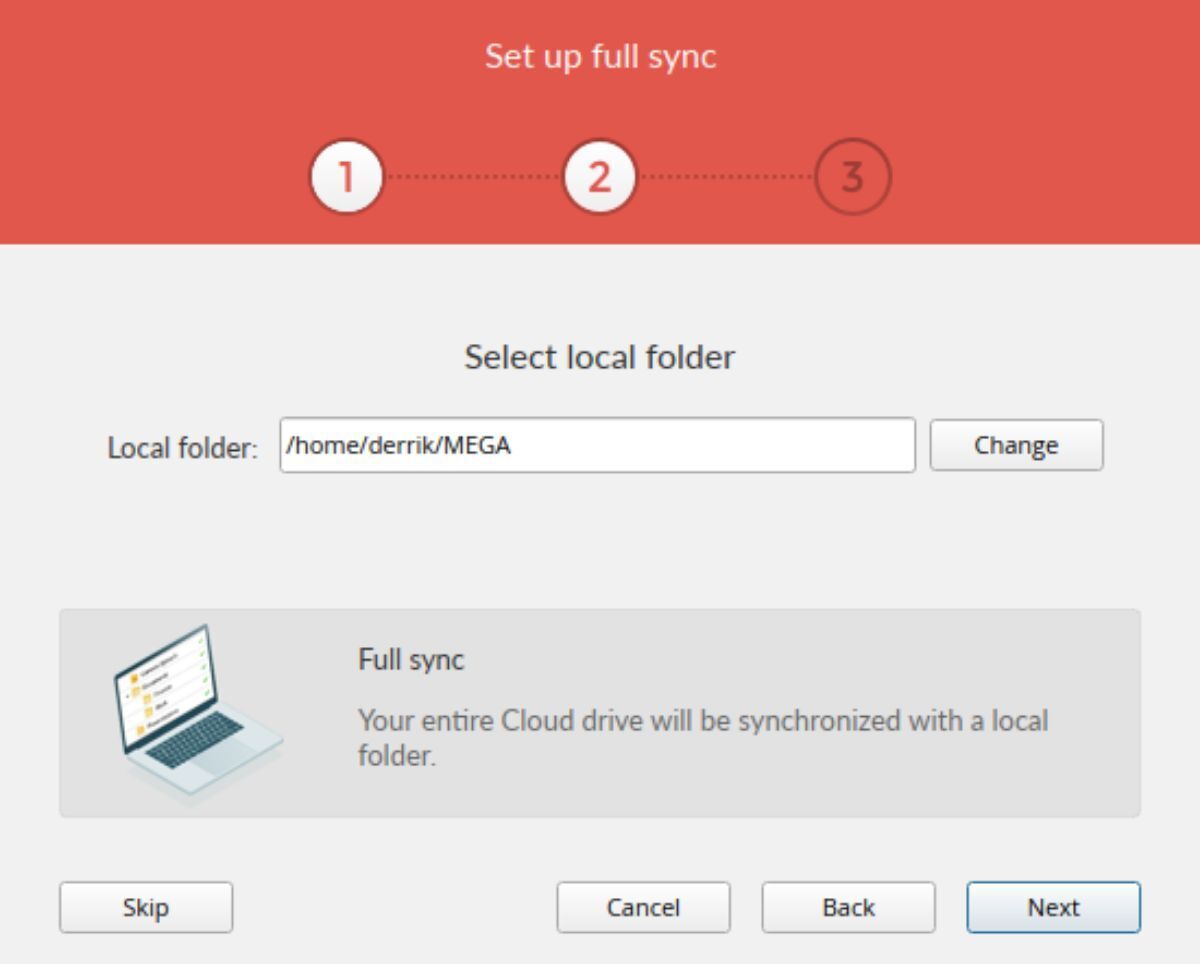
When you’ve made your sync choice, you’ll be asked where to store your “Local folder.” By default, this goes to the Linux home folder. Leave it as default. Keep in mind, on your Chromebook, you’ll be able to access this folder via the Chrome OS “Files” app in the “Linux files” folder.
After setting up your “Local” folder, find the “Thunar” app in the “Linux apps” folder in the Chrome OS app menu. Once the Thunar app is open, locate the “MEGA” folder, and select it with the mouse.
Use the Thunar file manager to place files to sync with your MEGA account. Alternatively, place items in the “MEGA” folder inside of the “Linux files” directory using the Chrome OS “Files” app.
