How to Edit MP3 Tags on Chromebook: Quick Guide
If you have MP3 files on your Chromebook that you need to add tags to, it might disappoint you to find out that there aren’t any good native Mp3 tag editors for Chrome OS. Thankfully, Chrome OS can run Linux apps. In this guide, we’ll show you how you can edit MP3 tags on a Chromebook using Picard MusicBrainz.
Enable Linux support on Chrome OS
It is possible to edit the tags of your MP3 files, however, you must install the Picard MusicBrainz app. To install this application, enable Linux support on your Chrome OS system.
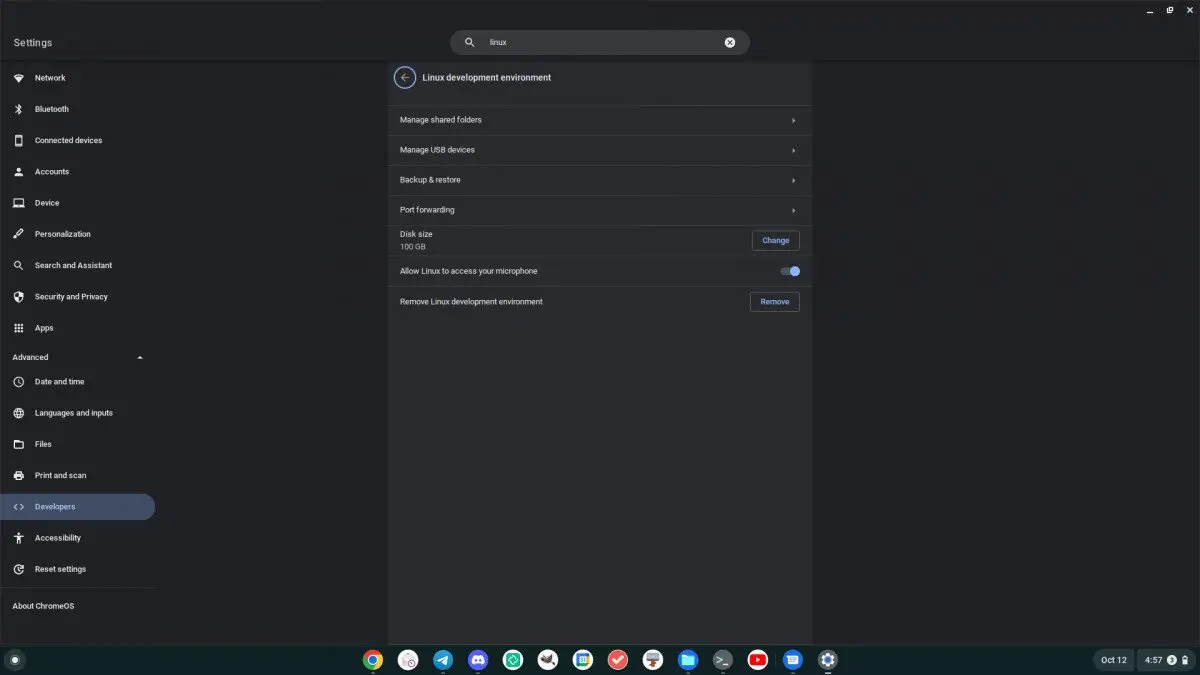
To enable Linux support on a Chromebook, start by opening up the “Settings” area. Once the “Settings” area is open, find the “Advanced” section, and click on it with the mouse to expand the advanced options inside of the “Advanced” options area, scroll down and locate “Developers”. After finding “Developers,” select it with the mouse to access the “Developers” area. Then find the “Linux development environment” area and select the “turn on” button.
Once you select the “Turn on” button, Chrome OS will download the Linux container environment for you to run Linux apps on Chrome OS. It will also download the “Terminal” app on your Chrome OS PC.
Install Picard MusicBrainz on Chrome OS
Open up the “terminal” app in Chrome OS via the “app” menu. Once it is open, locate the “penguin” section, and click on it with the mouse. When you select the “penguin” option, it will load up the terminal for your Debian container.
Inside the terminal, run the apt update command. This command will refresh the software sources inside the Debian container.
sudo apt update
When the software sources are up to date, you can install any pending updates in the Linux container on your Chrome OS system with the apt upgrade command.
sudo apt upgrade
Now that the container is up to date, you can install the Picard MusicBrainz application on your Chrome OS system. Using the apt install command, setPicarde “picard” package on your Chromebook.
sudo apt install picard
Once the Picard application is installed on your Chromebook, it will appear in the “Linux apps” section as “MusicBrainz”. You can launch it from there to use the program on your Chromebook.
How to edit MP3 tags on a Chromebook
Editing MP3 tags with Picard MusicBrainz is, mostly, automatic. You won’t actually have to set the artist tag, the song tag, the album tag, etc. The reason none of these tags need to be set is that MusicBrainz can scan a song’s “acoustic ID,” which allows them to determine what the song is.
To use Picard MusicBrainz, open up the app in the Chrome OS app launcher. Then, follow the step-by-step instructions below.
Step 1: Launch the Google Chrome OS Files app. Once in the Files app, look to the left-hand sidebar. Click on the “Linux files” section. You can then add your MP3 files to the “Linux files” area so that Picard MusicBrainz can access them.
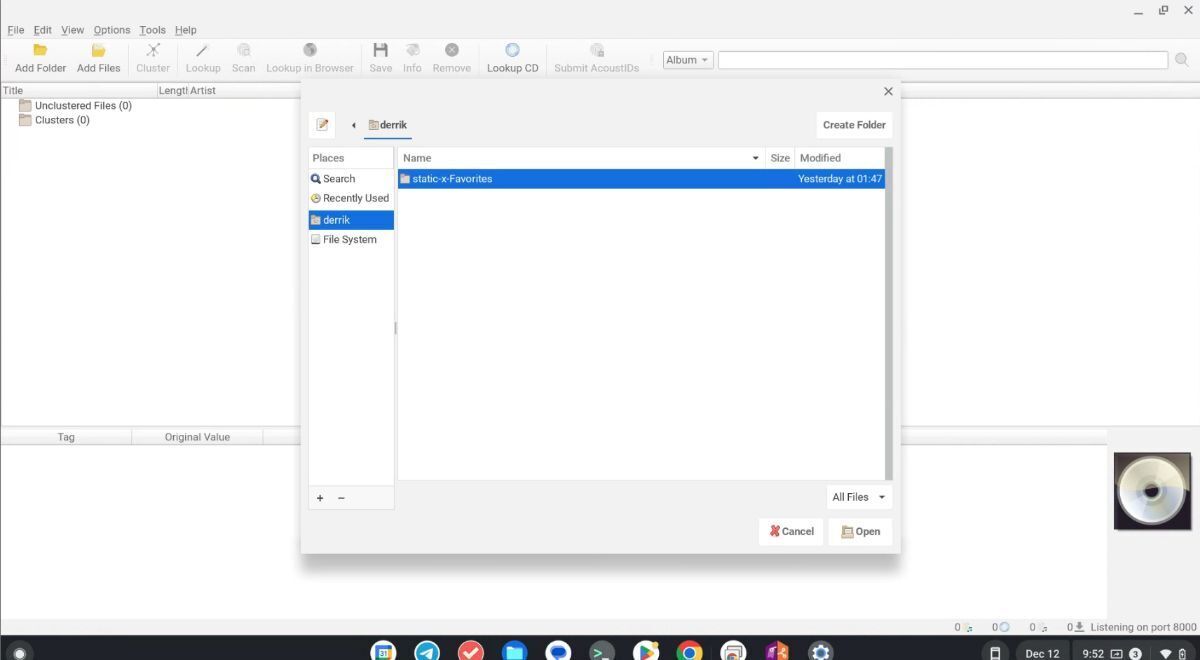
Step 2: Once your MP3 files are in the “Linux files” area, find the “Add Folder” button and click on it with the mouse. When the files are added to Picard, they should show up under “Unclustered Files”.
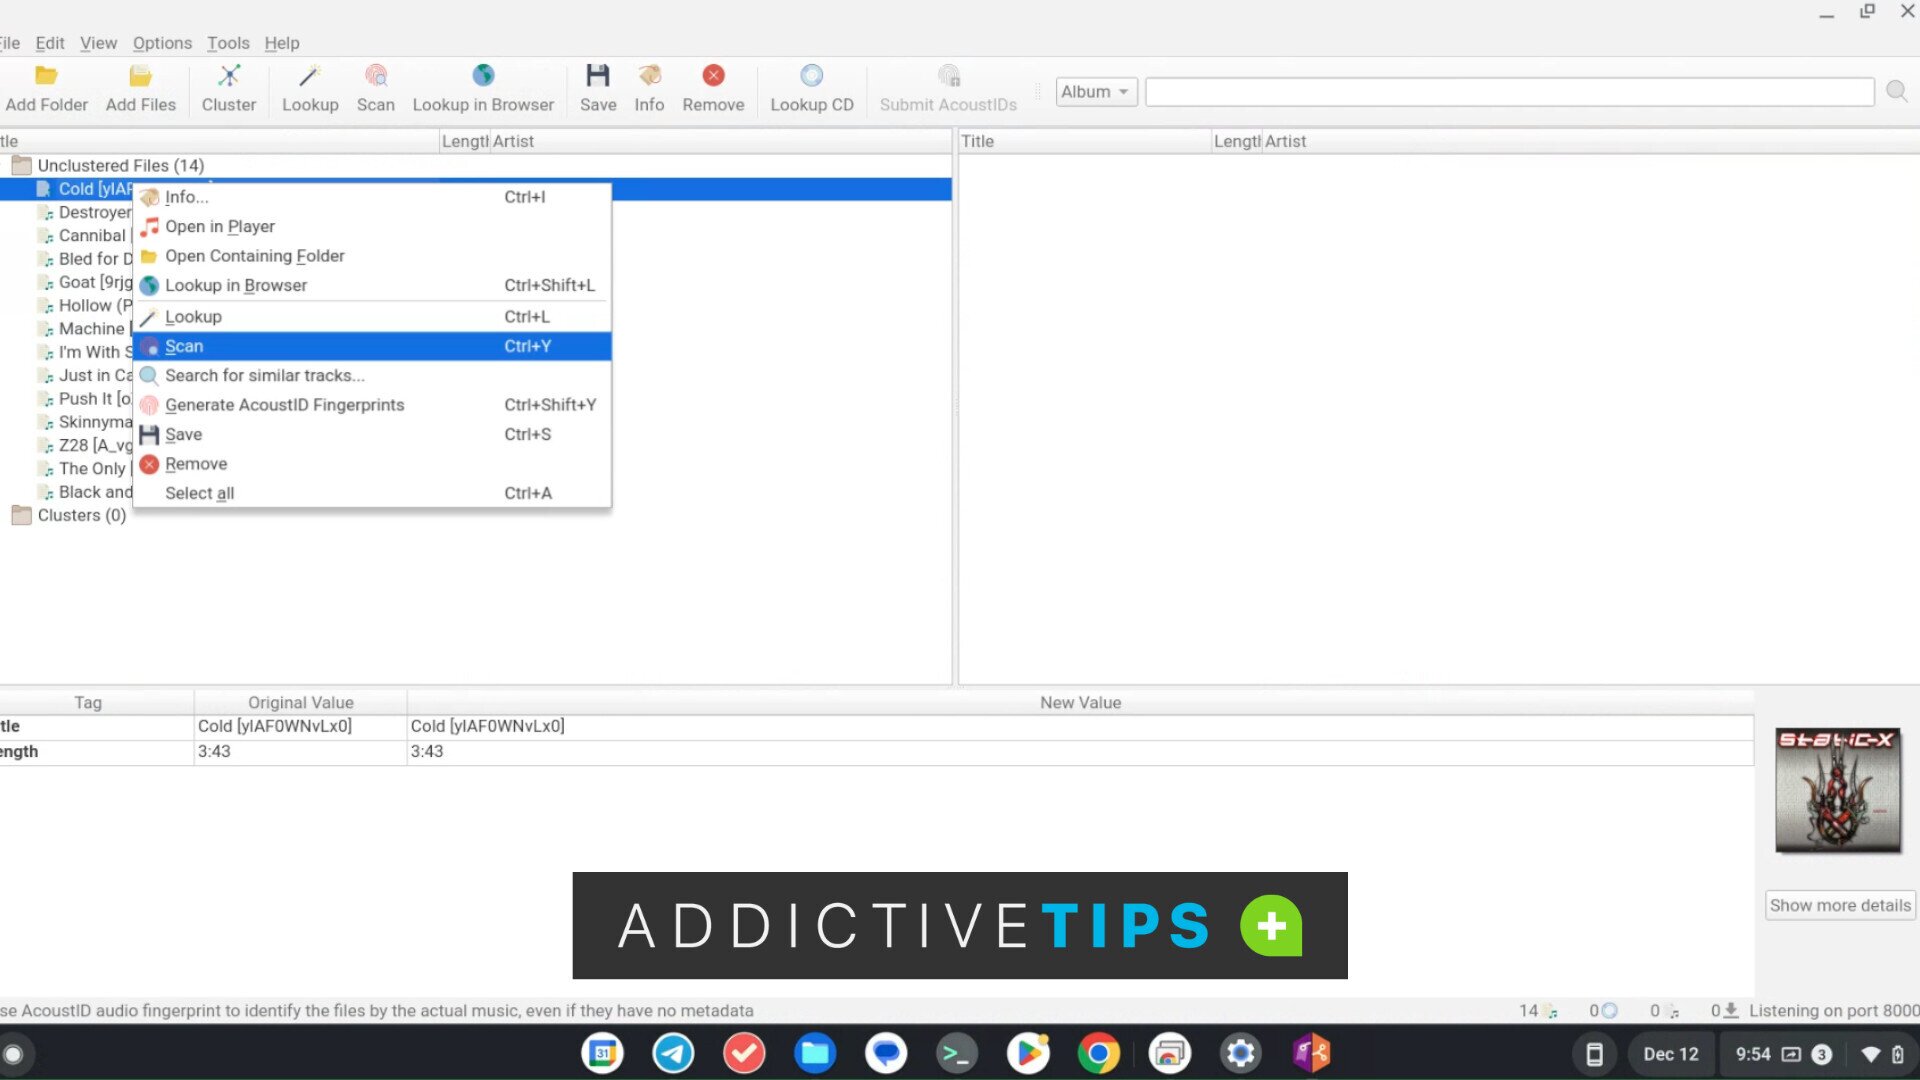
Step 3: Find the files in “Unclustered Files,” and press Ctrl + A to highlight all of them. After selecting all the files, right-click on them and find the “Scan” button, and click on it.
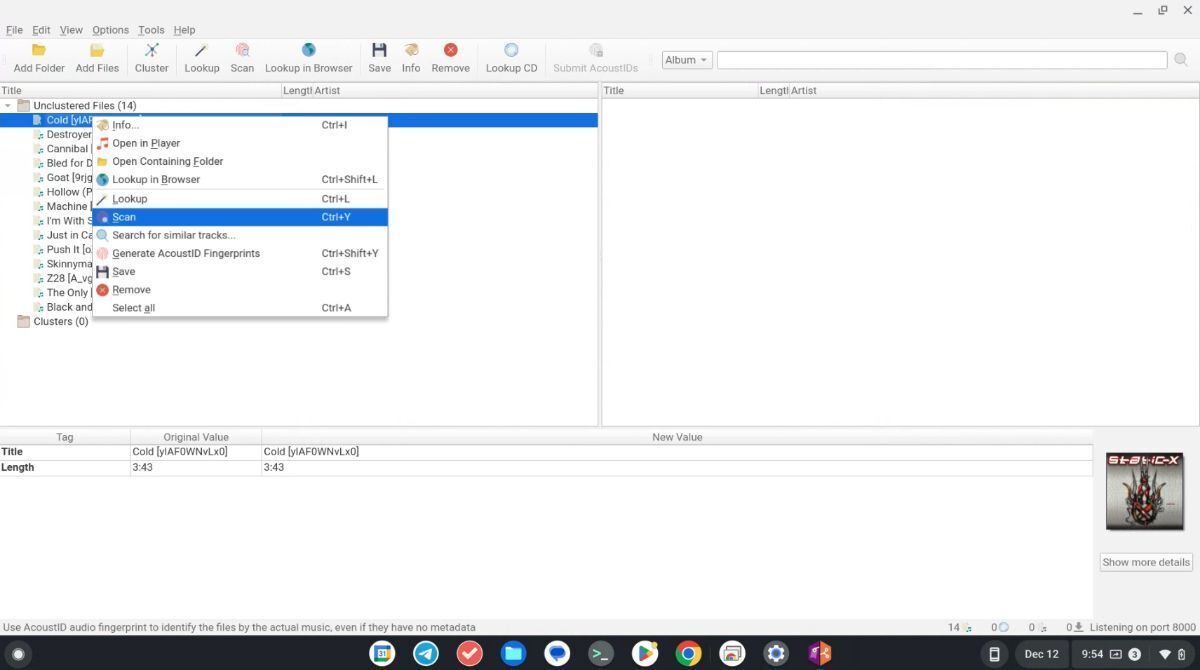
Selecting the “Scan” button will allow Picard MusicBrainz to look up your MP3 files and search for their “acoustic ID.”
Step 4: As your files are scanned in Picard MusicBrainz, they will show up in the right-hand pane with tags, album art, etc. If these matches are wrong, right-click on the individual file, and select “Search for similar tracks.” This option will allow you to browse for the correct tags.
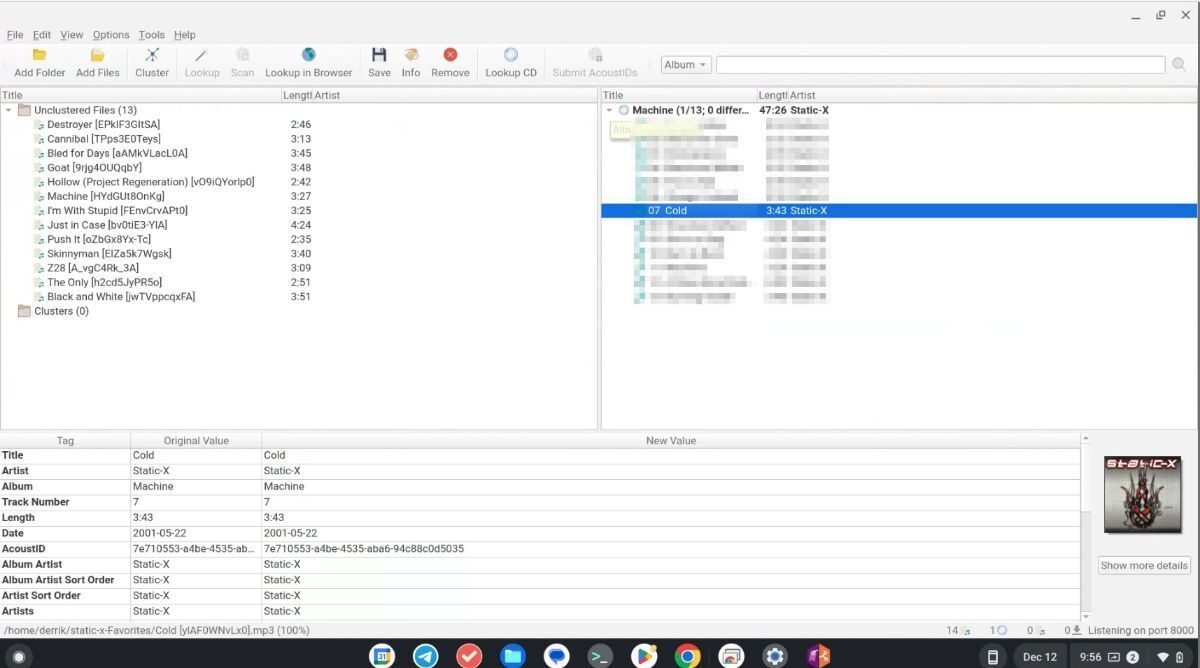
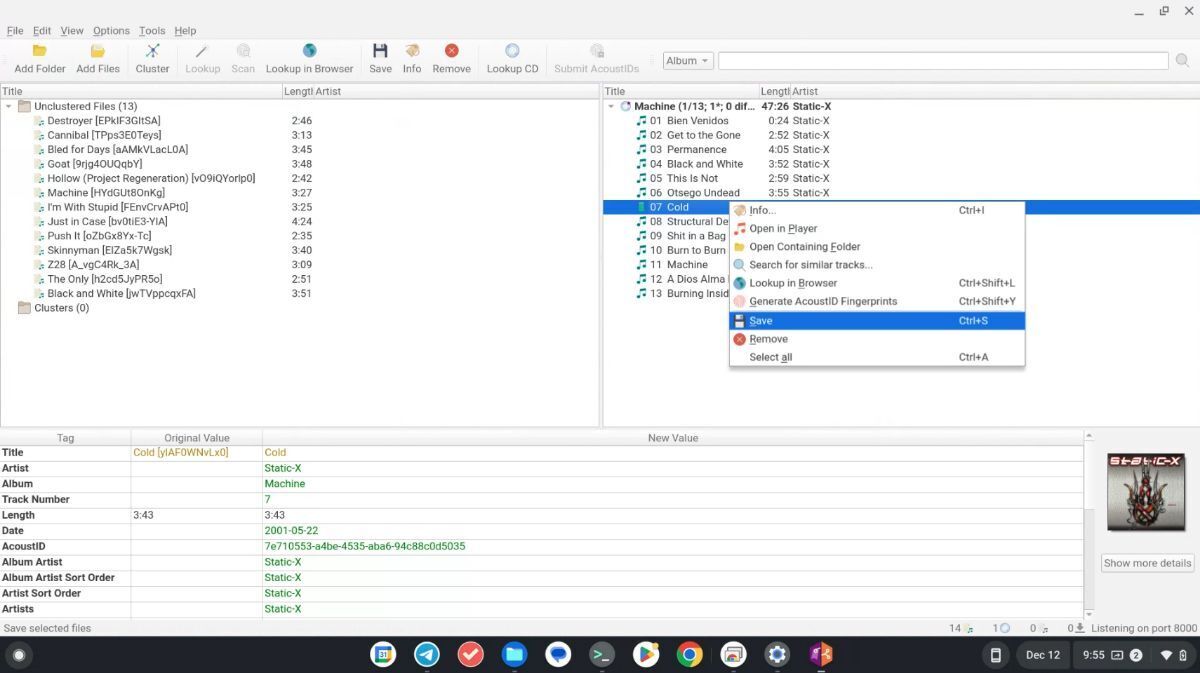
Step 5: Once all tags are correct, press Ctrl + A to select the files. After selecting the files in the right-hand pane in MusicBrainz, click the “Save” icon in the panel on the app. Selecting this button will save the tags to the MP3 files.
When your MP3 tags are saved, they’ll be ready for your favorite music player on Chrome OS. Enjoy!
Manually editing
MusicBrainz is incredibly effective at finding the correct tags for MP3 files. However, if you need to add tags manually, here’s how to do it. First, add the files via “Add Folder” or “Add Files”.
After adding the file(s) to MusicBrainz, select it under “Unclustered files.” When you select it, the bottom pane will show the file tags. Right-click on the bottom pane, then select the “add new tag” button. You can then manually add tags to your MP3 file.
