Block Google tracking in Chrome OS
Google Chrome OS is a useful operating system, however, it regularly violates its users’ privacy. If you want to enhance your privacy while using your Chromebook, you need to block Google’s tracking at the OS level with a custom DNS solution. Here’s how to do it.
How to create a NextDNS account
Blocking Google’s tracking in Google Chrome OS at the operating system level requires setting up DNS over HTTPS. To do that, you need a custom DNS system, and NextDNS is one of the best.
Why NextDNS? It allows users to block tracking at the DNS level, as well as other security features, such as parental control, and filtering out unsafe IP addresses, and advertisements. You’ll need to create a NextDNS account to use the service.
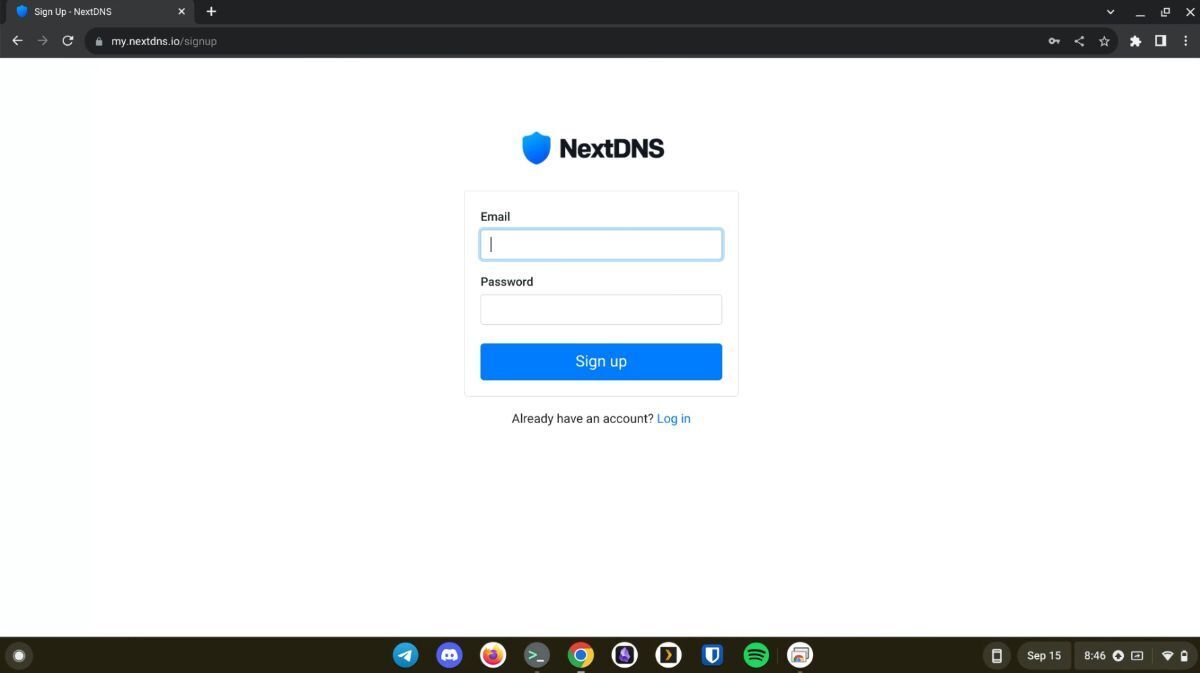
To create a NextDNS account, head over to the official website. Once there, click the “sign up” button. After selecting the “Sign up” button, create your new account. You’ll need an account to customize what NextDNS can do (enable tracking blocking, etc.)
How to set up your NextDNS to block Google tracking
Blocking Google’s tracking at the operating system level is done with DNS over HTTPS. However, even if you add the DNS over HTTPS URL to Chrome OS’s network settings, it won’t begin to work until you configure it.
After signing up for NextDNS, select the “Privacy” tab. Under “Privacy,” find “NextDNS Ads & and Trackers Blocklist,” and select the “Add a Blocklist” button. Clicking on this option will open up the various NextDNS lists available.
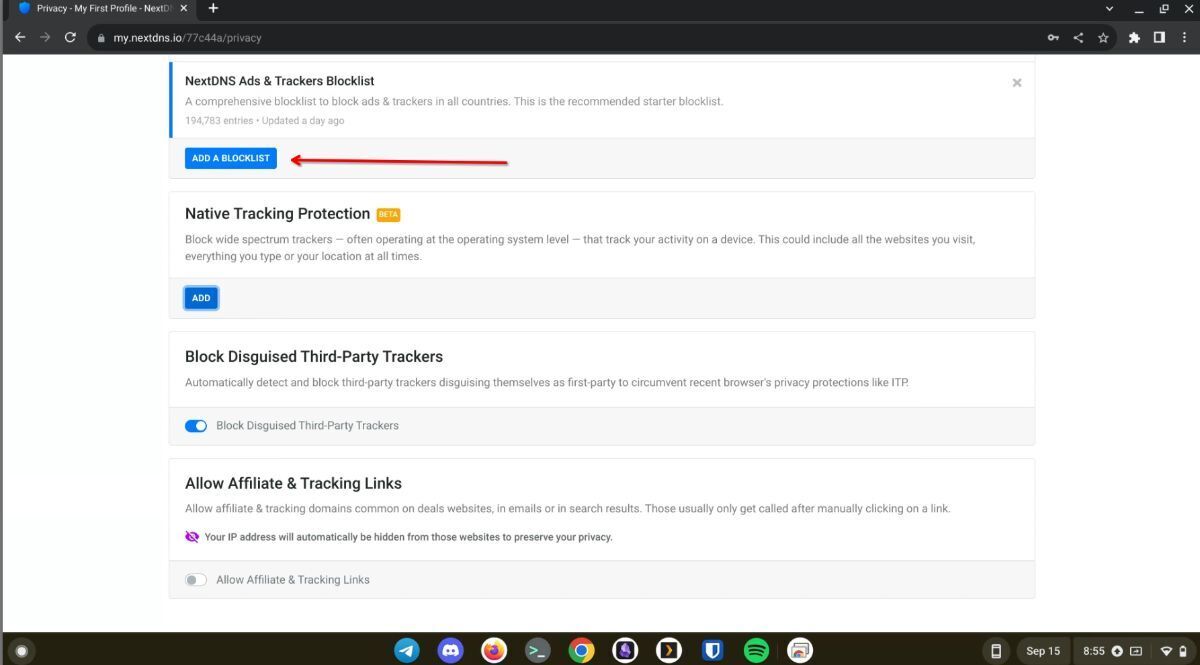
In the “Blocklists” area, NextDNS’s default blocklist is already enabled. However, this isn’t enough. Look through the blocklist and add “EasyPrivacy,” “notracking,” and “AdGuard Tracking Protection filter.”

Other Blocklists
Enabling the three tracking protection lists in NextDNS alone should be sufficient to enhance your privacy in Chrome OS. However, if you want more control over what you see online in Chrome OS, feel free to browse the blocklists and add as many filters to your NextDNS as you wish.
Pro-tip: as Google plans to make it much harder to block advertisements in Google Chrome, consider adding some blocklists. Doing this will enhance your privacy in Chrome OS, especially when using the Chrome browser.
Allow lists
While a lot of the usefulness of NextDNS is derived from its easy-to-use blocklists, you can also allow and block IPs over DNS manually. So, if you’re running into a situation where a website or service is being blocked by your NextDNS filters, you can manually add them to your “Allowlist.” Here’s how.
First, log into your NextDNS account in the browser. Then, find “Allowlist” and click on it. Once in the “Allowlist,” add a domain (or domains) to allow. Once these domains are added to your allowed list, they’ll be let through NextDNS.
Deny lists
In rare cases, NextDNS will allow harmful IP addresses through the filter. If this happens, you can manually block a domain. Here’s how. First, log into your NextDNS account. Then, find “Denylist”. Once you’ve loaded up the Denylist, you can add a domain to block through NextDNS. After adding a domain, NextDNS will immediately begin blocking it.
How to set up Chrome OS to block Google tracking at the OS level
To enable NextDNS inside of Chrome OS, you need to open up the “Settings” area. To do this, click on the clock in the Chrome OS panel. Then, select the gear icon to load up the Chrome OS “Settings” area.
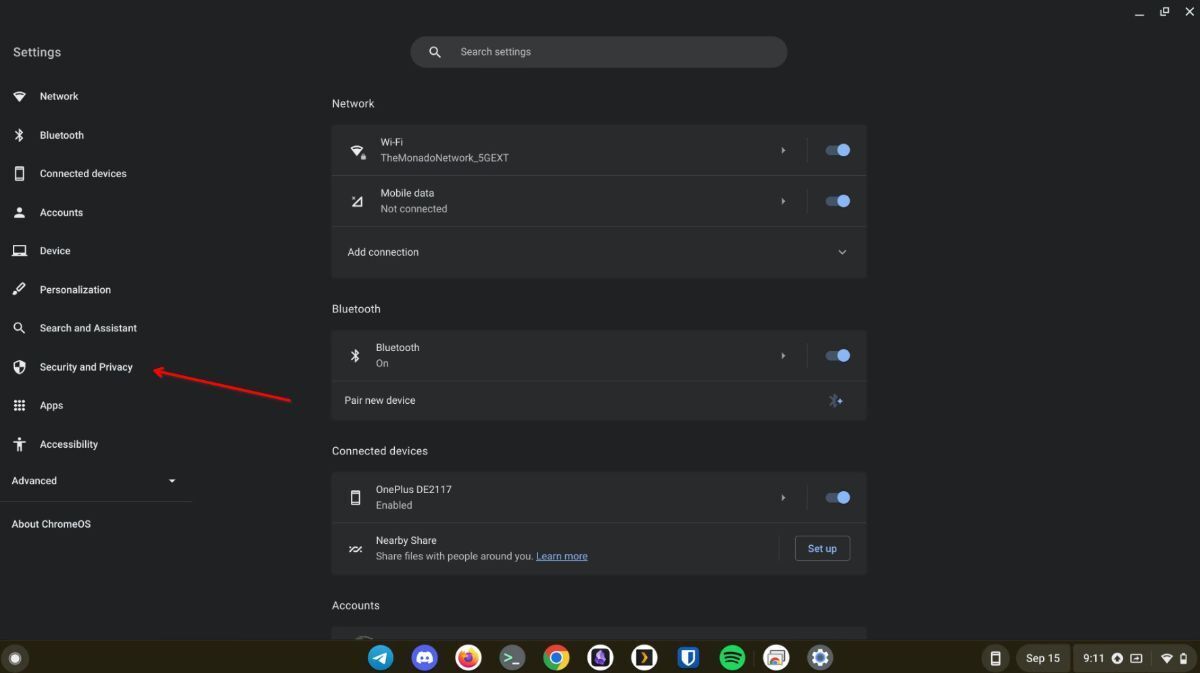
Once you’ve loaded up the Chrome OS “Settings” area, look to the sidebar, and select the “Security and Privacy” option. Click on “Security and Privacy” to load up those settings for Chrome OS.
When you’ve accessed the “Security and Privacy” area of Chrome OS “Settings,” scroll down and locate “Use secure DNS.” After you select this, set it to “Custom” in the drop-down menu.
Now that Chrome OS is set to use “Custom” in the “Use secure DNS” area, head back to your NextDNS dashboard. In the dashboard, find the “Setup” area, and then locate the “Endpoints” box.
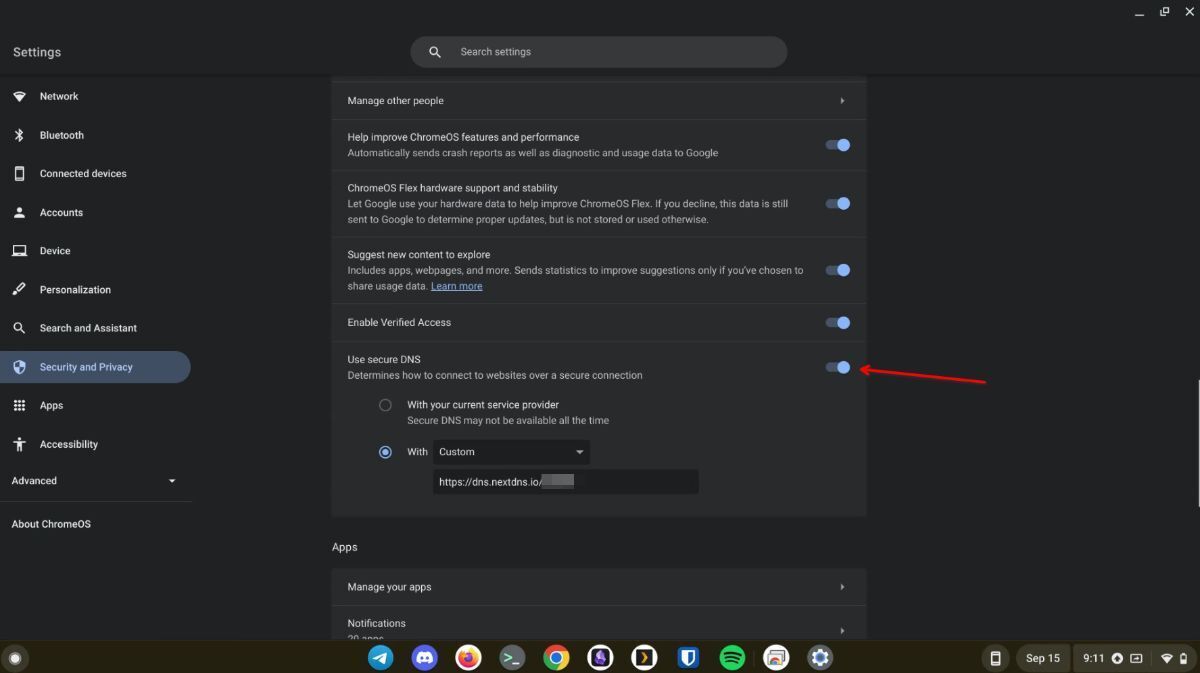
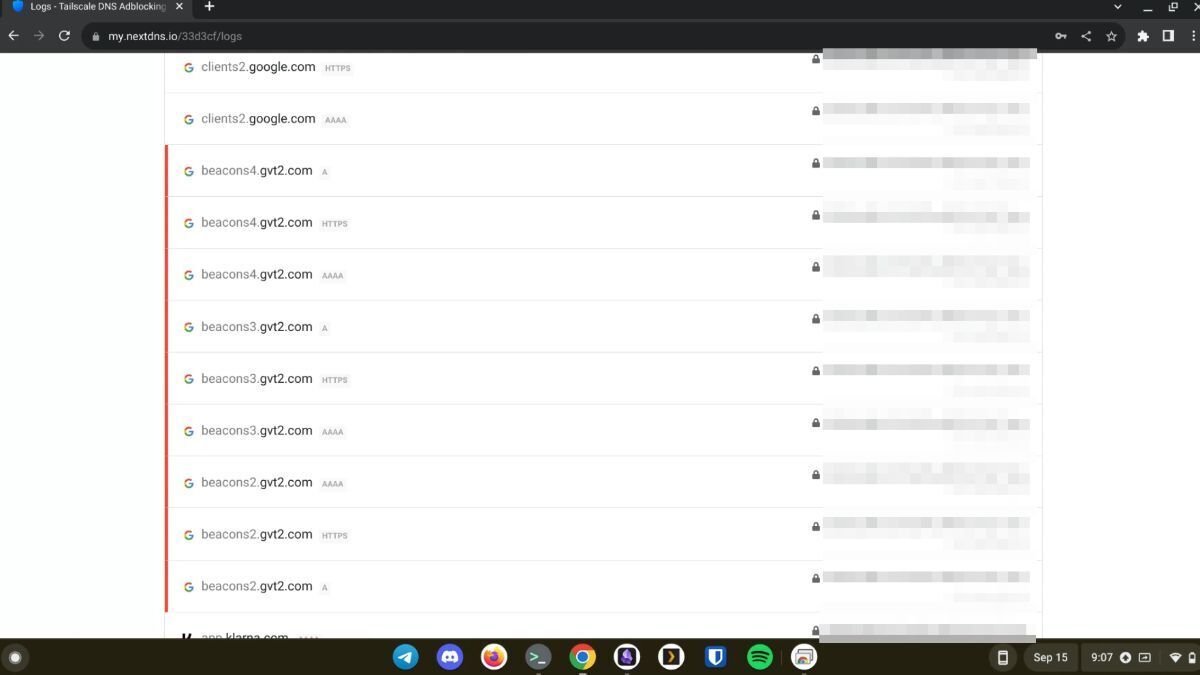
In the “Endpoints” box, find “DNS-over-HTTPS” and copy the URL to your clipboard. Then, go back to the Chrome OS settings, and paste the URL in. When you add the NextDNS URL to “Use secure DNS,” Chrome OS will begin using NextDNS as the default DNS provider, which will enable privacy tracking on your Chromebook.