How To Use White Balance In Google Photos
Google Photos has a new feature called ‘White balance’. This feature isn’t new in the sphere of photography or picture editing apps. Countless camera and photo editing apps have had this feature since ages. It is, however, new to Google Photos. The feature adjusts the color in a photo and gives it an even tone. Pictures taken in poor light have areas that are too dark or too bright. White balance fixes that problem. Here’s how to use white balance in Google Photos.
White balance in Google photos is only available on Android, for now. Google has said the feature will soon be added to Google Photos for iOS. To use White Balance in Google Photos, you need to first upgrade the Google Photos app to version 2.10.0.148909749.
Apply White Balance In Google Photos
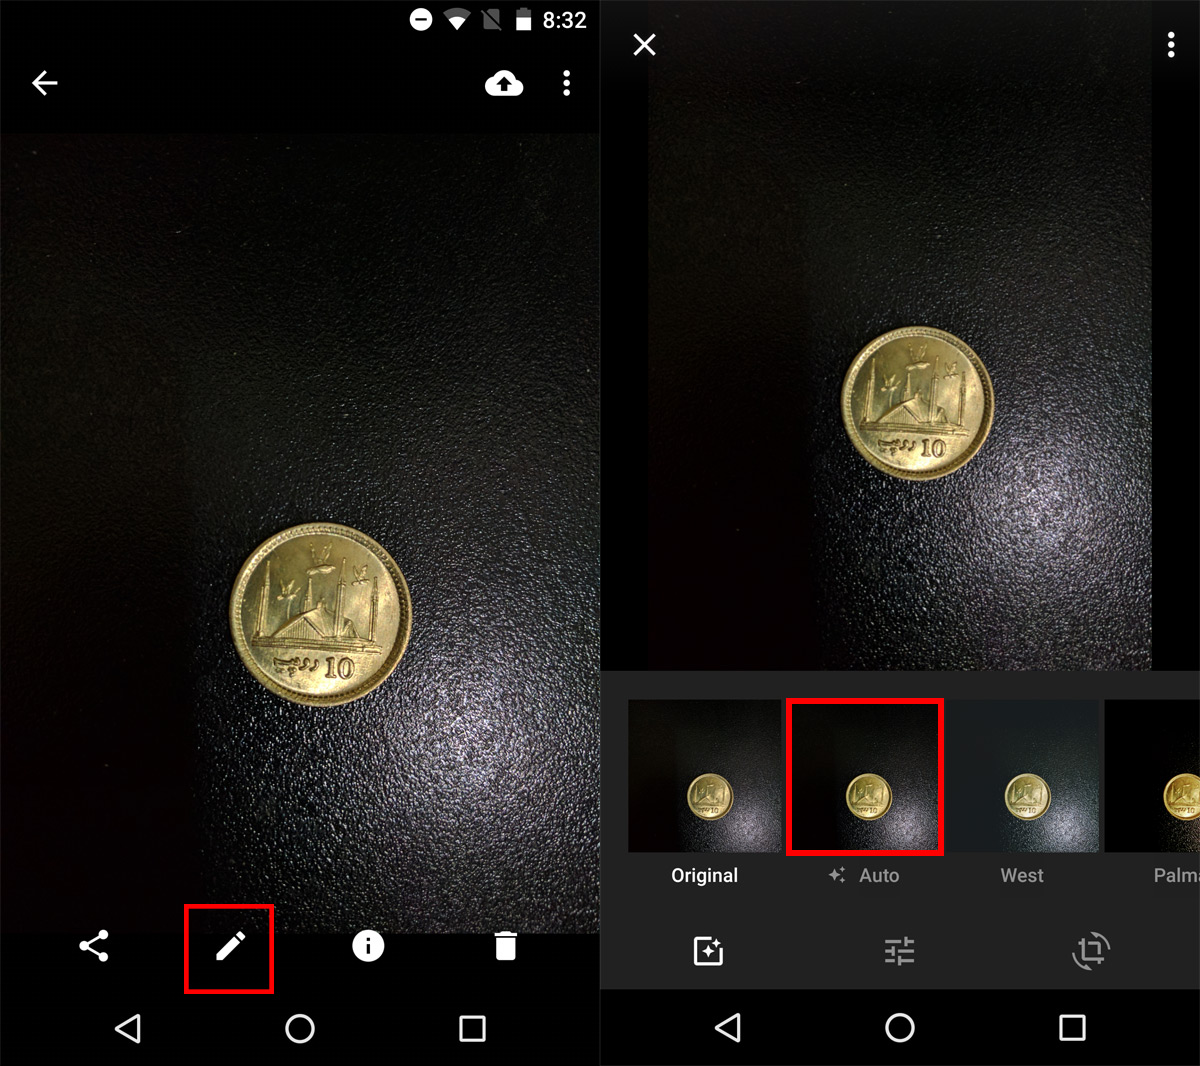
Open an image in Google Photos. Tap the edit button on the bottom bar. In edit mode, you see a row of filters that you can apply to an image at the bottom of the screen. These are mostly color filters much like those you see in Instagram. There is however, one filter that isn’t a color filter; Auto.
‘Auto’ applies color correction to the photo you’re editing. Prior to the update, this ‘Auto’ filter only corrected saturation and exposure. Now, it will apply white balance correction as well. The ‘Auto’ filter will simply apply these corrections to the photo.

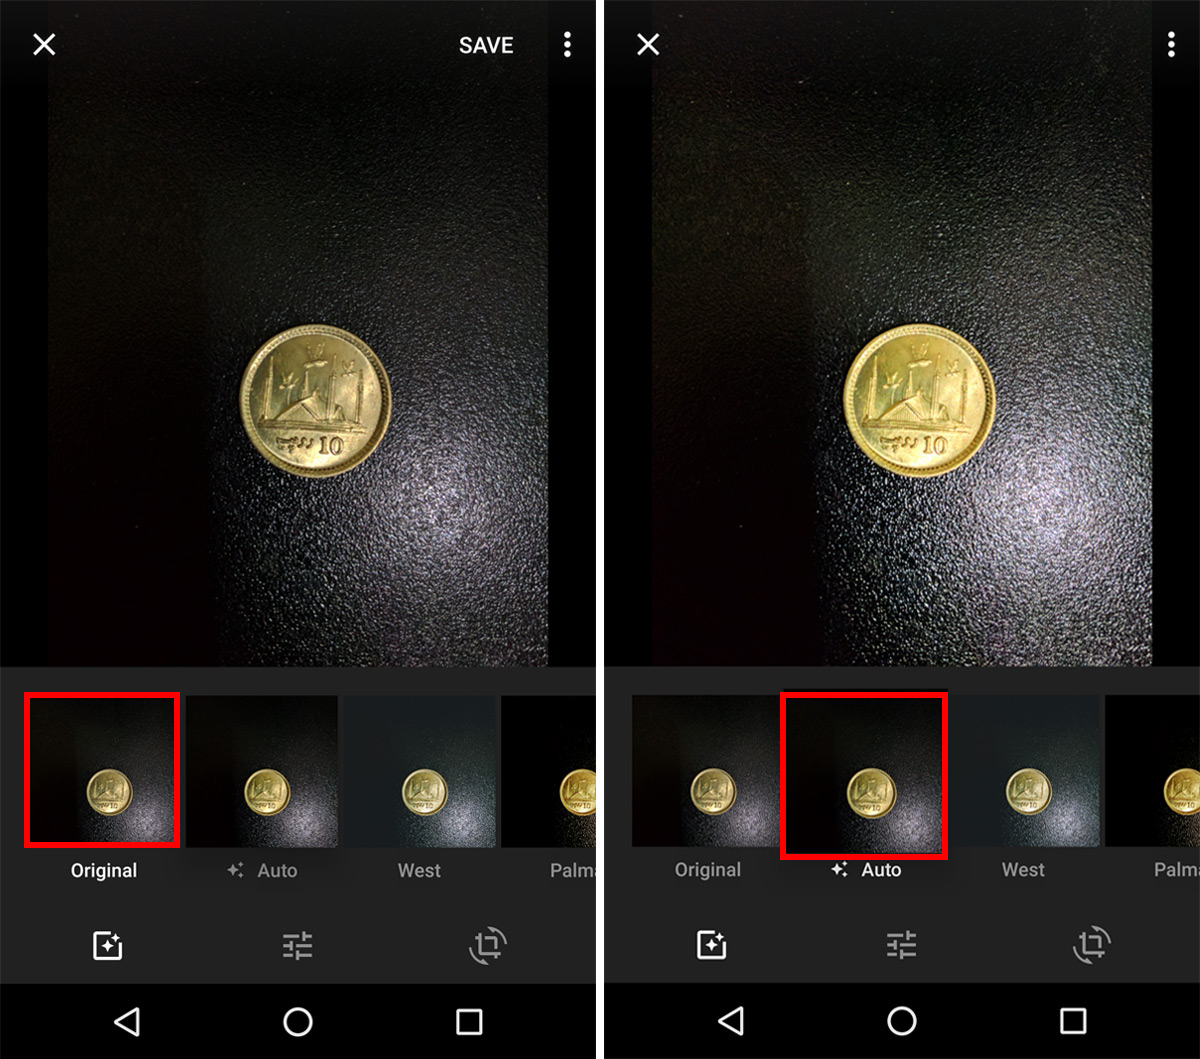
The other filters will apply their respective look to the photo, and also apply color corrections including white balance. If you want just the color corrections, white balance and all, select ‘Auto’.

Tap the ‘Save’ button when you’re done. The edit is made to the original photo. If you want to save the edited photo as a copy, tap the overflow button and select the ‘Save as copy’ option. Even if you save changes to the original photo, you will have the option to revert back to the original.
Remove White Balance In Google Photos
Not all corrections that Google Photos makes to an image makes it look better. To remove white balance from a photo that Google Photos has enhanced, select the ‘Original’ look. All ‘looks’ i.e. filters you apply to a photo will correct the white balance. There is no way to apply a look without white balance correction. You either have to stick to the original photo or go with the fully corrected version.
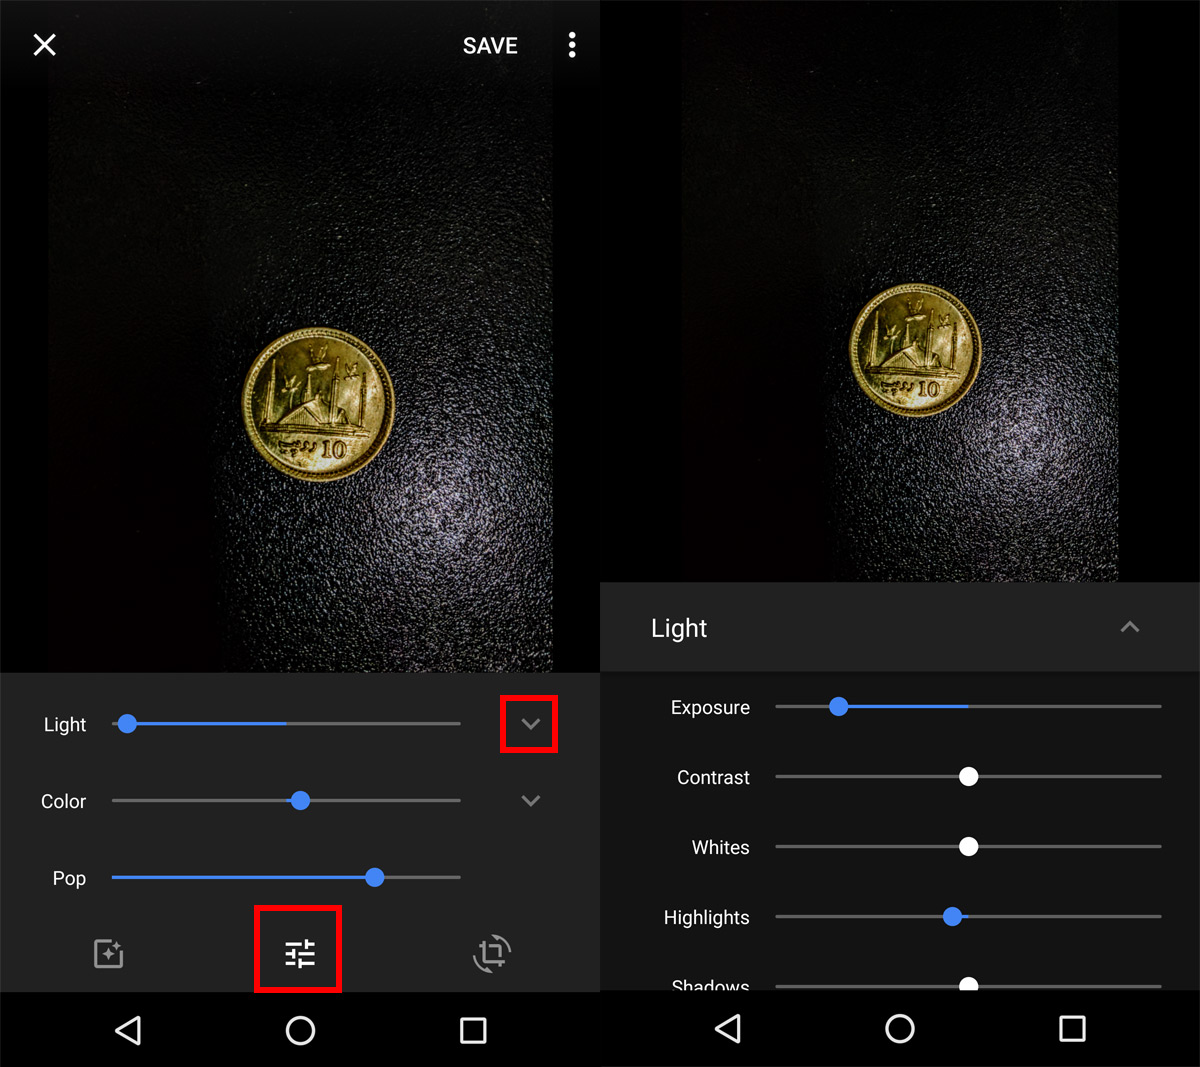
One way to work around the corrections made by Google Photos is use the light, color, and pop adjustments. Tap the settings button next to the looks button to customize light, color, and pop. Each setting has additional setting under it that you can access by tapping the downward pointing arrow.

You will have to play around with these settings a bit to get the photo to look just right. With great photo editing options come great complications as well. If the edits Google Photos makes don’t work for your photo, you will have to spend considerable time fixing them. Alternatively, you can always use a different photo editing app.

Yay! Good for you.