Nexus 4 Toolkit: One-Click Root, Unlock, Recovery, Drivers & More
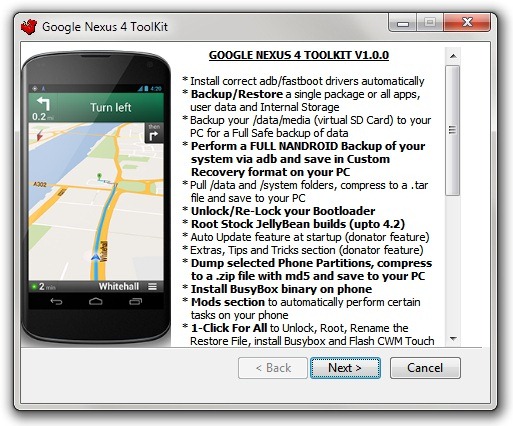
One click root for the Google Nexus 4 is now available! Earlier we brought to you an extensive guide on rooting and installing ClockworkMod recovery on Nexus 4, and it was no walk in the park, to be honest. However, thanks to the hard work and efforts of XDA-Developers forum member and recognized developer “mskip”, we now have a truly all-in-one Google Nexus 4 Toolkit. Now, what makes this deal even sweeter is the addition of more than just a one-click bootloader unlock and root. Automatic driver installation, backup, flashing, mods, recovery booting and more. The Toolkit is strictly available for the Windows platform for now. Normally, the paradigm of Android development related to specific devices is always unpredictable, but I’m looking at a Nexus here, so no surprises at how fast this has come our way.
If you’re thinking twice about rooting your device, view our guide on the top 10 reasons to root your Android device.

For a device that was confirmed rooted around two days back, the plethora of features the Nexus 4 Toolkit offers, is beyond amazing. Following are some of its salient features (as mentioned on its XDA thread):
- Automatic installation of ADB/Fastboot drivers on Windows XP/Vista/7/8 (32bit & 64bit).
- 1-Click bootloader unlock & re-lock.
- 1-Click root and un-root.
- Download Google stock image directly from the toolkit (for flashing it onto the phone when needed).
- Busybox installation.
- Support for rooting stock builds up to 4.2.0 JOP40C.
- Backup & Restore for one or all apps on the phone, including user data and internal storage as well.
- Backup elements in /data/media (virtual SD card) folders onto the PC.
- Perform a full Nandroid backup of system via ADB, and save it on your PC in the CWM recognizable format (can be restored via CWM).
- Using ADB mode, reboot to fastboot mode, recovery, Android or download mode.
- Mods for automatically performing certain tasks on the Nexus 4.
- Boot into CWM Touch Recovery without actually flashing it.
- ‘.img’ files can be directly booted into or flashed onto the phone from your PC.
- Single or batch installation of APK files.
- Push files from the PC to the phone or pull files from phone to the PC.
- Dump BugReport to the PC.
Please note that the tool does not allow flashing a custom recovery for now, as the secure boot.img does not allow the Nexus 4 to boot into a flashed custom recovery. This is why support for ‘booting’ into CWM Touch Recovery has been added. Also, the executables ‘ToolKit.exe’ and ‘ModsSection.exe’ files may be picked up as virus or spamware by an antivirus program you may be running, and the files could be automatically deleted. This is because the files in question are not digitally signed with a Microsoft Certificate, so in case the files are deleted, simply restore them again and exclude these files from any future spamware or virus scans.
The Toolkit has a ‘Donate version’ as well, bringing in just some minor enhancements, such as automatic updates for the toolkit.
Disclaimer: Please follow this guide at your own risk. AddictiveTips will not be liable if your device gets damaged or bricked during the process.
Requirements
- Windows XP/Vista/7/8 (32bit or 64bit).
- A working internet connection.
- Google Nexus 4 Toolkit (Mirror).
Instructions
- To begin, download the Nexus 4 tool kit and install it.
- Run Toolkit.exe, but do not plug in the device as yet.
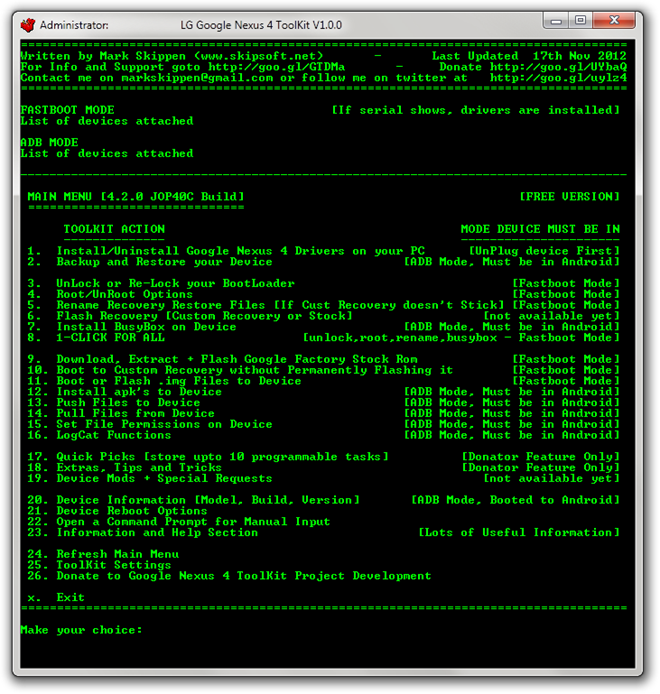
![LG Google Nexus 4 ToolKit V1.0.0 - Features LG Google Nexus 4 ToolKit V1.0.0 - Features]()
- Press ‘1’ as seen in the screenshot above, to install the Nexus 4 drivers on your PC (in case you opted to skip this installation when installing the Toolkit).
- Once that is done, you’ll need to reboot the device into fastboot mode. You can do so by powering it off and then pressing and holding the volume-down and power buttons together. (Note that for some functions, you will have to be booted into Android with Android Debugging enabled.)
- Connect the device to the PC via the USB cable, and you should see a serial number show up on the top-right corner of the window. This means the Toolkit has now detected the device and you are ready to proceed.
- As in the case of the driver installation, simply enter the corresponding number of the whatever option you want to use and hit ‘Enter’. There onwards, simply follow the on-screen instructions.
If you are one of the lucky few who just got their hands on the Nexus 4, this Toolkit is a definite and must-have for all who are interested in customizing and modding their device.
If and when you’re done rooting your Nexus 4, you may like to see our pick of the top 15 must-have apps on a rooted Android device.
For updates and queries related to the Google Nexus 4 Toolkit, head over to the forum thread at XDA-Developers linked below.
[via XDA-Developers]


how bout android 4.4.2 kit kat? i’ve just had my lg nexus 4 last week
There is no way the adb drivers install. Direct, through the install, or through device manager. Using Windows 8. Otherwise very impressed with the work….. Just can’t root without figuring out the driver.