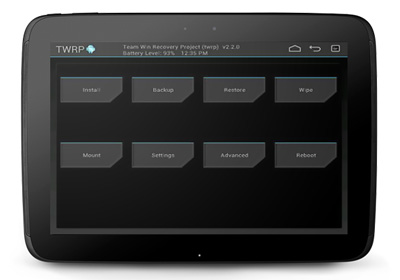
How To Flash TWRP Touch Recovery On Google Nexus 10
As Nexus 10 fans will know, the recently released tablet was rooted recently. Installing ClockworkMod Touch (CWMT) Recovery was part of the rooting process covered here at AddictiveTips, but CWMT isn’t really everyone’s cup of tea. The other, popular touch-based alternative to CWMT is Team Win Recovery Project (TWRP), which was developed with touch input in mind (unlike CWMT, which is essentially the standard CWM with larger input targets and touchscreen support). If you wish to install TWRP on your freshly-bought Nexus 10, follow our step-by-step guide after the jump!

TWRP 2.3.2.2 for Nexus 10 lets you backup/restore, install ZIP files, wipe data much like CWM, but with a touch-oriented, theme-able user interface. Additionally, it can backup, restore and flash ZIP files from an attached USB flash drive, provided your device supports USB host.
Choosing between TWRP and CWMT is really a matter of preference, so we’ll leave it to you to decide between leaving CWMT installed and trying out TWRP on your Nexus 10.
Functionally, the TWRP port to Nexus 10 works exactly like TWRP on other devices, but because of the super high resolution (2560 x 1600) display and not enough development time given to the project, the UI uses less than 2/3rd of the display. The developer has said that he will upscale the theme to fit the resolution of the Nexus 10 display as soon as he gets a chance. For this purpose, be sure to visit the official thread from the via link at the bottom of this post to see if TWRP for Nexus 10 has updated beyond v2.3.2.1.
Disclaimer: Please follow this guide at your own risk. AddictiveTips will not be held responsible if your device gets damaged or bricked during the process.
Requirements
- A rooted Nexus 10. Please read our previous post on how to root Nexus 10 to meet this requirement.
- Android SDK with fastboot installed on your PC. You may follow our Android SDK setup guide for this purpose, OR, if you are following the second set of instructions, install GooManager from Google Play.
- Android Debugging enabled under Android 4.2 Jelly Bean.
- Download TWRP 2.3 IMG file [MultiUpload mirror].
Now, there are two ways to go about flashing TWRP 2.3 on Nexus 10. We suggest following the second method since it is so much simpler and easier. You may follow the first method if you are comfortable with the command line.
Installing via Fastboot
- Although this method is safe and will not wipe existing personal data, we recommend backing up photos, videos, music and syncing your contacts before going ahead with this guide anyway.
- Place the TWRP 2.3 IMG file in the same folder as fastboot.exe under the directory where you have installed Android SDK.
- Shut down your Nexus 10. Once it is turned off, press and hold Volume Down + Volume Up + Power button until you enter fastboot mode.
- Connect your Nexus 10 to your PC with a USB cable.
- Launch command prompt, change current directory to the directory where you have placed the IMG file in Step 2 and then enter the following command:
fastboot flash recovery openrecovery-twrp-2.3.2.2-manta.img
Installing via GooManager
- Launch GooManager and grant it SuperUser permissions upon prompt.
- Press Menu button > Install OpenReocvery.
To boot into TWRP, press and hold Volume Up, Volume Down and Power button until you enter fastboot mode, and then, choose ‘Recovery’.
[via XDA-Developers]
