How To Natively Mount And Burn ISO Images In Windows 10
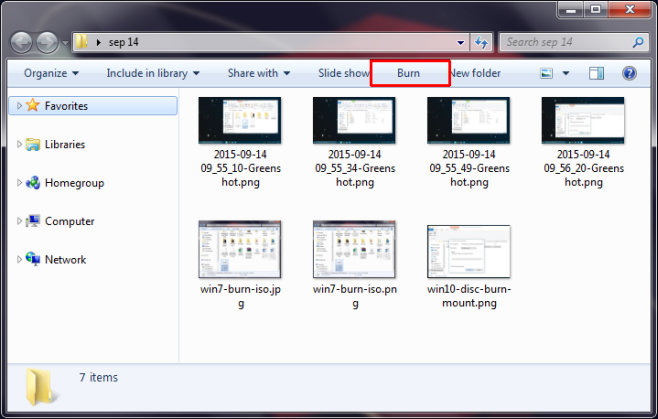
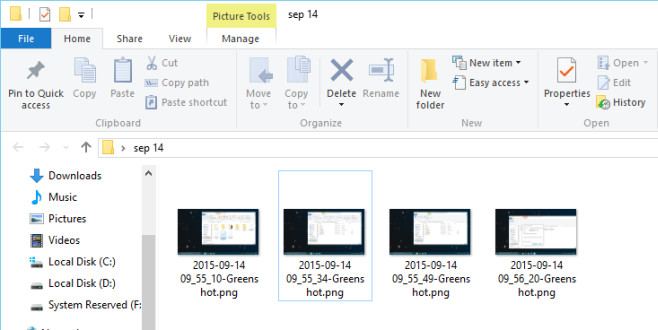
File Explorer in Windows 8 was revamped and the new look made its way to Windows 10. File Explorer got a new name; Windows Explorer and it bid farewell to the controls bar just below the address bar. The new UI features three basic ribbons that mimic the grouped controls you see in MS Office apps. The ribbon tabs have more or less the same controls you could access either from the control bar or the menus but some controls appear only when a specific type of file is selected. In Windows 7, regardless of what type of file you selected, you could always see a ‘Burn’ option at the top that allowed you to burn the file to a disc. With Windows 10, the option has not only migrated to a different tab, it’s also only available for certain file types. It gives the impression that you can no longer burn or mount disc files in Windows 10 when in fact, you can. Here’s how.
Here’s the burn option appearing for a folder of images in Windows 7;
When you select a similar folder in Windows 10, this is what you see;
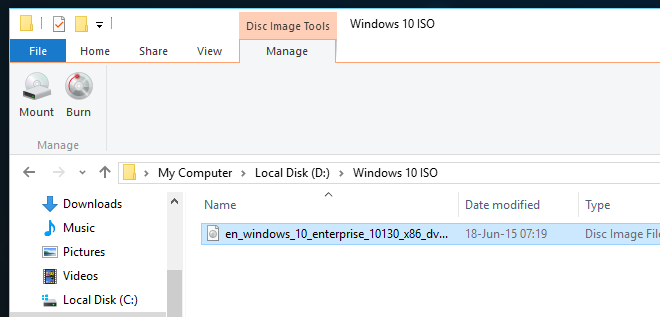
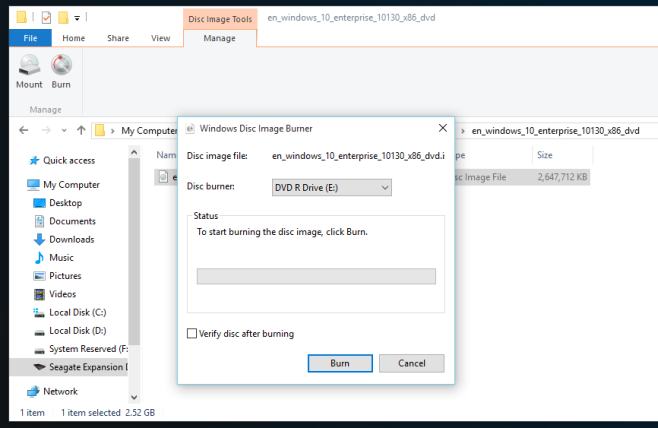
The burn feature, as well as the option to mount a disc image file are present in Windows 10 and they do not require the use of any third-party apps, nor changes to the registry to see. To mount a disc image, select the file in Windows Explorer and go to the Manage tab. The Manage tab is always context aware and the controls in it change depending on the selected file type. When you select the ISO file, the Manage tab featuring Disc Image Tools has two options; Mount and Burn.
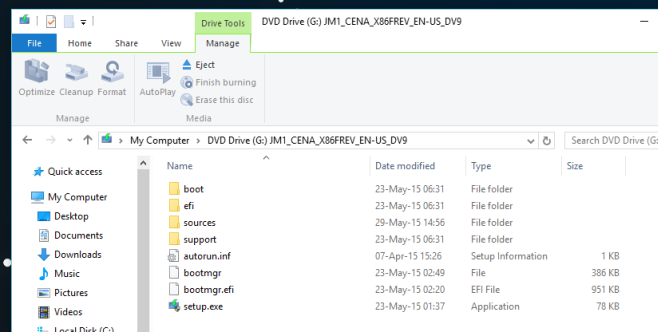
If you choose to Mount the file, you can see what’s inside and even execute files in it.
And if you choose to burn it, it will ask you to select the disc burning device.

Will is still be mounted if you Reboot?
” To mount a disc image, select the file in Windows Explorer and go to the Manage tab. The Manage tab is always context aware and the controls in it change depending on the selected file type. When you select the ISO file, the Manage tab featuring Disc Image Tools has two options; Mount and Burn.”
That claim is false.
Highlighting an .iso only brings up the Home | Share | View ribbon in Windows 10 Home.
There is not a Manage tab at all.
You have to associate the ISO file type with Windows explorer. Check the previous threads. The comments by “we don’t need rinos” and “Waba Jamba” both detail how to see the management tab. I could not until I followed their directions.
a quicker way to mount the image, especially if the manage tab does show, is tho right click>open with>Windows explorer. it will automatically mount the image and open it
*does not*
Thanks. Your explanation really helped me with burning an iso in Windows 10.
If you don’t see the manage tab then you need to change what the default program to open the file. Default should be windows explorer. Once this is set then you will see the manage tab.
does this option have to be abled? because i’m not seeing a manage tab when choosing .iso files
same here
Same here..
What you have to do is right click on the file and then select properties. Then look for the line that say opens with and select change. Click on that icon and select Windows Explorer. Then you will see a manage tab.
Thnx so much
Thanks
What you have to do is right click on the file and then select properties. Then look for the line that say opens with and select change. Click on that icon and select Windows Explorer. Then you will see a manage tab.
This comment worth more than the whole article. Thank you.
Maybe because you already both have Daemon Tools installed or something and it;s the default “player” for the .iso files. Just change it to Windows Explorer and it will work!
Enabled*