How To Enable/Disable Fast User Switching In Windows 8 [Tip]
Like previous versions of Windows, the Log Off and Lock functions in Windows 8 enable users to quickly switch between all the available user accounts without having to restart or shutdown the PC. When you lock the screen, it shows you a back navigation button on the logon screen to let you quickly switch to any user account without having to quit background processes. Often, when users switch to other accounts via Lock function, the background processes become unstable, and in some cases, Windows forcibly closes conflicting system processes. If you don’t want to allow switching between user accounts on your PC, you can use the Microsoft Management Console snap-in called Local Group Policy Editor to change the Fast User Switching policy setting. In what follows, we will guide you through the process of disabling Fast User Switching in Windows 8.
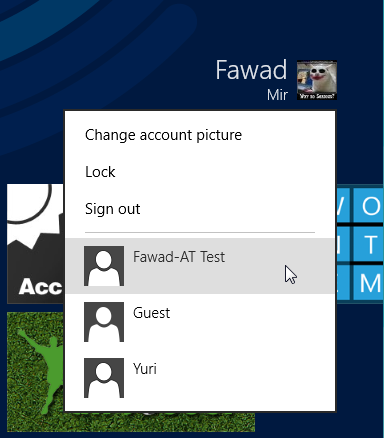
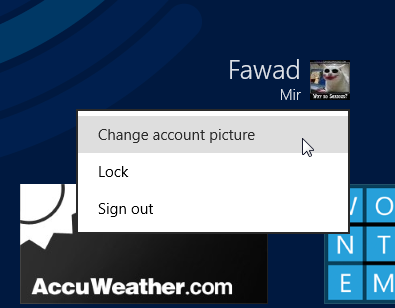
The Start Screen in Windows 8 displays your name along with the account picture at the top right corner. Clicking it opens up a menu containing options to Change account picture, Lock and Sign out from the current account, or access any other account existing on the computer just by clicking its name. Once you select another user account, you will be automatically logged off from the current one and taken to the login page of the selected account.
To begin, make sure that you have logged in as Administrator or have required administrative rights to change local group policies. First, go to Start Screen, type gpedit.msc, select Apps from right sidebar, and then click gpedit.msc in main window.
This will open Local Group Policy Editor. Now, go to the following location and look for Logon in the left pane.
Local Computer Policy/Computer Configuration/Administrative Templates/System/Logon
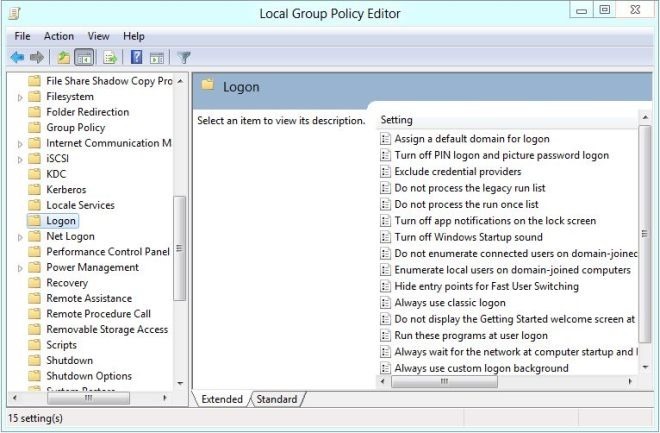
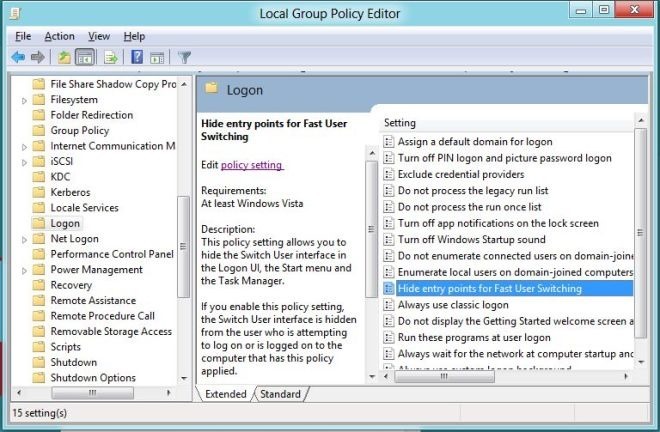
Just double-click Hide Entry Points for Fast User Switching to bring up a dialog box to change Fast User Switching policy setting.
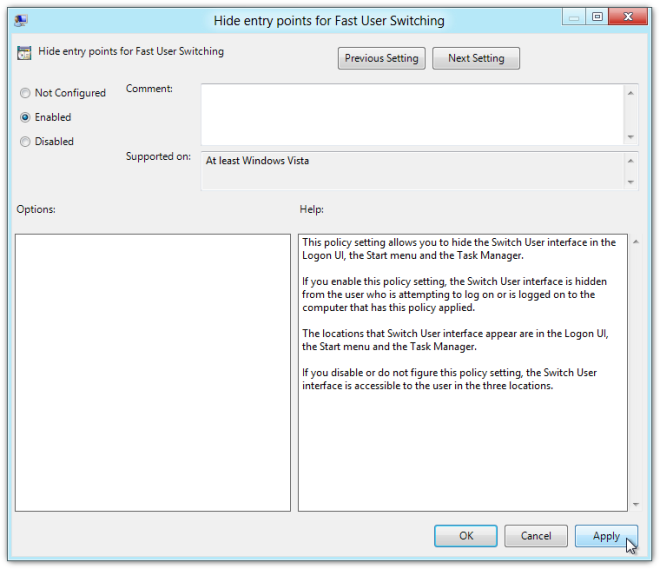
At the top, there are Not Configured, Enabled and Disabled options available. Selecting each setting will let you read its affect in Help section. To disable Hide Entry Points for Fast User Switching, just select Enabled from the list and click OK.
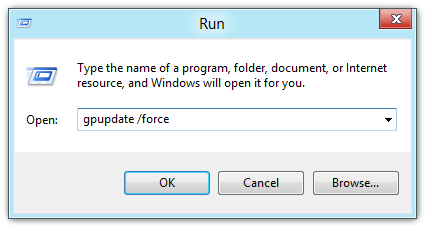
Once done, you will have to enforce the change made to Fast User Switching policy setting. To do so, close the Local Group Policy Editor and open the Run dialog box. Enter the command “gpupdate /force” and click OK. The policy will be updated and applied on all user accounts.
Fast User Switching will now be disabled in Windows 8. You will notice that User Tile menu (accessible from Start Screen) doesn’t show other user accounts.
To re-enable Fast User Switching, just choose Not Configured in its policy setting dialog and apply the changes via gpupdate /force command.


lol
What do I do when I don’t have ‘Hide Entry Points for Fast User Switching’?
Woot! Thanks for this… this applies to Windows 10 as well.
Yeah, WDs10 is nearly a copy of 8
what would i give if i had an apple 🙂
thanks , i exactly have this problem and i finally found it just here ; thanks again :-*
This is not Comfortable with me, but this is not work, where i do it except below, is there any other way?but my pc in switch user not function how do it?
Wow Great Tutorial Fawad. I will soon format my Win 7 and will install win 8. It will be helpful for me.
Thanks.
Don’t format your Windows! This is not a final build of the OS. Rather install it on a separate partition, or HDD.
Thanks Dexter for reply.