How To Create Customizable Multiboot System Rescue Disk
System Rescue bootable disks are built to help users easily troubleshoot those PC problems, which are generally quite difficult to fix such as corrupt boot sector, malware infected system files, physical & logical hard disk bad sectors, disk write failures and so on. In our previous guide on completely wiping the hard disk, we recommended using DBAN (Darik’s Boot And Nuke) Boot CD to shred the auxiliary and removable hard drives. Like any other boot disk, DBAN runs in a complete isolated environment to perform the disk wipe operation. Tools like DBAN, eScan Rescue, MSSS, Hiren’s Boot CD etc., require burning the ISO file on a separate disk for creating a bootable disk to fix PC issues, but what if you want to create a customizable bootable USB or CD/DVD disk to use all your favorite system diagnostic utilities without having to change the bootable disks on system startup?
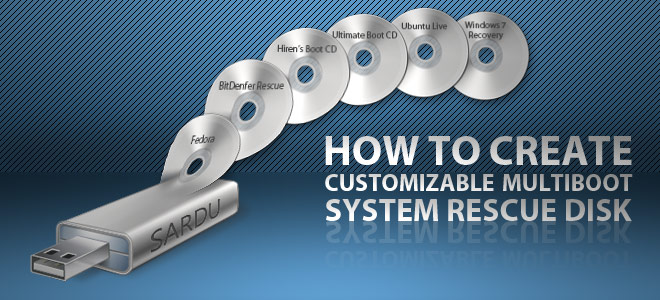
SARDU (Shardana Antivirus Rescue Disk Utility) is a tiny, yet powerful application for creating customizable bootable CD/USB. While it comes packed with all widely used system diagnostic tools including Ubuntu Live CD, BitDefender Rescue, Panda Safe, Ubuntu MRT, GParted etc. It lets you create a highly interactive boot menu to easily navigate between specified (installed) tools. It’s basically a multiboot USB and CD/DVD builder for Windows that allows user to either download the system rescue disks, or specify the already downloaded disks (in ISO format) for creating an all-in-one system rescue disk.
It includes a host of third-party antivirus utilities including AOSS PcTools, AVG Rescue, Avira AntiVir Rescue, Dr.Web Live, Kaspersky Rescue etc. to perform low-level virus scanning over entire hard disk. Moreover, you have the option to add multiple third-party rescue disks and system diagnostic tools such as Clonezilla, GParted, NT Password, Ophcrack, Ultimate Boot CD, Trinity Rescue Disk, Parted Magic, Ping, Redo Backup Live CD etc, from Utilities section. Some Linux and Windows related tools and Live CDs are also provided (Austrumi, BackTrack, Damn Small Linux, Ubuntu Live, Kubuntu Live, Mint, Puppy Linux, Slax, xPUD, LiveXP, WindowsPE, VistaPE, Win7PE etc) to apply fixes over corrupt OS installation.
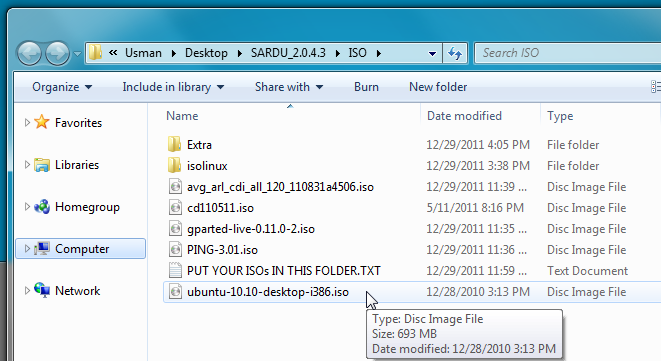
To get started, just pick the Antivirus tools, utilities, Windows and Linux tools from respective sections to burn them on the disk. If you don’t have the required ISO or bootable files of selected tools, you can download them from within the application; it comes with multi-downloader that can automatically fetch the ISO images of specified tools, and then download them in bulk. However, if you want to manually include the ISO image file of a utility or OS Live disk, place the ISO images to SARDU_2.0.4.3\ISO folder, then refresh the ISO images using Refresh ISO button on toolbar.
All aforementioned tools are grouped under tabs. From Antivirus tab, you can include bootable antivirus suites to your disk, while in Utility tab, you will find a wide range of system maintenance & diagnostics utilities including GParted, Ophcrack, Partition Wizard, OpenDiagnostics and more.

The Linux and Windows tabs let you include Linux based OS Live CDs (in ISO format), and Windows Live CD, Rescue disks to your media disk (CD/DVD or USB). Apart from Windows Recovery Disks, it also lets you add Windows Installer for Windows XP, Vista and Windows 7. If you don’t have Windows Installer (ISO image), you need to buy the Installer’s ISO image to add to your media disk.
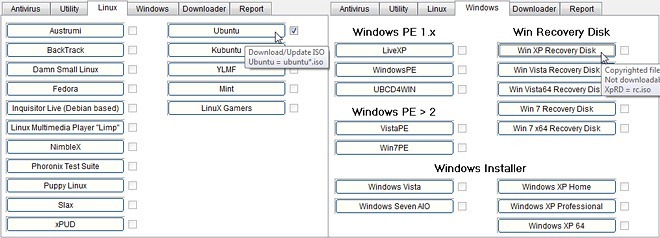
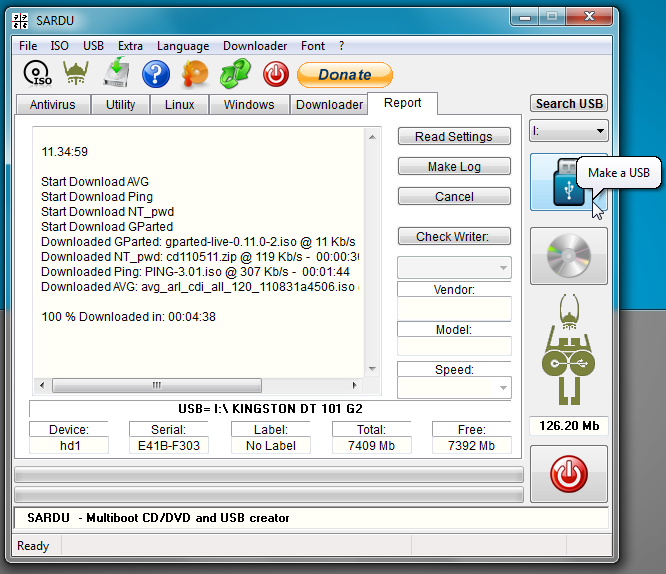
Selecting a tool listed under tabs will send it to download queue, where you have to manually start the download process. Under Downloader tab, click Start to begin downloading specified tools and rescue disks. Once done, plug-in your disk (USB or CD/DVD), and click respective button present in right sidebar to start the disk or CD burn process.
When bootable CD/DVD or USB drive is created, you need to change the system boot priority from BIOS menu. To do so, reboot the system into BIOS menu by pressing F2, F10, Del, or other system defined key. Move to Boot Options menu and set your external USB or CD/DVD ROM as first boot option. Once done, save changes made to BIOS, and reboot your system. It will take you to SARDU boot menu, showing all the specified tools, Live media disks, and other system rescue options.
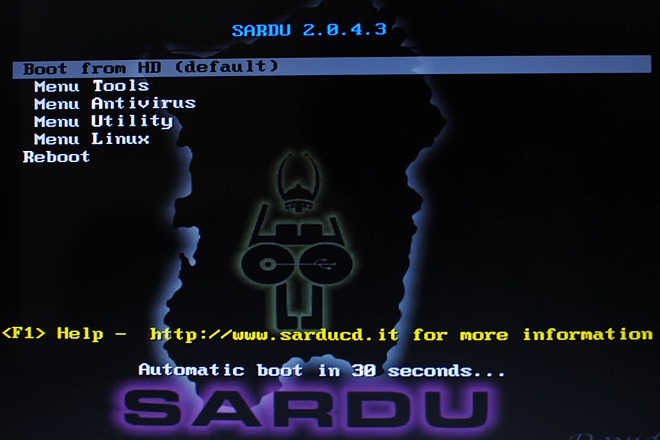
SARDU boot menu includes some basic system diagnostic tools including SuperGrub2, HDT (Hardware Detection Tool), TestDisk & PhotoRec (for data recovery), and Lilopwd (for password recovery), PLop Boot Manager and FreeDOS. You can use SuperGrub to deal with OS boot problems and detect installed operating systems, while TestDisk and PhotoRec will let you perform low-level data recovery operations over entire hard disk. However, if you just need to recover your lost password, Lilopwd may help; it’s a small application to recover forgotten Linux based OS and Windows account passwords.

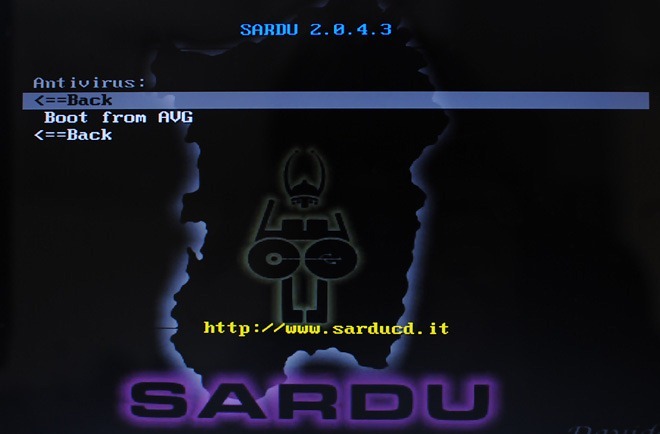
The Antivirus menu shows all the pre-selected bootable antivirus suites. Here, you can boot your system from, let’s say, AVG, Avira, and scan the hard disk for viruses and malwares.
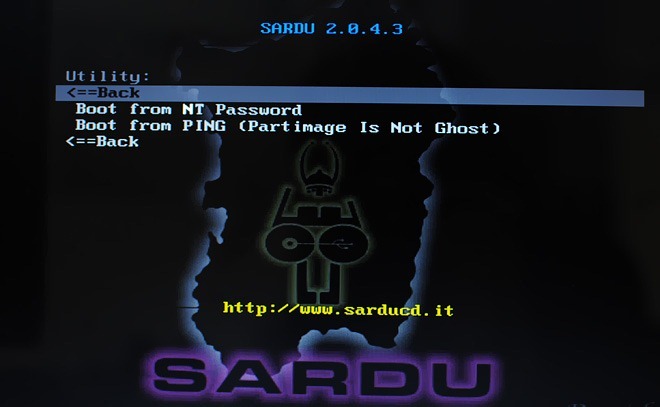
The Utility menu lets you run system repair utilities that you selected while creating your SARDU bootable disk. It must be noted that these utilities don’t run under SARDU environment, when you select the utility, SARDU will just take you to specified Utility boot menu.
The Linux and Windows menus allow you to boot selected OS. Just select the Live OS that you want to boot system from, and it will take you to selected OS boot menu.

If you use multiple boot CDs to identify and fix system issues, SARDU will help you run all type of system diagnostic programs from a single disk, saving you from the hassle of switching between the system rescue disks. SARDU supports both client and server editions of Windows.

I’m just learning about this topic, but what I have discovered is that I much prefer
YUMI – Multiboot USB Creator to SARDU. Why? (1) Yumi is a portable app, (2) SARDU agressively tried to install not one but two annoying toolbars, (3) Adding an ISO file that SARDU doesn’t know about is a real pain but is easy as pie with Yumi.
The only actual advantages of SARDU are: (1) it is a prettier GUI and (2) It will download files directly whereas with YUMI you have to go get them yourself (though links are provided).
Hi, can SARDU be used to boot from other iso images that are not given under the antivirus or other tabs. I have tried by putting some iso images in the iso folder, but SARDU has not been able to read them.