How To Add & Remove Buttons From Windows Explorer Toolbar [Windows 7]
If you don’t like following tedious steps to add customized buttons to Windows 7 Explorer toolbar which first include tweaking with Windows registry and then rebooting the system, CutomExplorerToolbar can significantly save you the time and effort involved in adding and removing buttons from Windows Explorer toolbar. This Nirsoft’s utility is designed to easily customize Windows Explorer toolbar; you just have to select ready-made utility buttons to add them to Windows 7 Explorer toolbar without having to reboot your system or to tinker around with Windows Explorer related registry keys.
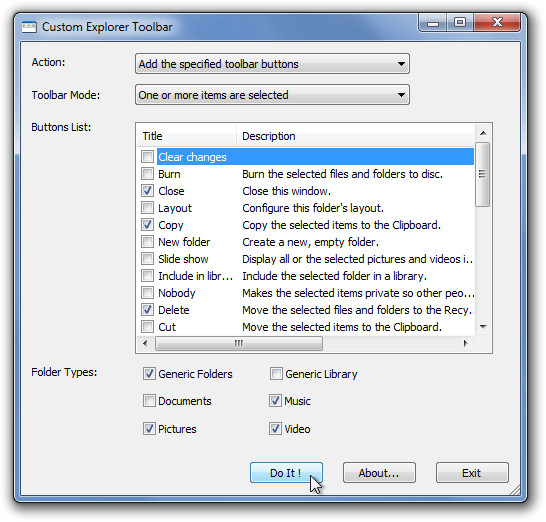
The application enables you to add and remove toolbar button in real time, which means, after adding or disabling toolbar buttons, just refresh the Windows Explorer window in order to use them. To begin, launch the application with administrative privileges, select the action followed by Toolbar mode. The Actions drop-down menu holds options to either add or remove the toolbar buttons. The Toolbar mode deals with two behaviors – show toolbar button when one or more items are selected or when items are not selected in Windows 7 Explorer.

Now, from the Buttons List, pick those buttons which you want to add and then select the Folder Types. Once done, click Do It! to add selected buttons to Windows 7 Explorer toolbar.

Similarly, you can change the actions from Add to Remove toolbar buttons. Just select show behavior (Toolbar Mode) and then enable those pre-defined buttons which are to be removed from Windows 7 Explorer toolbar. CutomExplorerToolbar works on Windows 7 and supports both 32-bit and 64-bit versions.
Download CustomExplorerToolbar
