Convert Physical Computer Into Virtual Machine (VMware, VirtualBox)
Virtual Machine software like VirtualBox, Virtual PC, Parallels, VMware etc, provide the utility of not only running multiple virtual environments on the host system, but also allow creating and configuring the machines as per the requirements. The Virtual Machine software are designed keeping high-end usage requirements in mind, and therefore, such applications are authorized to gain complete control over all the installed hardware and software components. While machine virtualization utilities are widely used to run disk images of operating systems, including Windows, Mac OS X, and Linux distributions, they don’t allow converting the physical into a virtual machine in order to use the entire system on other platforms in a virtual environment. Today, we look at the the simplest way to convert the local machine to virtual machine, and then configure and run it on other systems using virtualization software.
Amongst the virtualization software available out there, VMware Workstation is considered to be the most powerful machine virtualization application, enabling users to run both x86 and x64 OS editions as guest machines. Although it’s a paid utility, it offers a free VMware Player to run the pre-configured guest systems on host computer. VirtualBox, on the other hand, is a completely free virtualization software, letting users create, configure and run Virtual Machines on their systems. VirtualBox supports virtual hard disks and OS images created using VMware, and therefore, it can seamlessly run the guest machine configured via VMware. In this post, we will guide you through the process of creating a VMware Disk of local machine, and then use it on VMware, Virtual PC and VirtualBox.
First off, you need a conversion tool that can turn your local machine into virtual machine. VMware provides a free utility called VMware vCenter Converter for physical to virtual machine conversions. It has the ability to create a VMware Disk image of the entire system, including installed drives, local drives, configured hardware and software components, installed applications and more.
Once the local machine is converted into VMDK file, you can use it on other operating system including Mac OS X and Linux variants. The application presents a simple conversion wizard that guides you through the process of selecting the local system components, target locations and target VMware workstation/player (virtualization variant) on which you wish to run the converted VMDK file. It supports a wide range of source third-party images including Microsoft Hyper-V, Virtual Server, Virtual PC, Parallels, Norton Ghost, Acronis, Storage Craft and more. The application also provides a central conversion management console to help you organize and monitor local and remote machine conversion instances. Additionally, it performs sector-by-sector data copy operations to clone the selected disks. The disk cloning process is unobtrusive, and it doesn’t prompt users to confirm the copying actions while converting the local machine into virtual VMware disk image.
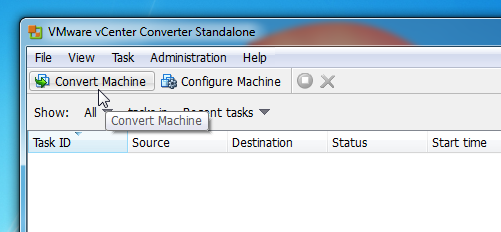
To get started, launch VMware vCenter Converter (download link given at the bottom of the post), and click Convert Machine on toolbar.
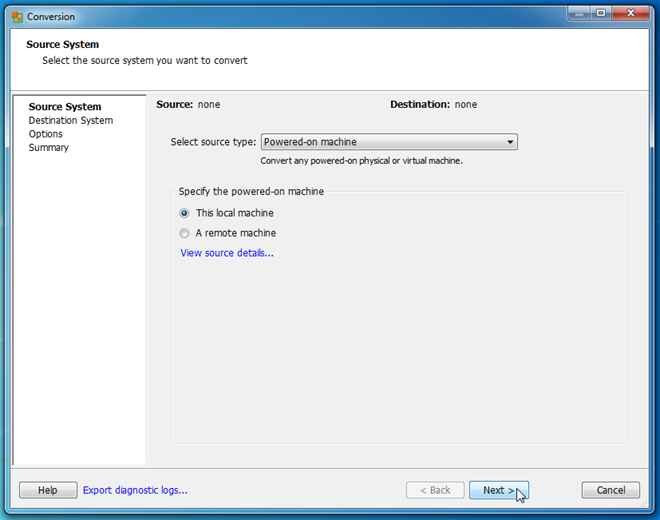
This will start the Conversion wizard. The first step is to select the source type of machine (physical or virtual machine) that you want to make. It supports selecting the current machine (physical machine), VMware Infrastructure virtual machine, VMware Workstation, Hyper-V Server, and other third-party virtual machines. Since you need to convert the current machine to virtual machine, select Powered-on machine source type from drop-down menu, and then enable This local machine option.
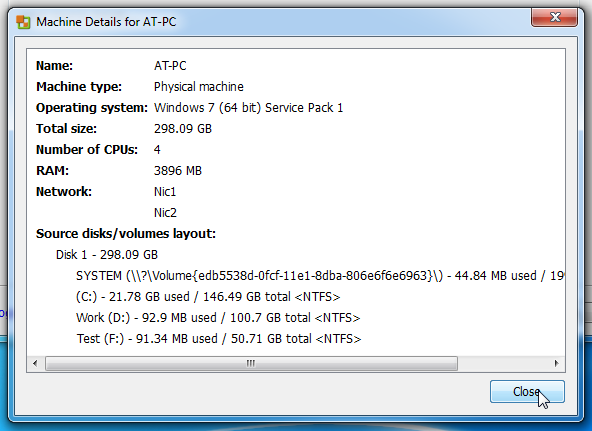
You can view the details of selected machine by hitting View source details. It shows name of the selected machine, machine type (virtual or physical), installed OS on selected machine, RAM size, Volumes layout, Total system size and other system-related information. After verifying the target physical machine, click Close followed by Next button.
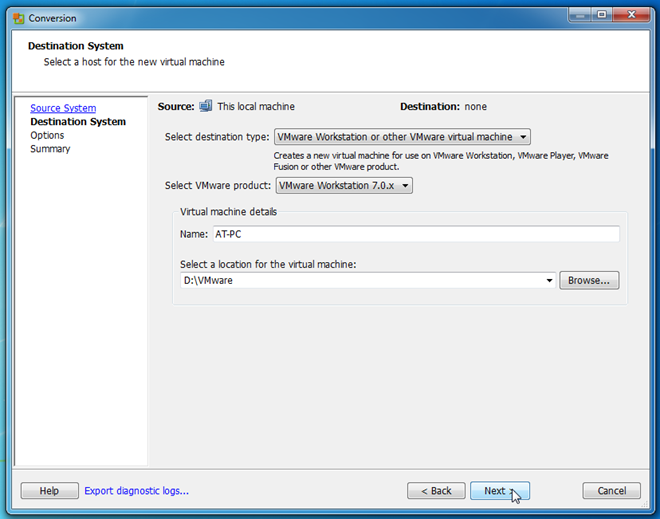
In next step, it will ask you to specify the destination type and VMware product. Choose VMware Workstation or other VMware virtual machine option as destination type, and select the target VMware product (VMware Workstation, VMware Player, VMware Server or VMware Fusion). Once done, enter the virtual machine name and select the location where VMDK file is to be saved. If you’re planning to use the converted physical machine on other systems, it’s recommended to save the VMDK file on external hard disk. However, to run the virtual machine on local system, you may choose any location on hard drive.
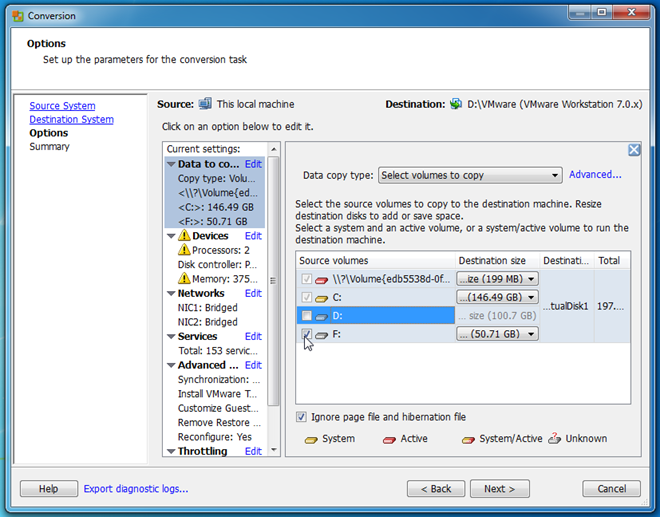
Once preliminary settings are configured, it presents a local machine explorer to let you choose the folders and drives that are to be included in VMDK file. Here, you can exclude the local drives, and configure system components’ settings including Processors, Networks, CPU Throttling level and more.
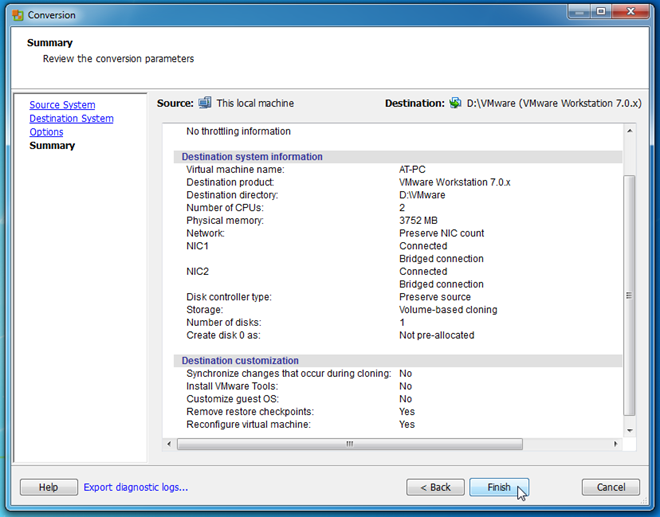
Once done, hit Next to view the physical to virtual machine conversion summary.
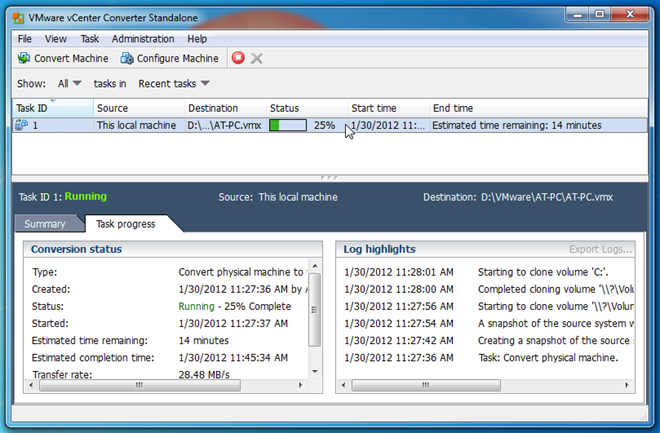
Clicking Finish will start the conversion process. You can stop the conversion and delete the task from toolbar. The main window shows the details of tasks which are being performed. It will create a VMX (VMware Virtual Machine Configuration) file along with VMware disk image file to help you quickly launch the converted physical machine in VMware Virtualization software.
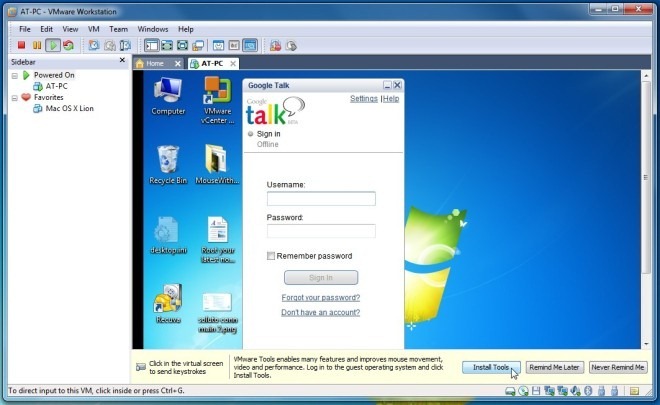
Once the physical machine is converted into virtual machine, move to system where you want to run the converted physical machine. Launch the VMware virtualization software (VMware workstation, VMware Player, etc), and open the VMX file to boot the OS of converted physical machine.
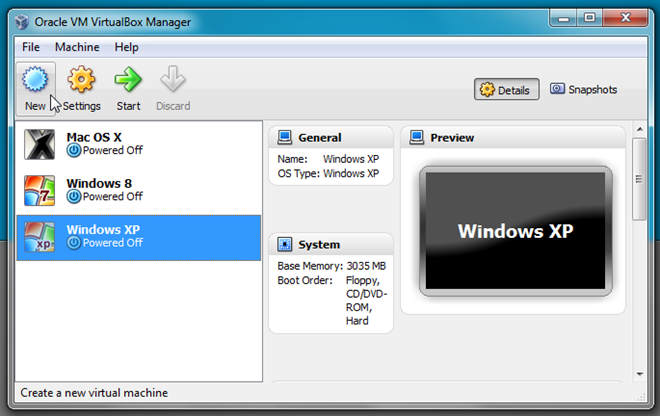
Since VirtualBox supports VMware VMDK container format, all you need is to specify VMDK file that contains the virtual machine while creating a virtual machine to run it. For this, launch VirtualBox and hit New on toolbar.
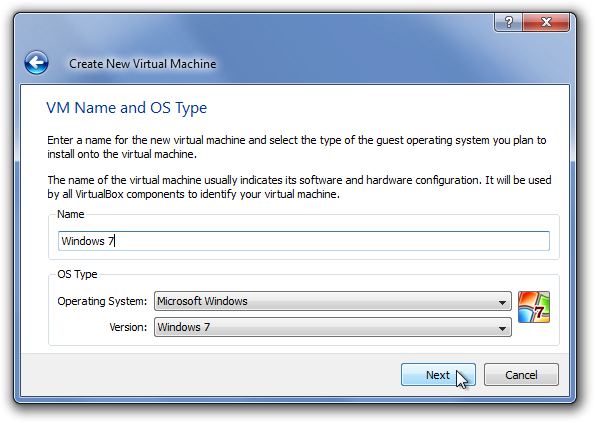
This will open Create New Virtual Machine wizard. Specify the name of virtual machine, operating system and then its version. If you’re creating Windows 7 virtual machine, just enter Windows 7 and it will automatically set the default OS Type.
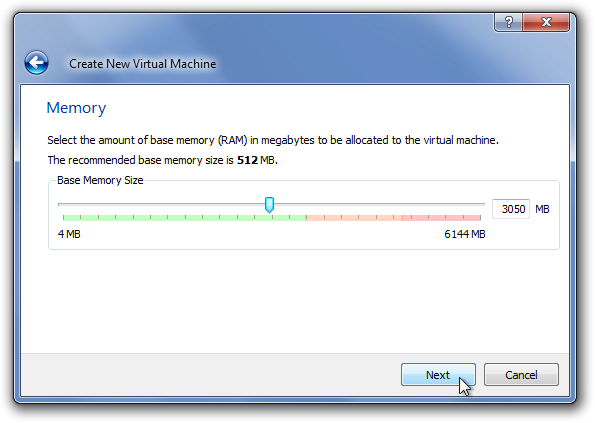
The next step deals with setting the maximum amount of physical RAM that can be used by virtual machine. Specify the RAM size and hit Next.
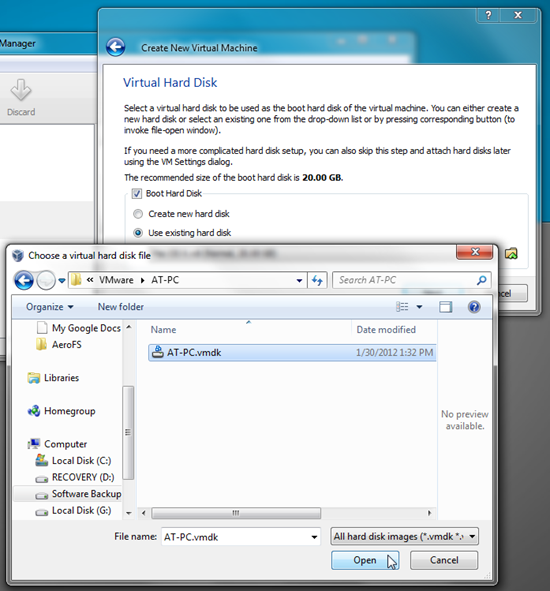
Now, instead of creating a new hard disk, choose Use existing hard disk option to specify source location of converted physical machine disk (VMDK file). Once selected, hit Next.
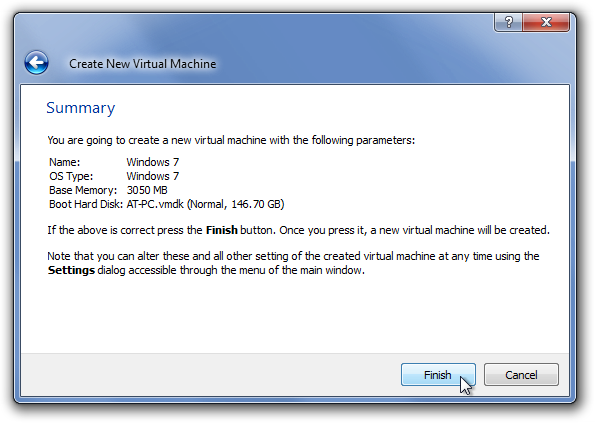
The Summary page lets you verify the virtual machine configurations. Now, hit Finish to create a virtual machine.
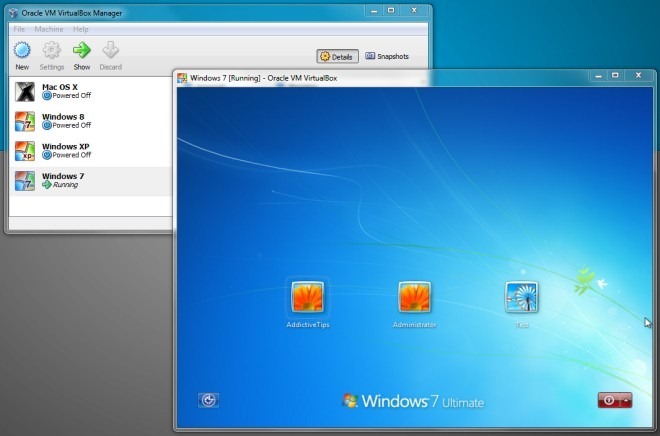
Once done, select the newly created virtual machine, and hit Start on toolbar to launch the OS of your converted physical machine. You can change the default virtual machine configuration from Settings such as network type, processor, maximum video memory, boot order, audio driver, shared folders etc.
Microsoft Virtual PC is another widely used virtualization software that allows running multiple guest operating systems simultaneously. Although the latest version supports only Windows 7, it presents a simple wizard to create Windows and Linux-based OS virtual machines. Unlike VMware and VirtualBox, it supports VHD format, and doesn’t allow users to use virtual machine disks in other container formats to run guest OS.
If you used VMware vCenter Converter to create virtual machine disk of physical machine, you probably want to convert the VMDK (converted physical machine) file into VHD format, so that it can be used with MS Virtual PC. StarWind offers a free application that allows you to convert numerous virtual disk formats. Using StarWind’s V2V Image Converter, you can convert a VMDK (fixed and dynamic) disk image into VHD format. Not only does it convert between Virtual Disk formats, it also enables you to convert VMDK and VHD file into IMG format. The application performs sector-by-sector copy operations to clone an entire source virtual machine format into user-defined container virtual hard disk format.
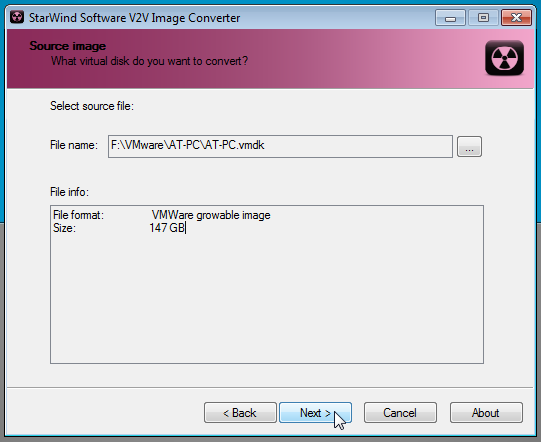
To begin, install StarWind V2V Image Converter, and launch it to specify the source VMDK container file. On the main interface, it asks you to specify the complete path of source image file you want to convert. Just enter the complete path of VMDK file, and then click Next.
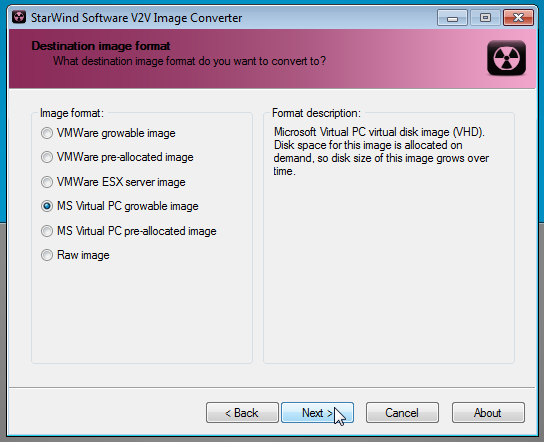
Now, specify the output image format from the list, and click Next.
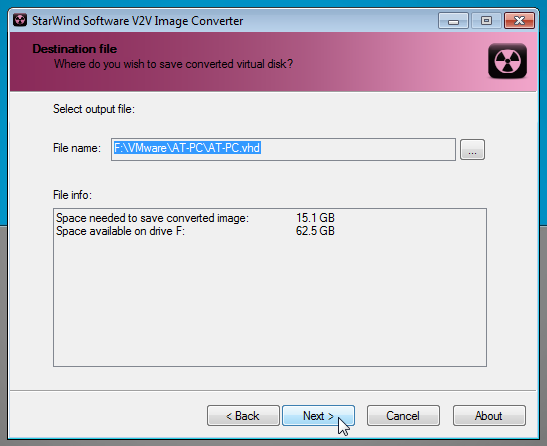
In this step, just specify the target location where VHD image is to saved.
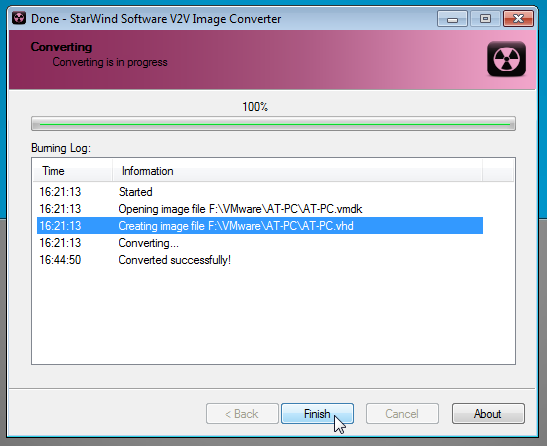
Clicking Next will begin the conversion process. The time it takes to convert the VMDK file to VHD format depends upon the size of VMDK file.
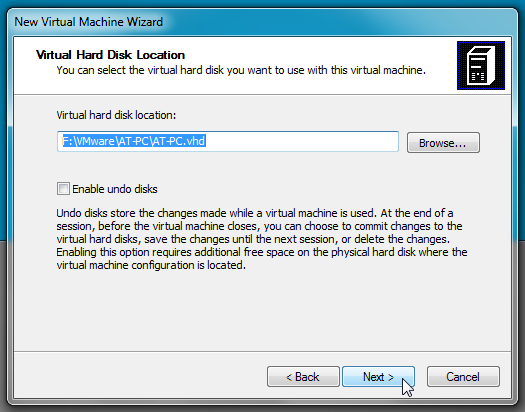
Once VMDK image is converted into VHD file, launch MS Virtual PC to start New Virtual Machine wizard. After entering the name of virtual machine and allocating maximum amount of physical RAM, select An existing virtual hard disk option, and hit Next.
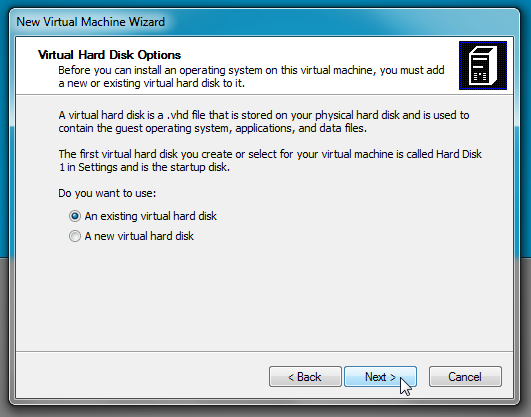
Now, specify the converted VHD image file and click Next to begin creating virtual machine.
MS Virtual PC falls somewhere in between the power of VMWare and simplicity of VirtualBox. However, it supports only a limited number of virtual machine additions, so you may face some technical issues while using the converted physical machine in MS Virtual PC. When it comes to running Virtual Machine with converted physical machine image file, you have several options at your disposal, but considering that VMware natively supports VMDK container format, we recommend using a VMware virtualization software to get the best performance from the VM disk image. In order to further boost the guest OS performance, you should install all essential virtual machine additions and other OS-specific tools.
Download VMware vCenter Converter

I’ve been reading up on VM’s and converting a physical to VM, but have not seen any way to do this without the operating system being booted. Is there a way to virtualize a physical if say it was in a laptop that is now broken and you cant use it to boot the physical O/S?
By follwoing the article i have been able to convert the physical machine (windows7) to virtual and restore on VMWare ESXi server. I am able to log-in to the machine through vsphere client. But i am facing nertworking probelms i am not able to ping to other PCs or from other PCs to this PC. Please suggest what am i missing.
This is one of the best articles I have read in a long time. Thank you very much.
Hi! Thanks for your article! I’m having trouble though. Whenever I try to convert my W7 machine I always get an error. When I connect locally I get the error: Unable to obtain hardware information for this machine. When I connect remotely (from another W7 machine on this network) I get the error:Unable to contact the specified host…..
nice article! very helpful
very nice post. Can’t wait to try it out!
Hi this is a good article. may I ask in this article you say ” select target VMware product (VMware Workstation, VMware Player, VMware Server or VMware Fusion).” I selected VMware Workstation 8.0 and 7.0 and every time I try to start windows on VirtualBox it crashes. which one did you use to be able to open it with VirtualBox and virtual PC?
Thanks for the instruction. I have run into an issue, after running the virtual image in VM player on another system windows 7 Pro detected hardware / driver changes and requires me to reactivate the installation. Is this normal and is there a fix for this issue?
VMware Player can create and edit virtual machines too
can’t
What happens when you make changes / install new applications on your virtual environment, does the local machine reflect those changes?
I’m looking for a solution to run my windows partition as a guest system on my ubuntu host system.
The VMware vCenter Converter only creates an image file (VMDK), containing the snapshot/current state of the local machine. Therefore, changes you make to virtual machine will not be reflected in local machine.
Thanks mate! Fantastic tutorial!
nice blog and articles as always .. keep writing – a daily visitor 🙂