Batch-Capture Screenshots Of Entire Webpages, Select Regions Or HTML Tags
While browsing the internet, we often come across information that we want to save or share. If it’s just text or individual images, one can simply copy them directly. Though if you want to save whole web pages as images, URL2JPEG saves you the hassle of using your screenshot tool for the purpose, meaning you don’t have to edit the image to remove parts of the browser itself from it. The tool can save a whole webpage, an HTML block or a manually-selected portion within it to a file or your clipboard. It works in three simple steps: enter the URL of your desired page, select what part of it you want, and save it to your PC. You can also capture multiple webpages simultaneously in a batch with URL2JPEG’s helpful Scripting option. To top it off, there’s also the option to capture screenshots of multiple sites by specifying a whole IP range. More details after the jump.
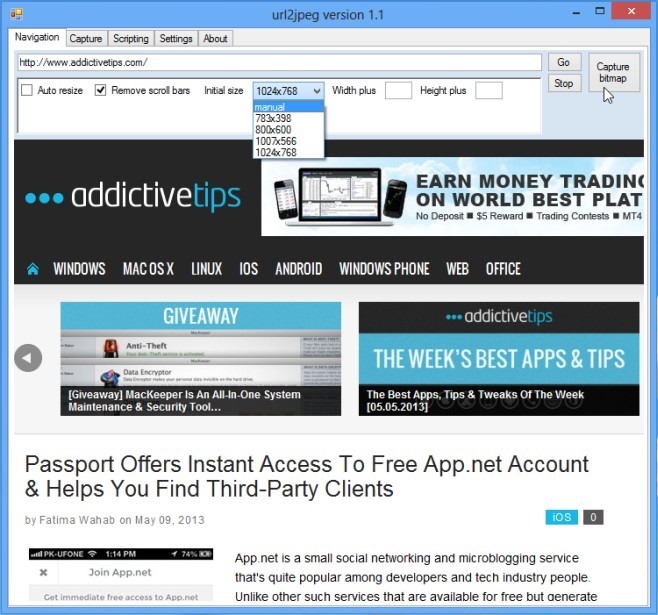
You start off in the ‘Navigation’ tab, where you can browse to the desired website directly from inside the application. I can’t really say why I feel good about this; probably it’s the added convenience. Though without any ‘Forward’ and ‘Back’ navigation keys, the budding thought that I had discovered a really cool camera-cum-browser quickly subsided. URL2JPEG is primarily a copy-URL-and-search process. You can navigate back and forward with the right-click context menu, though. When you’ve entered the URL in the address bar, hit ‘Go’, and your page will appear in the display area below.

There are also a few settings you can specify. The ‘Auto resize’ option is helpful when a page is larger than your screen. The application can still take a screenshot of the full webpage for you without this option, but if the page is too big, some of its parts might not appear in the resulting image. Scrollbars can be removed from a snapshot by checking the ‘Remove scroll bars’ box. You can also add extra space to your screenshot by specifying the amount in pixels in their respective text fields. A drop-down menu allows you to set the default initial size for all images. When you’re ready, click ‘Capture bitmap’.

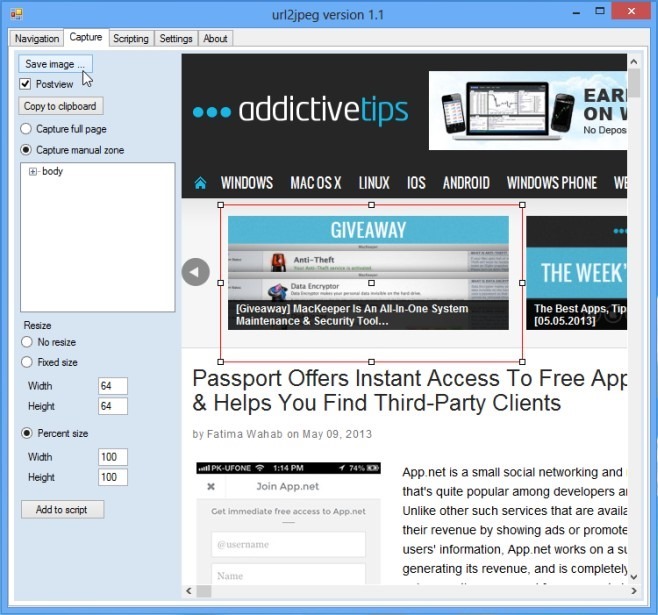
You will be taken to the Capture tab that offers a preview of your screenshot, along with some basic editing tools. You can toggle between capturing the full page or manually selecting a portion of it. Selection can be done directly as well, by dragging over the preview. If you want to resize the snapshot, you can opt between entering either specific dimensions or percentage for height and width. When everything is all set, you can save the page as an image by choosing from PNG, JPEG or BMP file formats and clicking the ‘Save image’ button at the top.
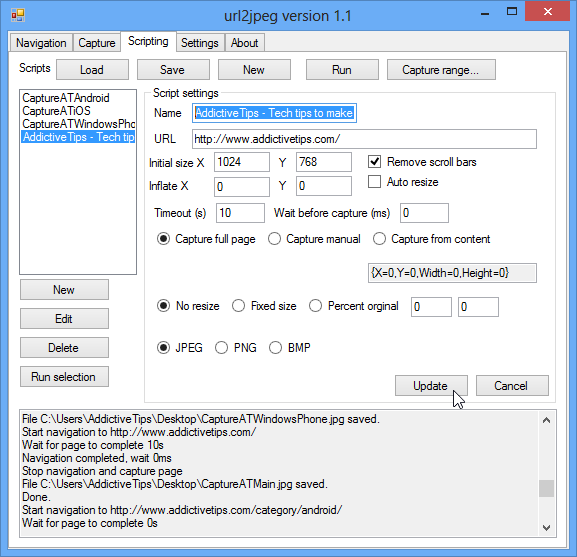
There’s also a ‘Add to script’ button here that lets you add your current selection to a batch, taking you to the ‘Scripting’ tab. Let’s take a more detailed look on it now.

This is where you can queue multiple snaps of different webpages collectively in batches. They will, of course, be saved as individual files. To add a script, use the ‘New’ button on top. To add a specific website’s entry in the script, click the New button in the left section, enter its name and URL, and set the various other parameters for it as appropriately in the available fields. There’s also a timeout function that allows you to indicate how long you want the app to wait before taking a screenshot; this is a useful feature for slower internet connections that may need to allow for some time to pass so the webpage can load. Once you’re all set, hit ‘Update’, and the entry will be added to the list shown on the left. You can also hit Edit to modify an existing entry. Click ‘Run’ in order to take screenshots of all web pages added to the batch, or select one and click ‘Run selection’ to capture any one of them. You can also save any script with all its entries as an XML file using the ‘Save’ button on top, and load it later at any time using the ‘Load’ button.
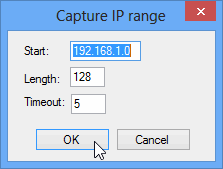
There’s also a button on the top-right labelled ‘Capture range’. It is going to be useful only for advanced users and network administrators; it basically allows you to specify a complete IP range, in order to take screenshots of all websites found on IP addresses in that range.

To sum it up, URL2JPEG is a really handy app for capturing screenshots of webpages exactly the way you want. The app works on Windows XP, Vista, 7 and 8, and testing was carried out on Windows 8 Pro, 64-bit.
