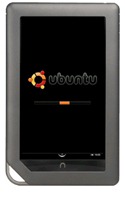
How To Install Ubuntu Linux On Your Nook Color

The idea behind this method is to use Nook Color to boot an Ubuntu Linux image on the SD card, while leaving your current internal memory intact. Thus your original Nook Color software or any Android version that you have installed on its internal memory remains the way it is.
Disclaimer: Please follow this guide at your own risk. AddictiveTips will not be liable if your device gets damaged or bricked during the process.
Requirements:
- A rooted Nook Color (See how to root Nook Color & install Android Market with Auto-Nooter)
- Ubuntu Image for the Nook Color
- 7zip to extract the image
- Android SDK installed on your system (See how to install ADB and Android SDK)
- NookColor Tools app installed on your device.
- Android VNC Viewer app installed on your Nook Color for the Ubuntu GUI.
Procedure:
- Extract the downloaded image onto the root of your SD card.
- Use NookColor Tools application to uncheck AutoMount on USB. [ How to Unlock Extra Settings on your Nook Color ]
- Connect your Nook Color to your computer via USB.
- Launch a Command Prompt window on your PC and enter the following command:
adb devices
- Wait for the serial number of your Nook Color to come up and once it does, enter these commands:
adb shell
su
cd /sdcard/ubuntu
sh ./ubuntu/.sh
bootubuntu
- You should be presented with the ‘root@localhost:/#’ prompt. Enter these commands to get some packages needed for GUI and VNC connectivity:
apt-get update
apt-get install tighvncserver
apt-get install lxde
export USER=root
vncserver –geometry 1024x600
- This will set the resolution for your Ubuntu boot and ask you to set your VNC password. Do remember the password.
- Enter the below mentioned commands in succession to add startup instructions:
cat > /root/.vnc/xstartup
#!/bin/sh
xrdb $HOME/.Xresources
xsetroot -solid grey
icewm &
lxsession
- Press “CTRL+D” twice after the last command.
- To enable Autostart of VNC server to start everytime with Ubuntu, enter the following commands:
cat > front
export USER=root
cd /
rm -r -f tmp
mkdir tmp
cd /
vncserver -geometry 1024×600
- Press “CTRL+D” twice after the last command.
- Now enter the below mentioned code:
cat front /root/.bashrc > temp
cp temp /root/.bashrc
- Now on your Nook Color, open up your VNC Viewer application (Android VNC Viewer)
- Setup the following settings:
- Host Address: 127.0.01
- Password : same as set before
- Port: 5901
- Save & Click Connect.
- You should be able to boot into Ubuntu!
- Type ‘exit’ in ADB, if you need to exit Ubuntu.
- Alternatively to start Ubuntu from the Nook, you can type ‘bootubuntu’ in any terminal emulator app. Make sure to exit it properly using the ‘exit’ command before closing Terminal Emulator. In case Terminal Emulator crashes or you close it by mistake, open it again, properly exit Ubuntu and close it.
Congratulations! You are now using the most popular distribution of Linux on your Nook Color. Explore and enjoy!
An issue has been noted that during reboot, Nook Color may get stuck at the ‘Future of reading’ screen. If this happens, just remove the SD card and boot again, it should boot normally. After that, the SD card can be put back in and Ubuntu can be booted.
For future developments or any issues, please head over to the XDA Developers thread.

The link to the ubuntu image is umm… Not available.
Thanks US government!
Your brain is umm… not available. Thanks US government!