How To Change, Customize & Create Android Boot Animation [Guide]
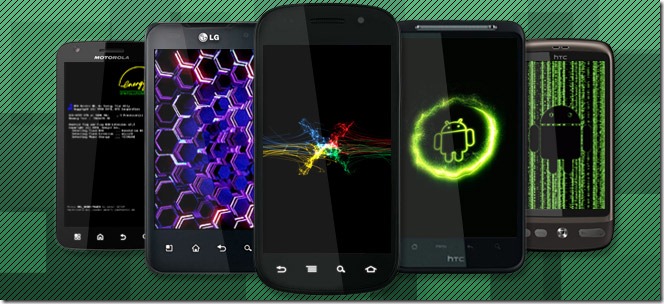
The boot animation is the first thing that you see when powering on your Android phone or tablet, after the operator or manufacturer logo. Although it does not serve a purpose functionally, an eye-catching boot animation can certainly make your device stand out while booting. In this third installment of our Android customization series, we will take a look at how to change or even create your Android boot animation and will feature some of the prettiest and geekiest boot animations we have come across.
This guide is a part of our series on how to customize the looks of your Android device. Other guides in this series include:
- Introduction to Android customization
- Make & Flash your own Android Splash Screen with Splash Screen Creator
- How to Change, Customize & Create Android Boot Animation (Currently viewing)
- How To Replace and Customize Android Lock Screen
- The Ultimate Guide to Android Wallpapers
- Replace and Personalize your Home Screen with the Best Android Launchers
Note that there may be changes in this layout as we proceed, and we will be updating the links as we keep publishing the parts.
Let’s now proceed with customizing the boot animation. This guide in itself will be organized as follows:
- The Basics
- Inside the bootanimation.zip file
- Featured Boot Animations
- Create Your Own Boot Animation
- Apply a Boot Animation
The Basics
The Android boot animation is contained within a an uncompressed zip file called bootanimation.zip that can be found in the media folder of the system partition i.e. /system/media on the internal memory of the device. This single file contains all the information required to play the boot animation, and is loaded automatically when the device boots. Thus, customizing or changing the boot animation is simply the process of editing or replacing this file.
Inside the bootanimation.zip file
This section is for those interested in finding out how the Android boot animation works. If you just want to install one without bothering yourself about what’s in the file, feel free to move on to the next section, as this one will get a little technical. Though it should be easy and simple enough for anyone to grasp.
While the Android boot animation might appear to be in a video format during playback, it is in fact a little different. If you extract the contents of the bootanimation.zip file to your computer, you will see:
- A desc.txt file
- A part0 folder (Contains PNG images named in incremental numbers)
- More part1, part2 etc. folders (May or may not be present)
As you can see, bootanimation.zip merely contains one text file and one or more folders with PNG images. The animation is played simply by displaying the images in a sequence, and the text file defines how they are to be played. In essence, first the PNG files in the part0 folder are displayed one after the other and afterwards, those in the part1 file – if it exists – are displayed, again one after the other, and so on. All of this is defined in the desc.txt file.
Let’s see how it works in a little detail by taking a closer look at the contents of the file.
The folders
These contain PNG images named in numbers, starting from something like 0000.jpg or 00001.jpg and proceeding with increments of 1. There has to be at least one folder, and there is no known upper limit to the number of folders.
The desc.txt file
This file defines how the images in the folder(s) are displayed during the boot animation, in the following format:
Width Height Frame-rate
p Loop Pause Folder1
p Loop Pause Folder2
An example of a desc.txt file is:
480 800 30
p 1 0 part0
p 0 0 part1
As you can see, in the first line, 480 and 800 define the width and height of the boot animation in pixels for this example. This must be the same as the screen resolution of your device for the boot animation to properly play in full screen. 30 is the frame rate in fps (frames per second) i.e. number of images to display per second.
The second and third lines have a same format, start with p, which stands for a part of the animation and end in part0 or part1, which denotes the folder in which the images for that part are present.
The number after ‘p’ defines how many times this part will loop (repeat playback) before switching to the next part (if present). Specifying 0 would make the part loop indefinitely till the phone has fully booted.
The next number is for the pause, and is expressed in the number of frames, which can be translated into time by dividing it by the frame rate. A pause of 15 for example, would mean pausing for the time it takes 15 frames to play and since the frame rate is 30 frames per second, 15 frames would take half a second.
Translating all of this in case of the above example, the boot animation will play at a resolution of 480 by 800 pixels, at a frame rate of 30 fps, starting with the contents of part0 folder and after playing them in one loop, switching to contents of part1 folder and playing them continuously till the device fully boots.
A note on resolution: Most high-end Android devices with large screens have a resolution of 480 x 800 pixels, and are referred to as HDPI. Some mid-range devices have a resolution of 320 x 480 pixels and are called MDPI. Lastly, the screen resolution of some low-end devices is 340 x 320 pixels and these are called LDPI, though these are either the really old Android phones or the cheapest Chinese models.
As a rule, a boot animation made for a lower resolution device will run fine on a high resolution one but it will be centered on the screen, with the extra screen space around it not being used. Using a high resolution boot animation on a low resolution device will result in the boot animation not fully displaying on the screen, with its outer parts being cut off due to being outside the screen’s bounds.
Featured Boot Animations
There are hundreds of boot animations out there for a range of device resolutions. Some of them come as stock with certain devices and get extracted by users to be made available for others to install on their devices, while others are custom built by users and shared with the community.
As promised, we are featuring here a few boot animations that caught our eye.
The Droids series by Dysgenic:
Android Particle Ring by Dysgenic (Modified by aph):
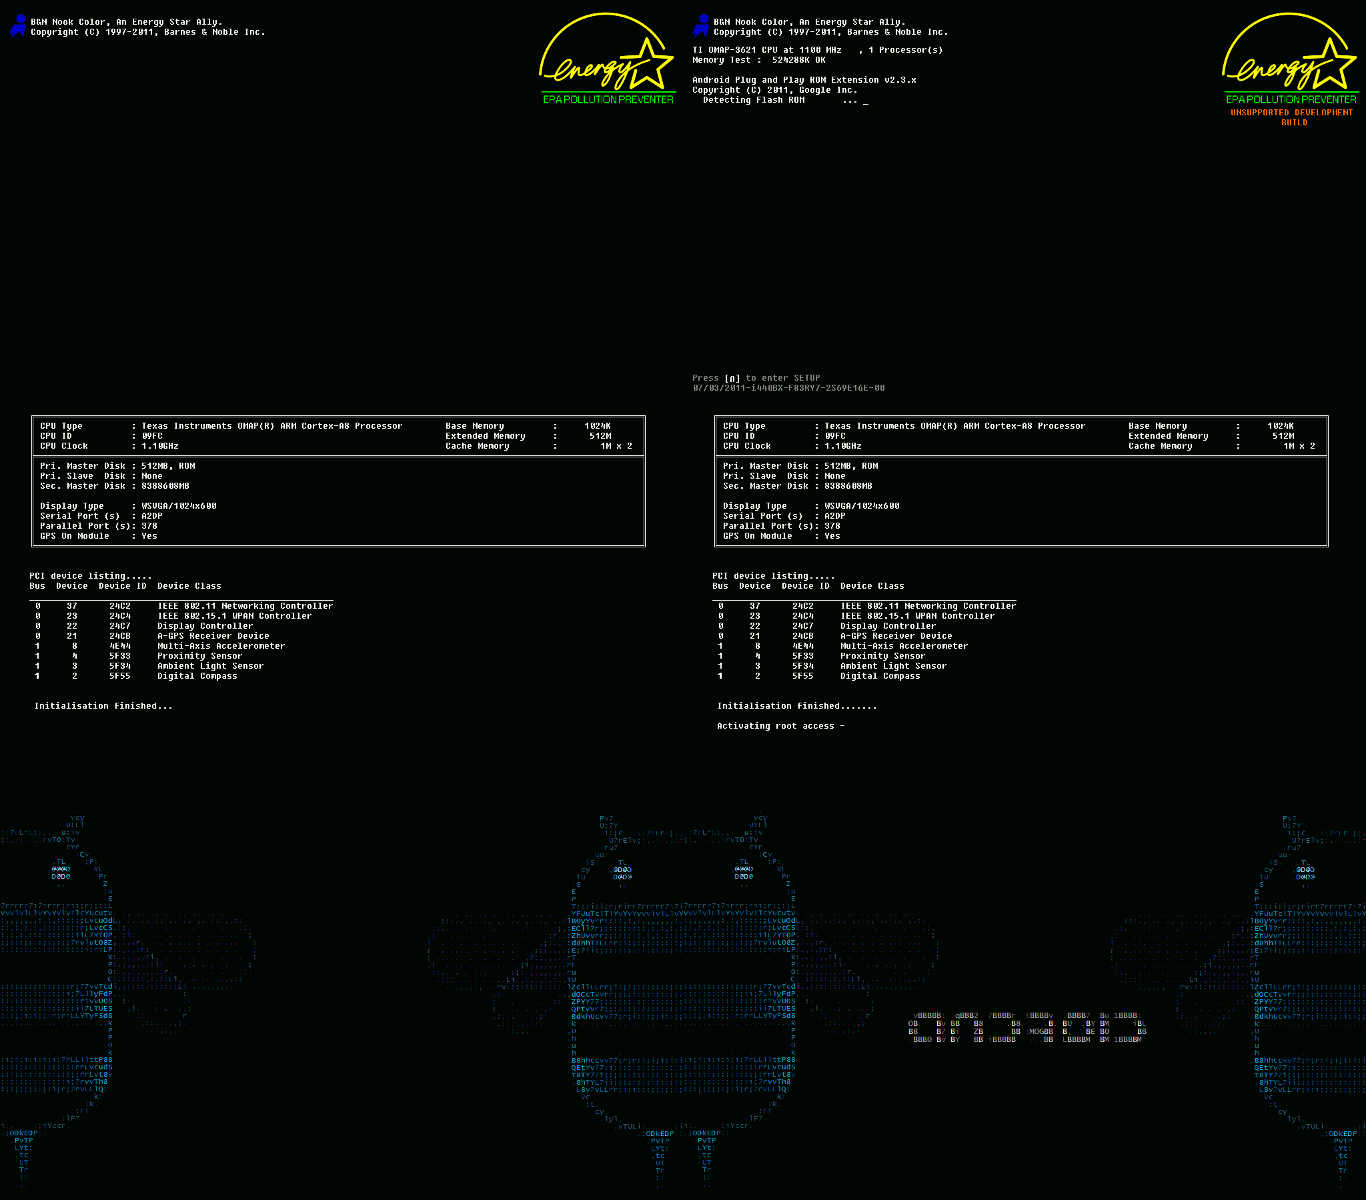
Android BIOS by frysee:
This one has both a phone version and a tablet version. The preview shown is of the tablet version.
Honeycomb by Google:
Click the above image for a full animated preview.
(https://addictivetips.com/app/uploads/2011/05/bootanimation.zip) Download
More:
There are a lot more boot animations floating all over the internet and searching on Google is bound to return you several. An excellent resource is the XDA-Developers Forum where users share hundreds of ported and new boot animations, though if you truly want to make your device stand out, why not make your own? It’s easy as pie!
Create Your Own Boot Animation
So you want to put the artist inside you at work and create your very own boot animation? It’s so easy even a child can do it, and we are going to show you how.
If you have found a boot animation that is made for higher resolution devices and you have a low resolution one, you can use this method to edit those to fit your device as well.
Requirements:
- A zip/unzip utility like 7-Zip
- Image editor of your choice like PhotoShop, GIMP, Paint.NET, heck even MS Paint will do.
- A plain text editor of your choice. Using Windows Notepad for editing text files that are to be used in Linux is not always a good idea, so use something like Notepad++ instead.
- As much time and creativity as you are willing to put into the task.
- You must know the screen resolution of your device if you don’t know it already. You can find the resolution by searching for your device specifications on Google.
Note: A high resolution device will be able to play a boot animation made for a low resolution device but it will not take up the whole screen, while a high resolution boot animation will not display completely on a low resolution screen device.
Procedure:
- Go through the entire Inside the bootanimation.zip File section of this guide first, if you haven’t already done so.
- Plan how your boot animation will run. This includes how many distinct parts it will have, how long will each part play and what will be the sequence of the parts.
- Make a new folder at any convenient location on your computer, and name it bootanimation.
- In this folder, create a folder for each part of your boot animation, named part0, part1 and so on.
- In the image editor of your choice, make all the image files for each part of your boot animation with the proper dimensions equal to your phone’s screen resolution, and save them in the respective folder for each part, in PNG format. Up to 32 bit PNGs are supported.
Note: In case you are converting an existing boot animation to fit your phone’s screen, simply extract the images from it and resize each of them to your device’s screen resolution. - Make sure the images are named in numerical format and in proper sequence, i.e. the images in the first part should start with let’s say 00000.jpg and go on till 00075.jpg, and the images in the second part should then start off with 00076.jpg and go on till – for instance – 00123.jpg.
- Once you have the images for all the parts done and saved with proper names in each folder, create a text file named desc.txt in the main bootanimation folder.
- Open the text file in a text editor and edit it in the format described in detail in the desc.txt file section above. Do consider that a frame rate higher than 30 fps can give issues on many devices.
Note: In case you are converting an existing boot animation to fit your phone’s screen, keep everything the same as in the original desc.txt file and change only the resolution. - Now select everything inside the bootanimationfolder and zip them into a new uncompressed zip archive using your favorite compression utility. Here is the method using 7-zip:
- Select everything inside the bootanimation folder.
- Right-click on any of the selected files/folders and from the 7-zip menu, select ‘Add to archive’.
- Use ‘zip’ as the archive format and ‘Store’ as the compression level, and click OK. This will create a file called bootanimation.zip in the same folder.
That’s it – you have created your own Android boot animation! The only thing left now is to apply it to your device, so let’s get on with it.
Apply a Boot Animation
So you have found a boot animation that you want to install on your phone? Created one of your own and can’t wait to see it in action on your device? All you have to do is copy it at a certain location on your device. There are two locations you can copy it: /data/local and /system/media, and both have their advantages and disadvantages.
Advantages of copying it to /data/local is that you will not require root access for it and it should work for all non-rooted devices without running the risk of changing anything in the /system partition. Furthermore, if a bootanimation.zip file is found in both locations, Android ignores the one found in /system/media and gives priority to the one in /data/local. A disadvantage of this method is that upon a hard reset (also called a full data wipe or a factory reset), the new boot animation will be lost.
Copying the boot animation to /system/media/ is possible only if your device is rooted and you have read+write access to the /system partition. An advantage of this method is that upon a hard reset, the new boot animation will still remain and there will be no need to apply it again. A disadvantage is that it requires ADB or a root level file browser such as Root Explorer or Super Manager.
Had enough of the details? Here’s how to get on with applying the boot animation. We will tell you how to copy the file to any of the above mentioned locations and will use ‘All devices’ for the /data/local path method and ‘Rooted devices only’ for the /system/media path method.
UPDATE: It has been brought to our attention that the following method will not work for some devices running stock ROMs because their manufacturers have made the ridiculous decisions of either using their own proprietary format for their boot animations (we’re talking about you, Samsung!), or choosing a non-standard path for the bootanimation.zip file and removing the ability to override it by copying a new one to /data/local (that would be you, HTC!).
In case of the proprietary format used by Samsung, there is little we can do. However, the HTC devices use the same format but at a different path i.e. /system/customize/resource/ instead of the usual /system/media. This means users with rooted and S-OFF HTC devices can still replace the original one using the following method, by simply changing /system/media to /system/customize/resource/ but those without rooted and S-OFF devices are simply out of luck, as the /data/local method will not work on such phones.
Requirements:
- Android phone or tablet running Android 2.2 Froyo or later. Tested to work on Froyo and Gingerbread; may or may not work on earlier or later versions due to different file locations.
- A root file browser such as Root Explorer or Super Manager.
Note: If you already have ADB installed or if you are comfortable with the command line, you can use it instead. For ADB installation help, see what is ADB and how to install it. We will also provide you with the ADB method below. - The boot animation of your choice in bootanimation.zip name and format.
Note: To check which format is it in, open it using a zip/unzip utility and see its contents. If it contains the files and folders mentioned above in our ‘Inside the bootanimation.zip file’ section, it is the right format. If you see folders amongst which one is called META-INF, it is in recovery flashable format but you can still find the bootanimation.zip file inside the archive in the /system/media folder, and extract that file from the recovery flashable zip file, for using it with this method.
File browser method (Rooted devices only):
- Connect your phone to your computer via USB and mount the storage card for file transfer.
- Copy the bootanimation.zip file that you want to install, to your SD card.
- Unmount USB storage and launch the file browser of your choice on your phone.
- Browse to /system/media, copy the existing bootanimation.zip file from there and paste it somewhere safe on your SD card.
- Browse to the location on the SD card where you copied the new bootanimation.zip and copy it.
- Browse to /data/local and paste the bootanimation.zip file there to override the default system boot animation without replacing it.
OR
Browse to /system/media and paste the bootanimation.zip file there.
If you are using Super Manager, you will have to enable its root function first from the settings. Furthermore, you may need to mount the /system partition as read-write first too upon entering it.
Note: If you had earlier on copied a custom bootanimation.zip file into /data/local, you will also need to delete it or else the new one from /system/media will not be loaded.
ADB method:
- Enable USB debugging on your device in Settings > Applications > Development.
- Connect your device to the computer via USB.
- Launch a command prompt/terminal window on your computer.
- Navigate to the location where you have the bootanimation.zip file saved.
- Rooted/Unrooted devices:Enter these commands:
adb pull /data/local/bootanimation.zip c:\
adb push bootanimation.zip /data/local/
OR
Rooted devices only: Enter these commands:adb pull /system/media/bootanimation.zip c:\ adb remount adb push bootanimation.zip /system/media/
Whichever method you used, you should now have the new boot animation successfully installed on your device. Simply restart it and you should see it running upon boot.
Restoring the original boot animation:
If you want to revert back to the original boot animation, you can easily do so, since we backed up the original one in both the above methods. In the file browser method, you can find it on the storage card at the location where you backed it up in step 4, while in the ADB method, it was backed up to the C drive. Simply follow any of these methods with the original bootanimation.zip file and you’ll have it back.
What’s Next:
That’s all we have for you when it comes to boot animations but it’s just the beginning. Stay tuned for our next feature in the series, in which we will tell you all about customizing the lock screen of your Android device.
Liked the boot animations featured here? Found better ones? Made one of your own and want to share it with us? Let’s hear about it in the comments.








my phone not rooted how can i get this working pls?
root it
does it work on real me 3 pro?(not rooted) i don’t wan’t to root my phone but i want to change the boot animation
Hello i have my animation that i want to be booting. i have backed up the default animation , i wanted to use a method where i dont have to have rooted my device, so i wanted to copy my zip file to data/local but i cant paste here, nor see local folder in data folder. it says my phone seem not rooted so i cannot access it. i thought this method didn’t require root
My MTN-L860 does not have any of the directories(/system/media or /data/local)…. Please is there any other way to do this on my device?
Okay, maybe I accidentally skipped something, but how do I get to the /data/local folder?
I know this post is almost 5 years old but it still helped me a lot!
The ADB method worked perfectly with my unrooted tablet. Thanks.
Do you know if and how it’s possible to change the boot_logo with adb too?
Greetings
Can i replace C: with other backup location?
thnx guys, I was waiting for changing the boot screen!!!!
Resized my images, edited the desc file for resolution, zipped with 7zip and changed permissions to match original zip file. All I get is a black screen. I am rooted on my tablet. Any ideas on this?
Dear Raja,
first and most of all, congrats and thanks a lot for the very helpful guide.
All the steps are clear enough, even for someone not very familiar to Android, programming and so on.
Sadilly, it didn’t work for me.
I have a Sony Xperia SP, recently bought and recently updated to FW version .266.
Worst of all is the stupid crap operator animation on boot and shut down.
Not to mention the useless apps I cant get rid of…
I’ve tried everything – rooting, the methods here above – nothing seems to work, the f***ng device is way shut =/
If you ever find a way to help, I’d appreciate a lot.
Regards
Put the bootanimation.zip into /data/local/ then change the permissions to RW-R-R. I don’t own that phone myself, it’s just something I found googling, but hopefully it works for you.
fajne scagam 3
thanks for the posting, it helped me to make a custom boot animation!
“PNG images named 0000.jpg or 0001.jpg” Well, make up your mind. Is it PNG or JPEG?
Please answer this important question!!: If I am using two different animations in two different part(x) folders and they both use two different bit rates (number after screen resolutions), then how can I apply a bit rate for the first part0 and another bit rate for a part2 and part3 folder? I have 3 parts total and part2 and 3 are the same bit rates. But what if I wanted to make three folders with three different bit rates?? Please help answer this question as this would make my world!! 😀
When i am pushing the zip file to /data/local it says permission denied. I have a Karbonn s5
try resizing the images to your screen size that should help I know for lg marquee its 480×800
I think yours might be 1080×1920 or you may need to save it as .png or jpg all pends on your phones specs
Hi! Your guide is awesome and very clear. I’m having trouble changing the boot animation though. I rooted the device successfully and everything, I copied the right files in the right place, but I still can’t manage to change the boot screen.. I have a Samsung Galaxy Gio GT-S5660M android version 2.3.4 … I have seen videos on YouTube of people doing it and it works fine with the same phone, but mine doesn’t. Can you help me ?
Can you use a gif to do this?
cmd run on both admin and regular said this
Microsoft Windows [Version 6.1.7601]Copyright (c) 2009 Microsoft Corporation. All rights reserved.
C:windowssystem32>adb pull /system/media/bootanimation.zip c:’adb’ is not recognized as an internal or external command,operable program or batch file.
C:windowssystem32>
does anyone now why the adb command isnt working
zip your bootanimation with simple storage mode
Cool. Can I set a downanimation on a NO ROOTED device into /data/local?!
It doesn’t work for me.
I just found this article (July 2012) and know it is old. I was having the blank/black screen that some others here were seeing after creating my own animation. I found that the batch conversion/rename tool that I was using (Irfanview) was changing the color palette from RGB to indexed. This will result in a blank screen. I reconverted all images to the RGB palette and my personal animation is now working. Hope this may help some others.
how did you convert it back? i dont know wha i did wrong and i keep black screening
It was very helpful thank you very much…
Tried this with my htc Evo 4g, I can move the zip file and all the origional images work, but any image I edit and save in Gimp paint, or whatever fail to process. The first 10 images are the stock images and they work fine. the last one I opened in Gimp, made a black square in the middle of the image(didn’t touch the edges) verified the file was the same dimensions, 8 bit just like the original was. I extracted the files and their permissions are the same(as long as the permissions stay after extraction) but it stops at the edited image. Any ideas?
All of these methods are incompatible with ZTE devices(2.3.4 ZTE Score).
Can someone help me out? I want the Big O startup as an animation. [Cast in the name of god. Ye not guilty.]
I think it would be really neat and even if someone didn’t know what it was about, it’d be neat to them.
I have rooted my HTC Legend successfully (took me 7 days & nights, being an absolute noob) with CM 7.1.0 running android version 2.3.7. I have created a bootanimation.zip and have copied it to my SD card. Now, when I try to copy it to system/media, it is not letting me even though I have enabled ROOT in Super Manager. The sooner I navigate to system/media, the image is turning to r/o even when I enable r/w.
Help please… thanks in advance…
exelente exelent nice site tenks my friends
bootanimation.zip is not coping in /system/media
make sure you have root, and have mounted the system partition as read/write
i cant find bootanimation.zip at system/media/ on my SGS@ :S
Great thanks!
i cant see local inside data.what to do?
I cant seem to get my rooted evo with a rooted ota rom to use the bootanimation of my choosing, Ive tried all methods. Any other method?
Try the app BAC, (boot animation changer I think.) Worked on my rooted evo. It actually searches out where the boot animation zip is located on the phone. There is a lite version that will let you try it and might possibly be enough. Hope that helps you. -B-rye
samsung fascinate sch-i500
running PWGB 2.0 beta3
which is AWSESOME!!!!
I have been working on this .qmg issue for 3 weeks….
I even tried installing a voodoo kernel with this ROM.
still cant solve the .qmg file extention need.
I found a FREE online file converter here
http://www.convertfiles.com/#supported_formats
in which I can easily convert my snipped music pieces to .ogg format
to use as bootup and shutdown sounds.
but have not found YET where I can convert anything to a .qmg
so I can put workable bootanimation on the phone…
I love my phone but this is unfortunate.
Samsung ought to get in the business of providing custom bootanimations
for thier loyal customers I guess.
Seems this qmg trick is in the order of being more like apple.
I guess SAMSUNG may even try to kep us fom accessing the battery and SDcards in the future too and make the phon to only be able to download music from the SAMSUNG website…SamTunes :o)
SAMSUNG MAKE A GREAT PHONE SELL IT AND LET IT GO! CUSTOMERS
WANT TO CUSTOMIZE THESE THINGS LIKE WE DO OUR CARS…
MARKET ON IT OR LET IT GO!
So anyone with a galaxy i896,9000, etc.. That has .qmg files for boot animations are screwed? ive also been looking into this with no luck.
Haroon,
Best self help article ever. Please help others to learn how to explain things as well as you have in this article.
Haroon,
Thank you for this article! Articles such as this one open my eyes to the possibilities of Android.
Has this article died in mid-stream?
Nope, there was just a break due to unavoidable circumstances in my personal life.
will it work on a fire stick do you know?
HTC EVO 4g. Long long time. But got it. we were doing it right but the last step zipping. no compression. 7zip just use store. bootanimation.zip is first looked for in /system/etc/customer/bootanimation.zip then it reads (if it’s not there) /system/customize/CID/default.xml to find where to look next. /system/customize/resource/spc_bootanimation.zip. if not there you get the ANDROID screen. you can test it via ‘adb shell /system/bin/bootanimation’
Hope this helps
I recently updated from a rooted eclair rom to a rooted stock rom of froyo on my HTC espresso (Mytouch 3G slide), and in doing so lost my old custom boot animation.
I had been fighting the boot animation for about a week to no avail. I tried a slew of various locations, but could not find an original bootanimation.zip anywhere on my phone. Placed a zip in /system/customize/resource, data/local, system/media… tried symlinks; nothing worked. Checked the CID/default.xml and it only pointed to a gif in the boot, so I changed the gif image and had some success (but couldn’t get the image to loop).
ANYHOW: I followed what pctriage wrote, added a customer directory to /etc/ and bam! damn thing worked. Major props to you mate. Googled the heck out of this problem and couldn’t find a solution, so you win!
*(side note)Without knowing that, it was an uphill battle for sure. I am no stranger to a bit of phone fiddlin’ and have S-OFF with a custom splash and such, and I still couldn’t figure it out. Yet again, thanks chief!
I am on an HTC thunderbolt. I’m fairly sure I’m getting the .zip file to the right place but i just get a black screen for boot animation…
I can’t seem to get it to work with the custom one I made. Spent a couple hours making it an im kinda upset… idk what i did wrong
Works great for me on my Desire HD!
Thanks for writing this amazing guide!
Big BIG problem.
FlyTouch 3, temporary root using Z4root.
Replaced bot animation using this tutorial:
https://www.addictivetips.com/mobile/how-to-change-customize-create-android-boot-animation-guide/
Used this bootanimation.zip file – AndroidParticles2:
http://dl.dropbox.com/u/19412696/480x800_AndroidParticles2.zip
Got it from here:
http://forum.xda-developers.com/showthread.php?t=905538
I put the ZIP file in this folder: /system/media/ – that was probably a very stupid ideea.
Now the tablet is not getting past the boot animation.
In the middle of the animation, there’s a 1-2 seconds pause, white screen instead of android robot.
Endless bootanimation loop.
Of course, tried hard reset. Of course, it did not help.
Probably, all my apps and bookmakrs are gone.
Probable solution: flash a custom ROM. But that’s really scary.
Any other ideas?
Fixed it myself.
Flashed Tim ROM: http://public.timduru.org/Android/Flytouch3/
Then fixed 576 resolution. Even tough Elixir and webpage specs say it has 600 resolution !!
the loop folder isn’t working…
Great guide! Thank you for taking the time to create this. It is written very well. It’s unfortunate that so far all the comments are complaints. I am going g to be trying this out on my rooted HTC evo after I post this. Wanted to say “thanks” in advance.
Haroon is that name Arabic or Persian?
Hope it works for you. Just make sure to try the /system/customize/resource/ path as mentioned in the update, rather than /data/local or /system/media.
And the name is quite ancient; I’m not quite sure of its language of origin but in modern times, it can be considered Arabic. It’s the same as Aaron, Moses’ brother. =)
Whenever i go system/customize/resource .. the bootanimation.zip file doesnt let me do anything. When i try to change that file with the new bootanimation file .. root explorer says failed or error . Why is that so? i cooked the bootanimation from kitchen . What could be wrong?
Those of you having trouble with this guide, we have added an update right before the requirements section, that should explain the problem in detail and provide a workaround for HTC users.
Also, it appears that the file manager method will not work for most unrooted users so we have removed that. Unrooted users will have to use the ADB method.
It didn’t work on my aria. Using adb push I can get it to /data/local/ but when powering on the stock animation runs. While searching I found a forum that said that htc phones ignore the /data/local/ method. Don’t know if it’s true but in mine it doesn’t work.
It is true. HTC phones do ignore the /data/local folder and only search for boot and shutdown animations in /system/customize/resource.
didnt work with my Samsung Galaxy Ace. samsung is using some .qmg files for boot and shutdown animations
Reread the article. Samsung uses a proprietary file format for boot and shutdown animations different to the one used in other Android devices.
ADB Method doesn’t work either, i can put the bootanimation.zip into /data/local but upon restart the original htc bootanimation will play.
The original htc bootanimation.zip is in /system/cutomize/resource, this one i can pull from the phone to my computer, but without root access i can’t replace that one.
could it be that i have to put my own boot animation.zip into a other folder then /data/local ?
Reread the article. In HTC devices, the only way to change the boot animation is to change it in /system/customize/resource. Putting it in /data/local won’t work.
Please let know is it possible to convert windows 7 To android on HTC THROPY 7 phone?
Im having the same trouble as Armand, I also have HTC desire HD. The IO file manager wont let me copy the .zip file into either locations. Also the original animation.zip file is not in either /system/media or data/local. what can i do? I don’t want to root it as its only a few weeks old.
You can reread the article. Your options are explained.
doesn’t work for my htc desire, can’t get to see bootanimation.zip in the data/local folder, do i need root access on my desire in order to change the boot animation ?
Reread the article. Toward the end of this article your options are explained.
Nice writeup – thanks for featuring my work (in fact, a lot of others have contributed versions for their devices and ROMs to that thread).
greetz