Big Aperture: Add Depth Of Field, Lighting & Bokeh Effect To Any Photo [Mac]
Big Aperture is a paid Mac app currently worth $0.99, discounted down from $9.99. It is quite possibly the mothership of aperture apps, and with such a low cost, it is worth the review, not to mention the dollar spent.
The app allows you to add aperture effects in different styles, increase or decrease the lens size, add FX effects and, more importantly, paint the area that you want popping out of the rest of the image. The app comes equipped with several modes of applying the effects, both in a circular lens formation and in horizontal or vertical strips. The custom aperture effect rids you of the constraint to keep just a few select objects in focus and allows you to pop out various elements in a single image.
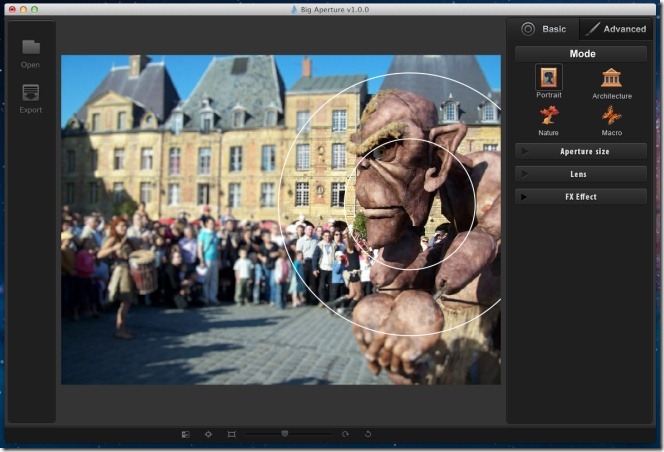
Once installed, open an image. The right panel will hold all controls and tools that you can use on the image. The Basic tab allows you to define how the aperture effect should be applied. You have to first select a mode before additional effects, i.e., Aperture size, Lens & FX Effect become active.
There are four modes; Portrait, Architecture, Nature and Marco, each applying aperture effects at different angels. The Portrait and Marco effects allow you to place a circular lens like aperture effect, while Architecture and Nature place horizontal aperture effects.

Once you’ve chosen the mode, select the Aperture size and the Lens size, additionally you can add a FX effects. All these are basic effects, and for more advanced ones, switch to the Advanced tab. All changes/effects you made in the Basic tab will disappear, so you should either save the image first, or lose what you previously created.
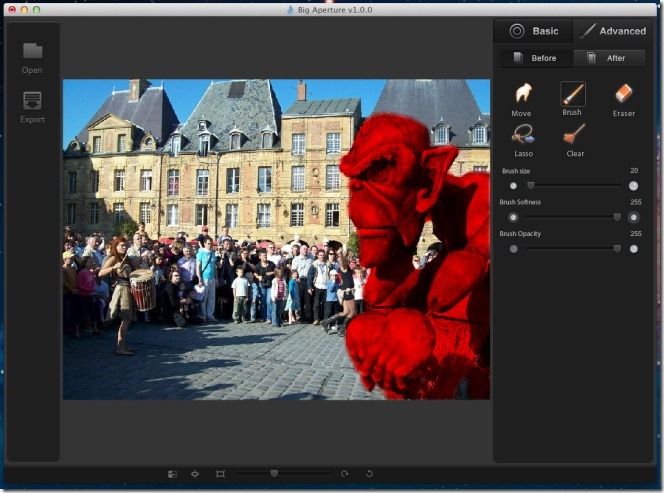
In the Advanced tab, you see five different tools, of which the Brush tool is of major importance. Other tools are Move, Eraser, Lasso and Clear. Notice that the Advanced tab is divided into two tabs itself; Before and After. Both these give you a preview of the changes you’re making. In the Advanced > Before tab, you can see where the effects are applied. Move the Brush tool over the part of the image you want to bring out from the rest of it. The brush tool has a red trail that shows which areas the effect will be applied to. You can control the diameter of the brush, its softness, and opacity from the slider below the tools.

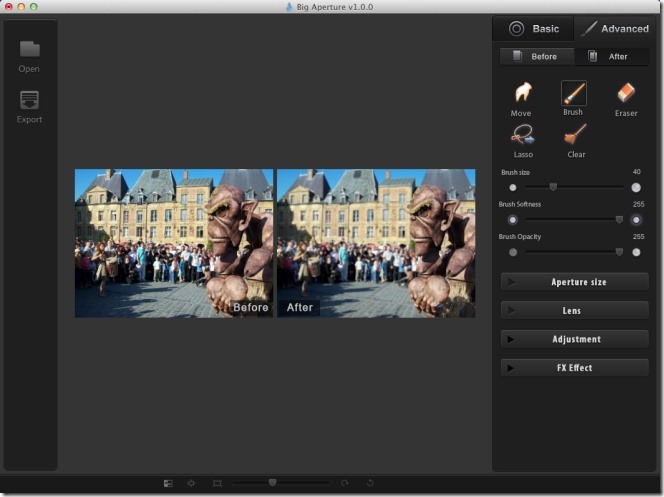
If you switch to the After tab, you will see the actual changes as opposed to the red trail. The Lasso tool ever so slightly let you decrease the aperture area from the edges, while the Erase tool allows you to remove the aperture effect altogether. The Clear tool removes all aperture effects applied. Once you’re done, click the first button on the bottom bar and compare your image before and after applying the effects. No editing is possible when the image is viewed in comparison mode.

To save the image, click Export on the left bar, enter a name for the image and save it. Your original images is not modified, and remains intact. The app is currently marked down from its original and rather high price, so hurry up and grab it before the holiday festivities and the accompanying discounts are over.
Get Big Aperture From Mac App Store

I can’t figure out how the smart lasso works… can you explain it to me?
It’s not ‘marco’ by the way, it’s ‘macro’, the photographing of small objects.
That aside, this is an excellent photo-editing app for the rest of us! Kind of similar to Focus but way more complete. Too bad it doesn’t fully-support Lion, especially the full-screen mode.